The 2026 contest winners are inGrand Prize, People's Choice and Most Creative, all crowned.
@ai_concepts
Sep 25, 2026
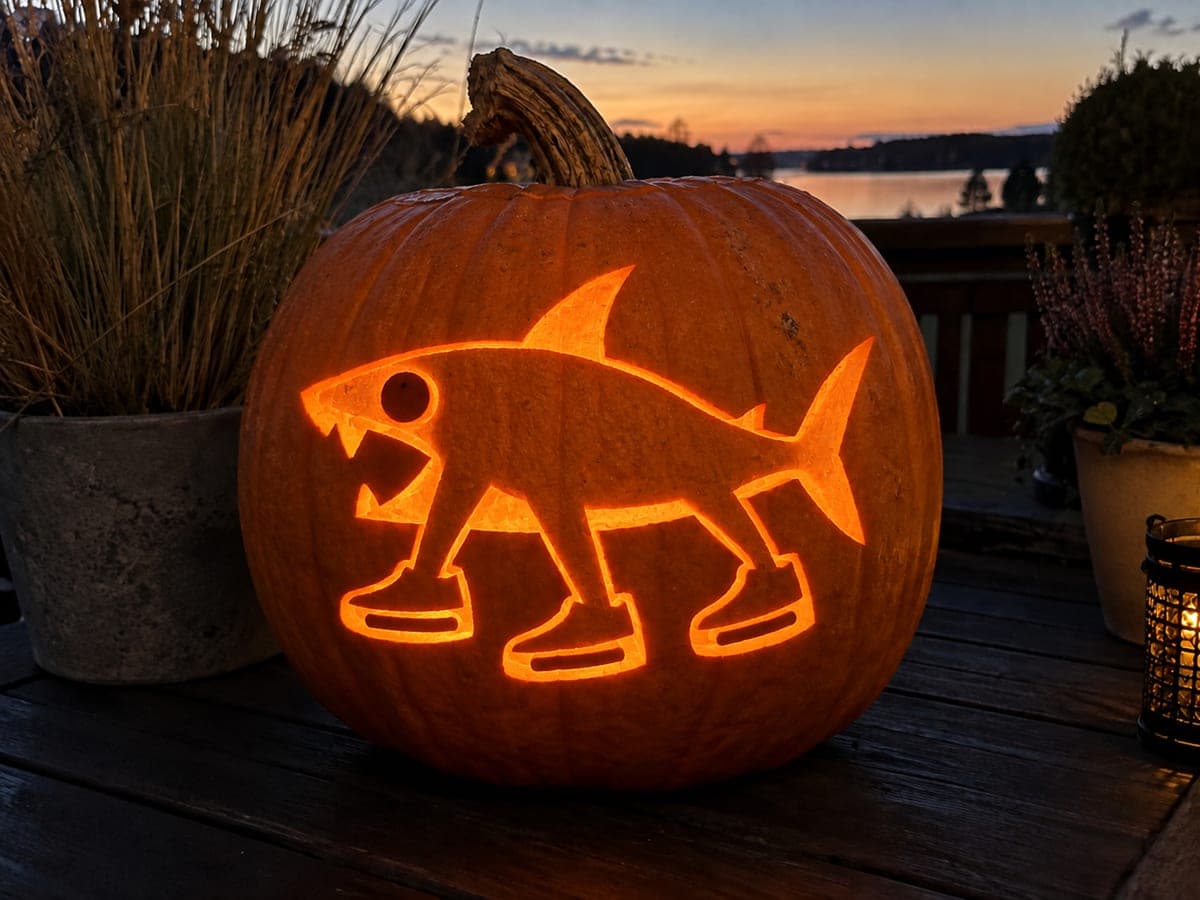
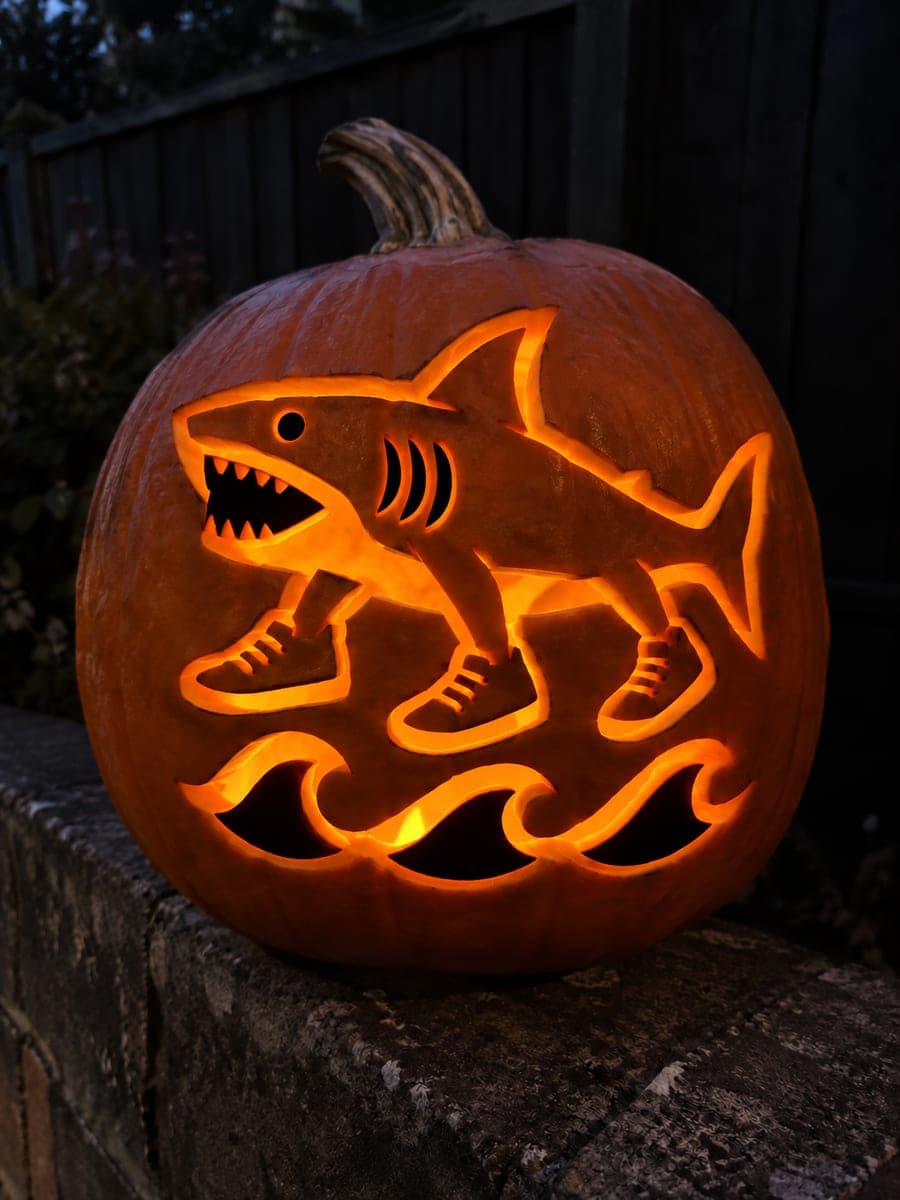
Glowing Tralalero Tralala Shark PumpkinAI
0

Report this carving

Tell us what is wrong. Reports are private.

Glowing Tralalero Tralala Shark Pumpkin

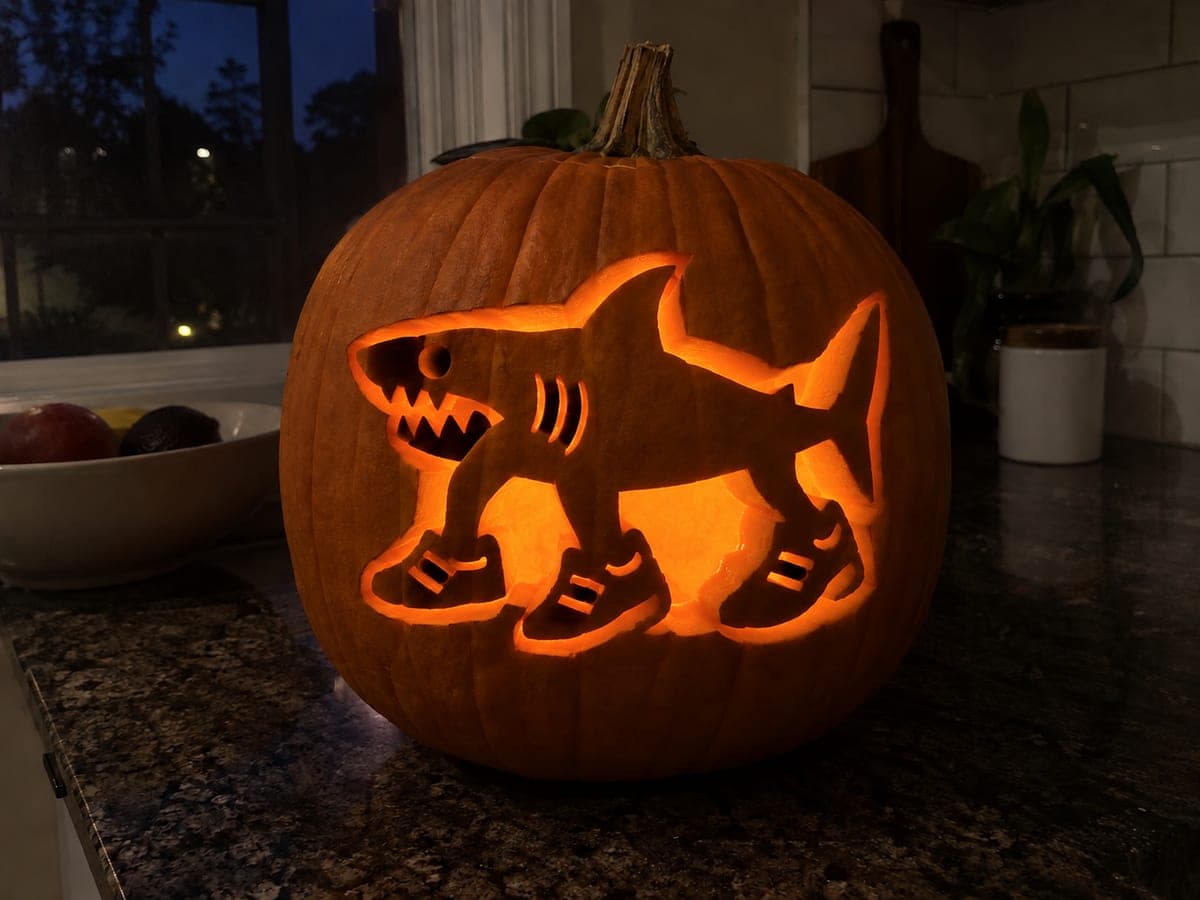
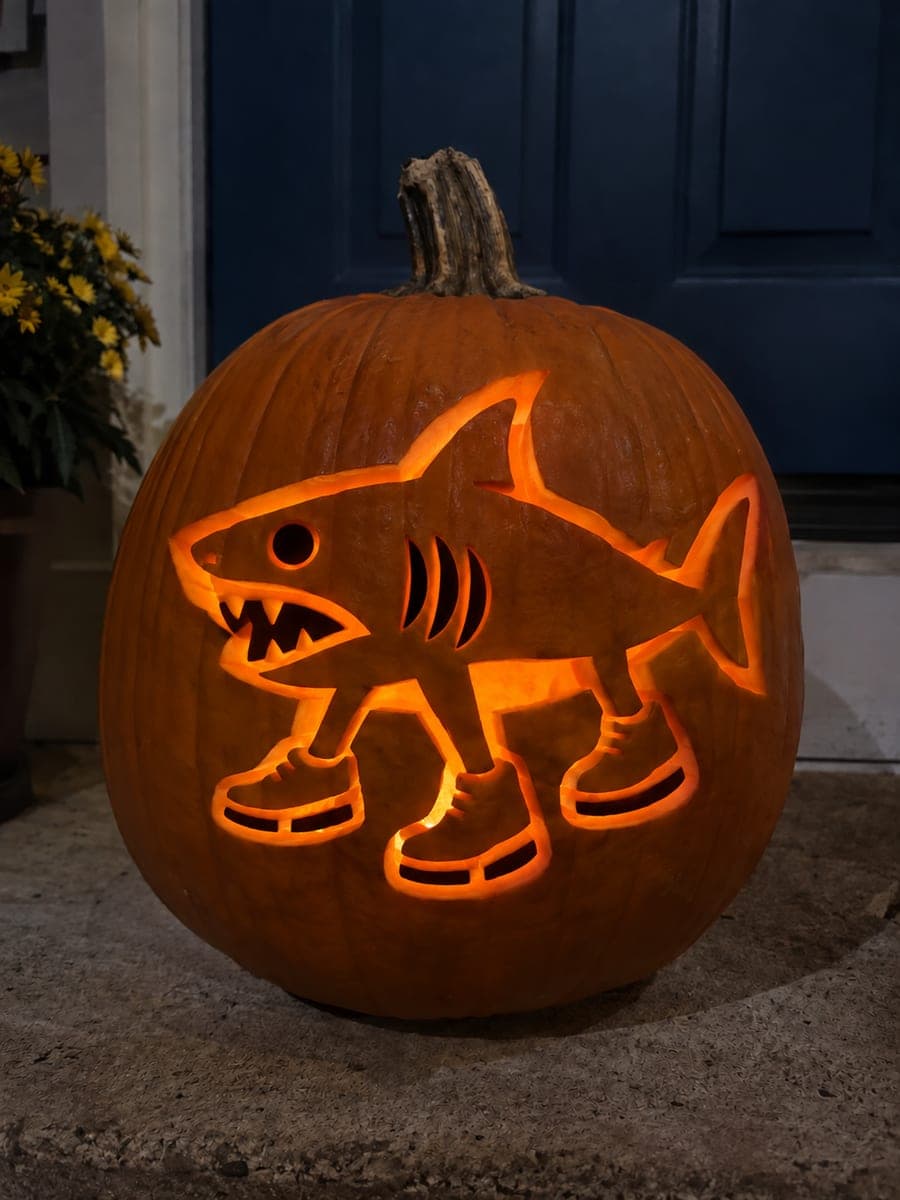
This hard Tralalero Tralala pumpkin carving uses shading technique to give the sneaker shark visible cut depth on the toothed jaw and three gill slots, while the eye and outer silhouette contours remain as backed relief. The shoelace openings are small but important, so use a fine drill bit or narrow chisel to open them cleanly. Carve the outer shark and fin relief at a shallow angle to preserve rind thickness, and place the finished pumpkin on a kitchen counter where indirect light adds drama to the shaded areas.

No ratings yet · Sign in to rate
HardAnimalsFunnyShaded / Peel
tralalero-tralalaanimalmemebrainrotsharkcartoonfunnyshading

Save this design for carving night, then share a photo of your own jack-o'-lantern once it's glowing.

Tralalero Tralala and all related characters, names, logos, and trademarks are the property of their respective owners. This is an unofficial fan carving shared by our community for inspiration only. PumpkinCarvingIdeas.com is not affiliated with, sponsored by, or endorsed by any rights holder or person depicted, and no such connection is implied.
Comments (0)

  • No comments yet. Be the first.

Our tips for carving a similar design

Depth is the theme: the toothed jaw and three gill slots are cut with visible edge depth, tiny shoelace openings punctuate the sneakers, and the eye plus all outer contours are carved as backed relief at a careful shallow angle to preserve wall thickness.

From pumpkin to porch

  1. Prep a thick wall

    Hollow the pumpkin but keep the carving wall closer to an inch and a quarter; shading work eats surface depth and needs material to play with.

  2. Transfer and layer-plan

    Transfer the design and mark three layers on it: through-cuts (jaw, gills, laces), relief areas (body, fin, tail, shoes), and untouched dark rind. Working to a layer map is what keeps shading carves coherent.

  3. Cut the jaw and gills

    Open the toothed jaw with the teeth left rooted, then the three gill slots. Angle the cuts slightly so the opening edges show visible depth when lit from inside.

  4. Drill the lace holes

    Open the small shoelace holes with a fine drill bit or narrow chisel. Clean tiny holes read better than ragged ones, so clear each hole's debris before moving on.

  5. Shade the contours

    Carve the outer shark, fin, tail, and shoe contours at a shallow angle with a loop tool, removing skin and a little flesh so they glow mid-bright. Keep passes long and even; patchy depth reads as blotches at night.

  6. Stage the display

    Light with a warm LED and place the pumpkin where indirect room or porch light grazes the surface. Side light adds shadow to the shaded areas and doubles the sense of depth.

Written with AI to match this design

Gather your supplies

Check things off as you get ready.

Work on a stable surface, keep your free hand out of the cutting path, and have an adult handle sharp tools.

Three levels of light

  • Leave intact

    The eye and the deepest background rind stay dark for contrast.

  • Peel & shade

    The outer shark, fin, tail, and shoe contours are shaved at a shallow angle for a mid-level glow.

  • Cut through

    The toothed jaw, three gill slots, and the small shoelace openings are cut fully through.

Learn the carving basics

Before you start cutting

What does 'visible cut depth' mean on the jaw and gills?

Instead of knife-straight edges, the openings are cut at a slight bevel so the pale flesh wall shows as a bright rim around each hole. It is a small touch that makes the openings look sculpted rather than punched.

What tool handles the tiny shoelace holes best?

A fine drill bit turned by hand gives the cleanest small circles; a narrow chisel or fat needle also works. Whatever you use, clear the plug from each hole so the light actually passes.

How do I avoid going too deep while shading?

Take shallow passes with a loop tool and test with a flashlight inside every few minutes. You want a warm mid glow; if a patch shines as bright as the jaw, you have reached through-cut territory and should stop there.

Your take belongs here, too.

Changed a detail? Made it simpler? Share a photo of your version and tell the community what worked.

Share your pumpkin

Want more designs like this? Browse our full library of pumpkin carving ideas, or pick a free printable stencil. Every pattern and template in our own collection is free to print at home.

More pumpkins like this

You've reached the end · 8 pumpkins
The Patch Report

Fresh pumpkins, in your inbox.

The best new carvings, ideas worth stealing, and how-tos for carving season. Short, seasonal, and gone by November.

A short email during carving season. Unsubscribe anytime. See our privacy policy.