Similar to This
View all stencils →About this stencil
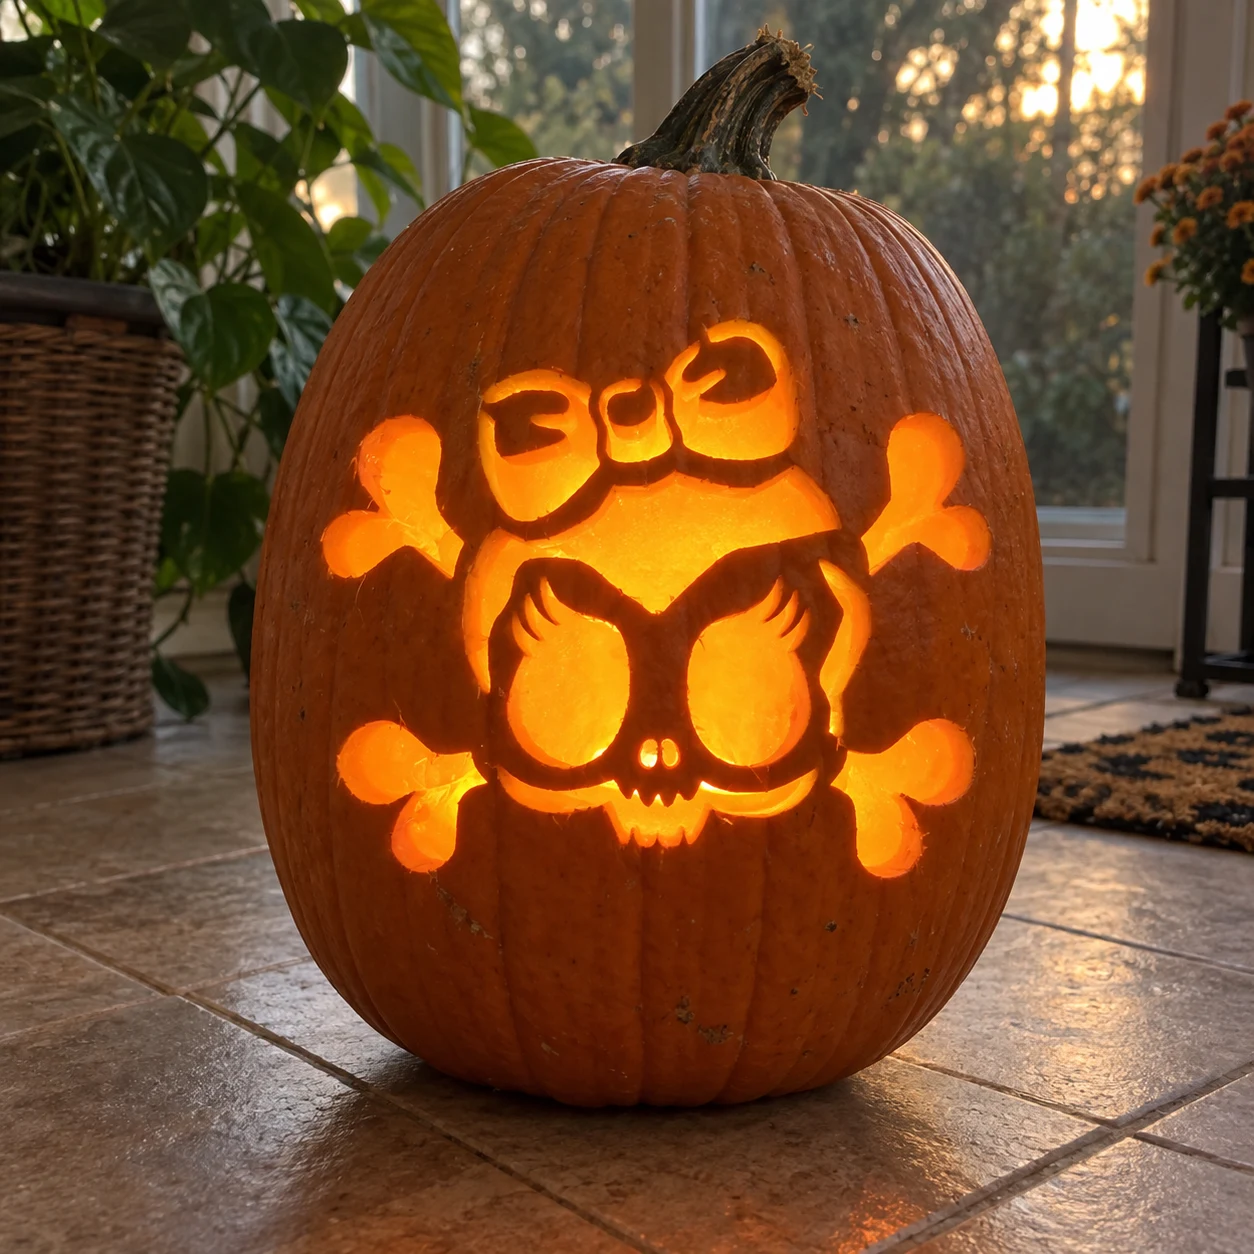
A skull-and-crossbones design with a feminine twist fills this pumpkin stencil: a small round skull wears a decorative bow on top, its large eye sockets rendered as open flame shapes, while a pair of crossed bones extends to the left and right behind it. The cut-out eye flames and a tiny tooth row are pierced through against the solid skull mass, and four rounded bone ends glow as separate openings at the corners. Cut the small decorative bow petals at the crown before opening the larger eye shapes, so the thin pumpkin wall connecting the bow to the skull doesn't flex and tear. This design is rated Advanced and takes most carvers around 150 minutes from trace to glow. Multi-layer cuts with skin-peel shading. Plan your cuts first.
Pumpkin size guide
- 🎃 Small (5–7") — print at 80%
- 🎃 Medium (7–10") — print at 100% (recommended)
- 🎃 Large (11–13") — print at 130%
- 🎃 Giant (14"+) — print at 150% on tabloid paper
Frequently asked questions
Can I resize this stencil?▾
Yes. The PDF is vector so it scales cleanly. Print at 100% for a 7–10 inch pumpkin, 130% for 11–13 inch, or 150% for a giant. Use your printer's "Fit to page" or "Custom scale" setting.
What kind of paper works best?▾
Standard 20 lb letter or A4 printer paper is fine. Heavier paper is harder to bend around the pumpkin curve. If your printer supports it, set the quality to 'best' so the lines are crisp.
How long will the carved pumpkin last?▾
Usually 5–10 days. Coat all cut surfaces with petroleum jelly and store the pumpkin somewhere cool overnight. Avoid direct sun. Battery tea lights produce no heat and double the lifespan.
Can I sell pumpkins carved with this stencil?▾
Yes, the carved pumpkin you make is yours. The license covers personal and small-scale commercial carving (selling carved pumpkins, photographing them, posting on social). You may not resell the PDF file itself.
What if my printer doesn't print the whole stencil?▾
Set 'Page scaling' to 'Fit' in the print dialog and uncheck 'Auto-rotate'. If it still cuts off, the design includes 0.25" of safe-area margin so a small crop won't ruin it.
How to carve this stencil
- Transfer the stencil by pin-pricking along all cut lines, including the small bow loops at the top and the four rounded bone tips.
- Start with the bow petals and the tiny tooth strip at the skull's base, these are the most isolated small cuts.
- Carve the four rounded bone-end openings at the corners next, working from the outer edge inward.
- Cut the two flame-shaped eye sockets, keeping cuts smooth to preserve the pointed tips of each flame.
- Open the crossed-bone bars last, slicing the long rectangular areas carefully to avoid snapping the narrow bridges near the skull center.
- Place a warm LED candle inside so the flame eyes and bone tips glow symmetrically.
Tools you'll need
For a advanced carve like this you'll want a linoleum cutter set, x-acto knife, peel tool, and pin transfer wheel. Here's the kit we reach for — start with whatever you already own.

Elmchee Pumpkin Carving Kit
13-piece kit with carrying case
Saws for the larger cutouts, plus a scoop for hollowing. Covers both jobs in one kit.
View on Amazon ↗
Speedball 4131 Lino Cutter Set
Handle + 5 interchangeable cutters
Interchangeable cutters for peeling and shading the face. Useful for the finer details.
View on Amazon ↗
Homemory LED Tea Lights
24-pack of battery-operated lights
Battery-operated, flickering lights for a candle-like glow inside your finished pumpkin.
View on Amazon ↗
Community Pumpkin Carving Ideas
Carving ideas that use stencils like this one.
Related stencils
Carvers who liked this one also downloaded these.
- Expert / Pro
Horned Demon Skull Pumpkin Stencil
A demonic horned skull with massive curved ram-like horns and a symmetrical face composed of dozens of interlocking cut fragments makes this one of the most intricate skull pumpkin stencils available. The forehead, cheeks, and jaw are all broken into shaped segments separated by thin pumpkin bridges, and the horns are densely cross-hatched with ridged cuts. Work from the center outward, cutting the tiniest interior fragments first before opening any large jaw or eye-socket voids, to avoid collapsing the many delicate bridges that hold the design together.
- Beginner-friendly
Skull Pumpkin Stencil
Two wide almond-shaped eye sockets with small fang-like lower details, a paired nasal cavity of two thin vertical slots, and a broad rectangular mouth with chunky upper and lower teeth make up this straightforward skull pumpkin stencil. The five main shapes are spread across the face with generous pumpkin skin between them, making this a stable carve. Cut the narrow nasal slots first since they are easiest to lose track of; follow with the eye sockets, and save the wide mouth for last so the pumpkin face remains solid while you finish the upper details.
- Beginner-friendly
Skull and Crossbones Pumpkin Stencil
A cartoonish skull-and-crossbones fills this pumpkin stencil: a round skull with raised eyebrow lines, two large circular eye sockets, and a lower jaw bearing six stitched teeth sits at the center, while four bone ends with rounded knobs extend diagonally from behind it. The eye sockets, teeth gaps, and bone end circles are all pierced through, creating rings of glowing light that contrast with the solid skin bridges holding the design together. Carve the six small tooth gaps before tackling the larger eye socket circles to preserve the jaw structure.
- Advanced
Mouse Skull Pumpkin Stencil
Two large round ear-shaped circles top a grinning skull face in this hard skull pumpkin stencil, the whole design dripping with melting-wax details that hang from the ears and chin. The skull's hollow round eyes and triangular nose are cut through, while the jagged smiling mouth and drip channels below the face create a pattern of narrow glowing slits. Lit inside a jack-o-lantern, the ears glow as two bright round openings above a menacing skull expression. Carve the two large ear circles first since they are structurally independent, then work down through the drips before tackling the fine interior face cuts.
- Beginner-friendly
Mean Skull Pumpkin Stencil
Two large angled triangular eyes slash across the upper face of this jack-o-lantern stencil, pointing sharply inward to give the skull an aggressive, furrowed scowl. Below, two narrow rectangular fang-tips drop from the center, and a wide jagged mouth with three upward-pointing teeth stretches across the bottom. All six shapes are cut through individually, leaving solid orange between them to hold the face together. The small central fang-tips are easy to snap, so cut each one from the outer corner inward and avoid side pressure on the blade.
- Advanced
Flaming Skull Pumpkin Stencil
A skull in three-quarter profile sits at the center of this hard pumpkin stencil, ringed by a crown of wild flame tongues that curl and taper at their tips. The skull's round cranium, hollow eye socket, nasal cavity, and separated teeth are all open cut-outs, while the solid skin between them forms the facial structure; the flames surrounding it are a mix of pierced channels and solid skin bridges. Carve the skull's eye socket and nose first, then work the teeth individually before tackling the outer flame tongues, which have thin tapered ends that tear if the blade stalls.