Similar to This
View all stencils →About this stencil
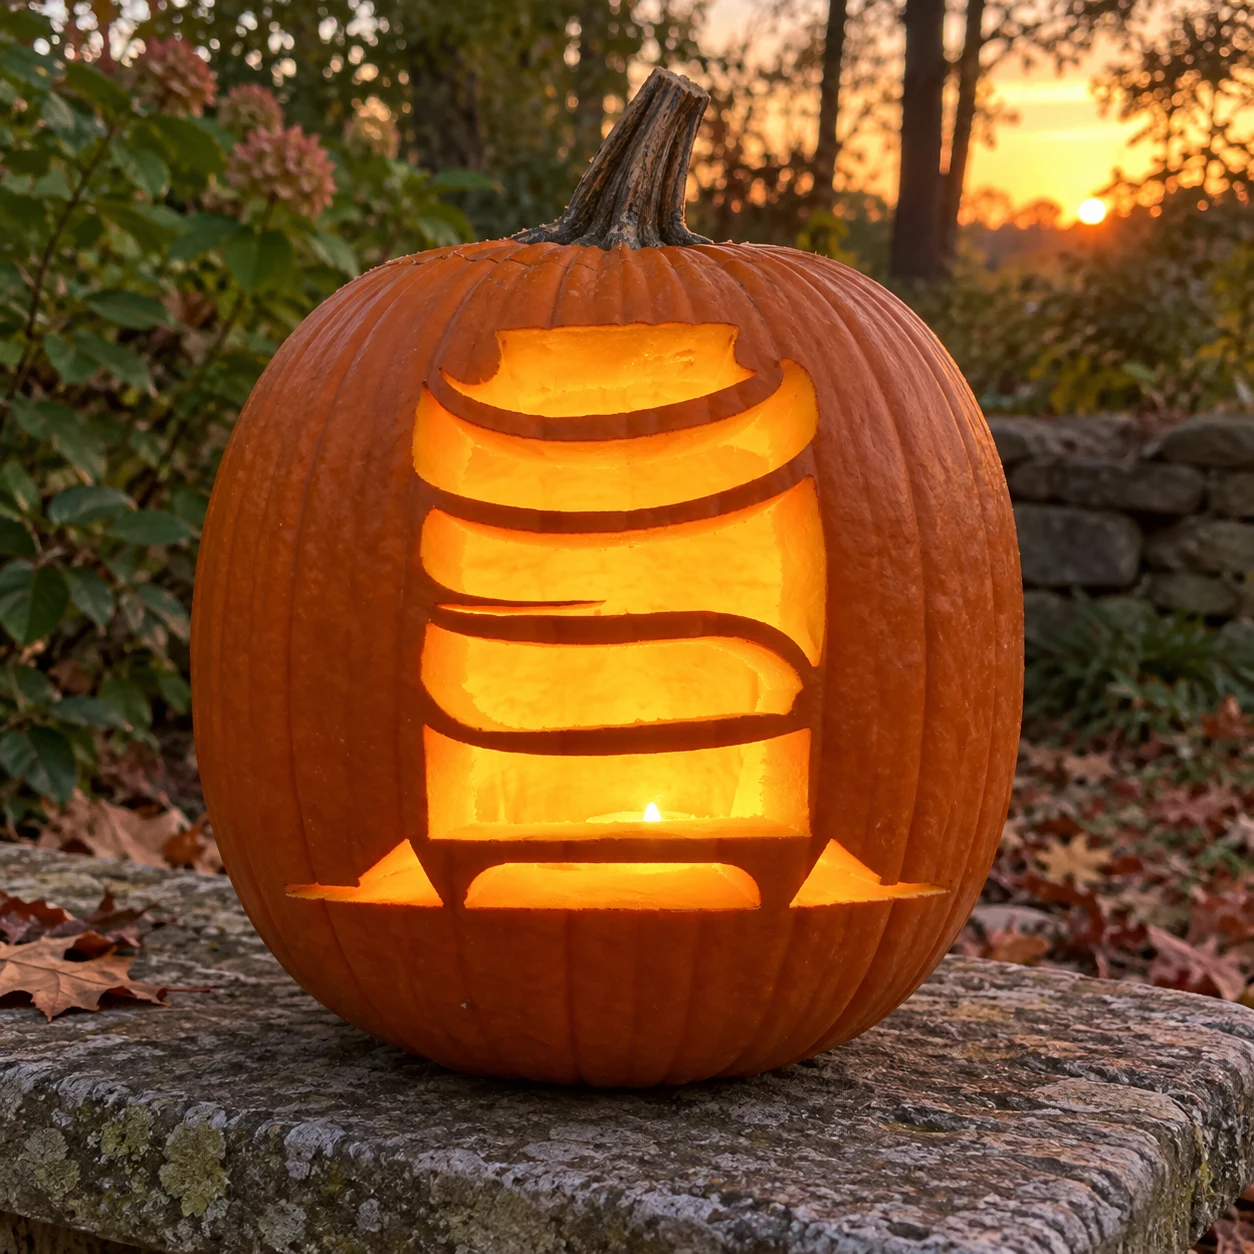
A stacked tombstone silhouette fills this graveyard pumpkin stencil, with three wide horizontal bands separated by curved white gaps that read as the stone's chiseled lines when lit. The large cut-out sections glow boldly, making this one of the most open, lantern-like designs in the graveyard category. Because the horizontal bands are each an independent floating piece, carve the bottom base strip first and work upward so the upper segments stay supported while you cut. This design is rated Beginner-friendly and takes most carvers around 30 minutes from trace to glow. Great for kids and first-timers. Big shapes, short cuts.
Pumpkin size guide
- 🎃 Small (5–7") — print at 80%
- 🎃 Medium (7–10") — print at 100% (recommended)
- 🎃 Large (11–13") — print at 130%
- 🎃 Giant (14"+) — print at 150% on tabloid paper
Frequently asked questions
Can I resize this stencil?▾
Yes. The PDF is vector so it scales cleanly. Print at 100% for a 7–10 inch pumpkin, 130% for 11–13 inch, or 150% for a giant. Use your printer's "Fit to page" or "Custom scale" setting.
What kind of paper works best?▾
Standard 20 lb letter or A4 printer paper is fine. Heavier paper is harder to bend around the pumpkin curve. If your printer supports it, set the quality to 'best' so the lines are crisp.
How long will the carved pumpkin last?▾
Usually 5–10 days. Coat all cut surfaces with petroleum jelly and store the pumpkin somewhere cool overnight. Avoid direct sun. Battery tea lights produce no heat and double the lifespan.
Can I sell pumpkins carved with this stencil?▾
Yes, the carved pumpkin you make is yours. The license covers personal and small-scale commercial carving (selling carved pumpkins, photographing them, posting on social). You may not resell the PDF file itself.
What if my printer doesn't print the whole stencil?▾
Set 'Page scaling' to 'Fit' in the print dialog and uncheck 'Auto-rotate'. If it still cuts off, the design includes 0.25" of safe-area margin so a small crop won't ruin it.
How to carve this stencil
- Print and tape the stencil centered on a cleaned, scraped pumpkin face.
- Transfer the outline of all five segments by poking a pin grid along every edge.
- Begin with the rectangular base strip at the bottom and remove it completely before moving up.
- Carve the three main horizontal tomb bands next, cutting from the center of each band outward to avoid flexing the narrow white bridges.
- Finish with the small curved top cap, using short, controlled strokes to keep its rounded edge clean.
- Place a tea light inside: the wide open bands create a bright, flickering lantern effect visible from across the yard.
Tools you'll need
For a beginner-friendly carve like this you'll want a paring knife, spoon / scoop, marker, and tea light. Here's the kit we reach for — start with whatever you already own.

Elmchee Pumpkin Carving Kit
13-piece kit with carrying case
Saws for the larger cutouts, plus a scoop for hollowing. Covers both jobs in one kit.
View on Amazon ↗
Speedball 4131 Lino Cutter Set
Handle + 5 interchangeable cutters
Interchangeable cutters for peeling and shading the face. Useful for the finer details.
View on Amazon ↗
Homemory LED Tea Lights
24-pack of battery-operated lights
Battery-operated, flickering lights for a candle-like glow inside your finished pumpkin.
View on Amazon ↗
Community Pumpkin Carving Ideas
Carving ideas that use stencils like this one.
Related stencils
Carvers who liked this one also downloaded these.
- Advanced
Mummy Pumpkin Stencil
A mummy figure wrapped in overlapping bandage strips stands upright in this hard pumpkin stencil: a round hooded head with two crescent eye cutouts and small circle pupils, a neck section, and a torso crisscrossed with diagonal and horizontal bandage-strip cutouts that create an intricate lattice pattern in the lower half of the design. Lit from inside, the bandage lattice glows as a grid of bright lines framed by solid pumpkin strips. Begin with the two eye crescents and pupil circles in the face, then work downward through the lattice section one row at a time to keep the remaining skin stable.
- Expert / Pro
Graveyard Scene Pumpkin Stencil
A bare, gnarled tree with reaching branches, a perched owl, two flying bats, and a cluster of cemetery cross tombstones fill a large crescent-moon frame in this expert graveyard pumpkin stencil. Nearly every element is a carved pierce-through, leaving thin orange bridges for the tree branches and tombstone edges. The lit pumpkin produces a richly detailed haunted graveyard scene. Start with the smallest elements inside the scene, such as the owl silhouette and the cross details on each tombstone, before the large moon arc is removed and the frame loses rigidity.
- Expert / Pro
Haunted Tree Pumpkin Stencil
A gnarled, bare-branched haunted tree with an angry face hidden in its trunk dominates this expert-level pumpkin stencil, its dozens of thin branch tips and the snarling mouth and eye details forming an intricate web of cuts. When lit, the branching silhouette glows against the pumpkin's skin with dozens of narrow passages of light. Work from the outermost branch tips inward toward the trunk face so the stencil sheet holds its shape while you cut the trickiest inner details last.
- Advanced
RIP Graveyard Pumpkin Stencil
A moonlit graveyard scene arches across this pumpkin stencil, with a large cracked tombstone bearing the letters RIP at center, flanked by two cross-topped stones and tufts of grave grass below, all framed inside a curved arch at the top. The composition is pierced so the entire scene cuts away from the pumpkin wall and glows as one large backlit picture. Cut the letter shapes inside RIP first with a detail blade, then work outward through the tombstone cracks, cross details, and grass tufts before removing the large arch framing area last.
- Expert / Pro
Graveyard Scene Pumpkin Stencil
A wide panoramic graveyard scene fills this pumpkin stencil from edge to edge: a gnarled bare tree dominates the right side with spidery branches, a crescent moon peeks above the tree line, two bats fly near the top left, a row of varied tombstones stretches across the middle ground, and a foreground of jagged dead grass and roots fills the bottom. All elements remain connected as a single cut sheet of pumpkin wall with the background space pierced away, so the entire scene glows in silhouette. Carve the bat shapes and moon sliver at the top first while the tall tree branches above them still anchor the upper wall.
- Expert / Pro
Rising Ghoul Pumpkin Stencil
A skeletal ghoul mid-stride in this expert pumpkin stencil reaches one clawed hand upward, its skull-face snarling with hollow triangular eyes, while ragged clothing and a mass of dirt and bone at the base suggest it is rising from the grave. The figure is a loose silhouette of interconnected pieces separated by thin white-line channels, so the lit jack-o-lantern shows a glowing zombie body with dark gaps that define the bones and tattered fabric. Preserve the thin ankle and wrist bridges until last, cutting the torso and skull interior openings first to keep those fragile joints from being stressed by surrounding cuts.