Similar to This
View all stencils →About this stencil
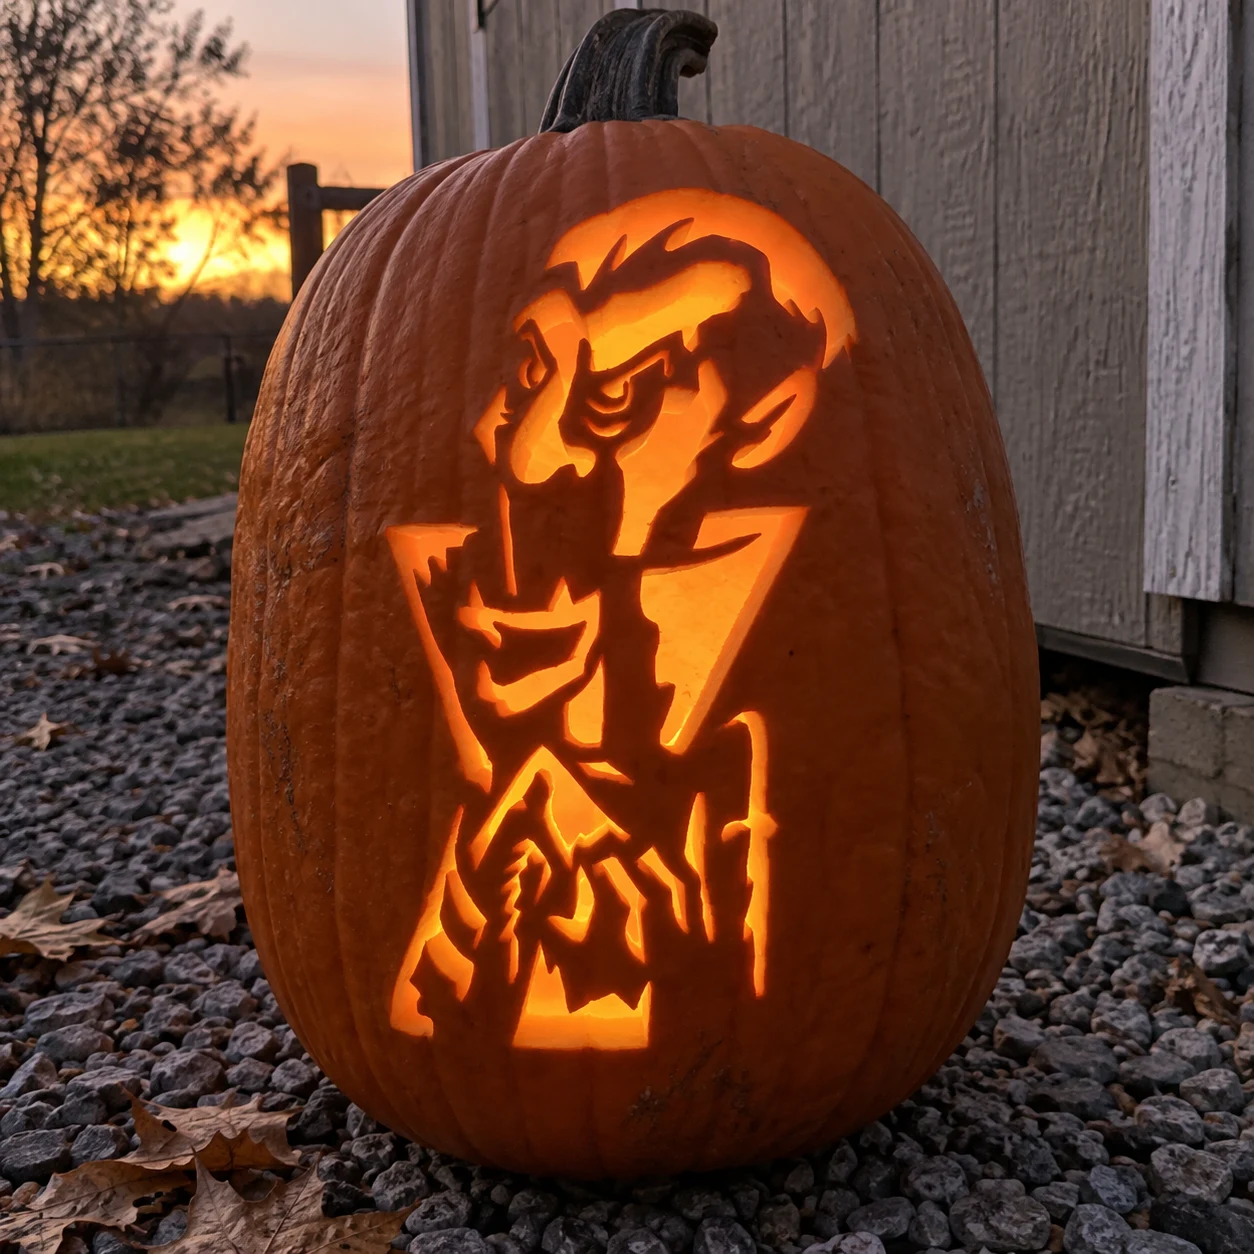
A vampire count shown from the waist up dominates this expert pumpkin stencil: a swept-back widow's peak hairline, arched expressive brows, sharp angular cheekbones, a sneering half-open mouth, and a high-collared cape spread wide at the bottom. The face is built from many disconnected cut-out islands separated by thin pumpkin bridges, giving the lit design a dramatic stained-glass quality. Before cutting any facial details, map all the bridge lines carefully: the narrow strip between the brow and the cheek is the most fragile connector and must be preserved until the end. This design is rated Expert / Pro and takes most carvers around 240 minutes from trace to glow. Sculpting-grade work. Three or more depth layers, fine detail.
Pumpkin size guide
- 🎃 Small (5–7") — print at 80%
- 🎃 Medium (7–10") — print at 100% (recommended)
- 🎃 Large (11–13") — print at 130%
- 🎃 Giant (14"+) — print at 150% on tabloid paper
Frequently asked questions
Can I resize this stencil?▾
Yes. The PDF is vector so it scales cleanly. Print at 100% for a 7–10 inch pumpkin, 130% for 11–13 inch, or 150% for a giant. Use your printer's "Fit to page" or "Custom scale" setting.
What kind of paper works best?▾
Standard 20 lb letter or A4 printer paper is fine. Heavier paper is harder to bend around the pumpkin curve. If your printer supports it, set the quality to 'best' so the lines are crisp.
How long will the carved pumpkin last?▾
Usually 5–10 days. Coat all cut surfaces with petroleum jelly and store the pumpkin somewhere cool overnight. Avoid direct sun. Battery tea lights produce no heat and double the lifespan.
Can I sell pumpkins carved with this stencil?▾
Yes, the carved pumpkin you make is yours. The license covers personal and small-scale commercial carving (selling carved pumpkins, photographing them, posting on social). You may not resell the PDF file itself.
What if my printer doesn't print the whole stencil?▾
Set 'Page scaling' to 'Fit' in the print dialog and uncheck 'Auto-rotate'. If it still cuts off, the design includes 0.25" of safe-area margin so a small crop won't ruin it.
How to carve this stencil
- Transfer every line of the stencil before cutting; note the thin bridge between brow and cheek on each side.
- Begin with the hair and scalp cutouts at the top of the design, working downward to keep the lower face stable.
- Cut the eye and brow accent pieces next, leaving the narrow brow-to-cheek bridge intact.
- Work through the nose, cheek, and mouth areas in small sections, rotating around the face rather than cutting one side completely before the other.
- Cut the cape sections at the bottom last; their large open areas would weaken the whole design if removed early.
- Use a bright LED so the many small cutouts glow individually and the pumpkin bridges read as dark outlines against the light.
Tools you'll need
For a expert / pro carve like this you'll want a full ribbon tool set, clay sculpting loops, x-acto knife, and dremel (optional). Here's the kit we reach for — start with whatever you already own.

Elmchee Pumpkin Carving Kit
13-piece kit with carrying case
Saws for the larger cutouts, plus a scoop for hollowing. Covers both jobs in one kit.
View on Amazon ↗
Speedball 4131 Lino Cutter Set
Handle + 5 interchangeable cutters
Interchangeable cutters for peeling and shading the face. Useful for the finer details.
View on Amazon ↗
Homemory LED Tea Lights
24-pack of battery-operated lights
Battery-operated, flickering lights for a candle-like glow inside your finished pumpkin.
View on Amazon ↗
Community Pumpkin Carving Ideas
Carving ideas that use stencils like this one.
Related stencils
Carvers who liked this one also downloaded these.
- Advanced
Vampire Face Pumpkin Stencil
A vampire face shown from the shoulders up dominates this hard pumpkin stencil, featuring a high widow's peak hairline with two swept horns of hair, large pointed ears, a monocle over one eye, a hawkish nose, a thin mustache, and a jagged collar below the chin. Each facial feature is a separate cut-through piece held apart by solid pumpkin lines, so when lit the face reads as a patchwork of glowing angular shapes. The monocle circle is the most isolated piece; carve it first before the eye socket cuts nearby remove the surrounding support.
- Advanced
Dracula Pumpkin Stencil
A cartoonish Dracula figure stands arms raised and cape spread wide in this hard pumpkin stencil, with pointed ears, a brow furrowed in menace, two prominent fangs, and clawed hands at the tips of the outstretched arms. The head, torso, and cape folds are rendered as separate cut-through pieces held together by solid pumpkin outlines, so the finished jack-o-lantern reads as a sharp, angular vampire silhouette when backlit. Cut the claw tips at each arm end first since they are the most isolated and will be hardest to control once the large cape areas are removed.
- Advanced
Dracula Pumpkin Stencil
A bald, hollow-cheeked Dracula figure holds a grinning carved jack-o-lantern to his chest in this hard vampire pumpkin stencil. The face has arching brow ridges, deeply cut cheekbones, fang-edged lips, and small pointed ear nubs. Below the chin the figure's open cape forms a bat-wing shape, and the jack-o-lantern the vampire cradles shows its own triangular eyes and jagged smile as inner cutouts. The composition creates two overlapping scenes: a vampire face above and a glowing pumpkin face below. Work from the outside edge of the cape inward, and carve the inner pumpkin face last to avoid over-thinning the chest wall.
- Beginner-friendly
Happy Vampire Pumpkin Stencil
A cheerful jack-o-lantern face with vampire character fills this beginner-friendly pumpkin stencil: two large arching eye openings each cradle a small solid half-moon pupil, a small heart-shaped nose cutout sits in the center, and a wide grinning mouth shows two prominent pointed fangs flanked by rows of square teeth. Each feature is a distinct pierced-through shape separated by solid pumpkin bridges. Start with the heart-shaped nose and the small pupil islands inside each eye before opening the bigger eye arches, so those internal solid pieces stay anchored while you work.
- Beginner-friendly
Vampire Jack-o-Lantern Pumpkin Stencil
A classic jack-o-lantern face with a vampire twist fills this pumpkin stencil: arched brows made of two angular patches over each eye, two large irregular triangular eye openings, a small v-shaped nose cutout, and a wide gaping mouth with jagged upper fangs and a rounded lower lip. All features are separate pierced-through shapes, so the candle-lit face shows glowing eyes, nose, and teeth against the solid orange pumpkin skin. Cut the small v-shaped nose notch and the two narrow eyebrow patches first so you can use the surrounding wall for leverage when carving the larger mouth and eye shapes.
- Advanced
Cartoon Vampire Pumpkin Stencil
A cartoonish chibi-style vampire stands front-facing on this pumpkin stencil, wearing a sweeping cape, a bow tie, and an impish grin showing two prominent fangs. The face details, hands, cape folds, and bow tie are all separate cut-out islands surrounded by solid pumpkin bridges. Start with the smallest interior islands such as the round cheek circles and the bow tie before cutting the large cape sections, so those tiny pieces are supported by a still-intact wall when you trace them.