Halloween Pumpkin Carving Contest · Starts October 1st · $500 in prizes
← Back to ideas
@ai_concepts
Sep 14, 2026
Alaska State Map PumpkinAI
0

Alaska State Map Pumpkin

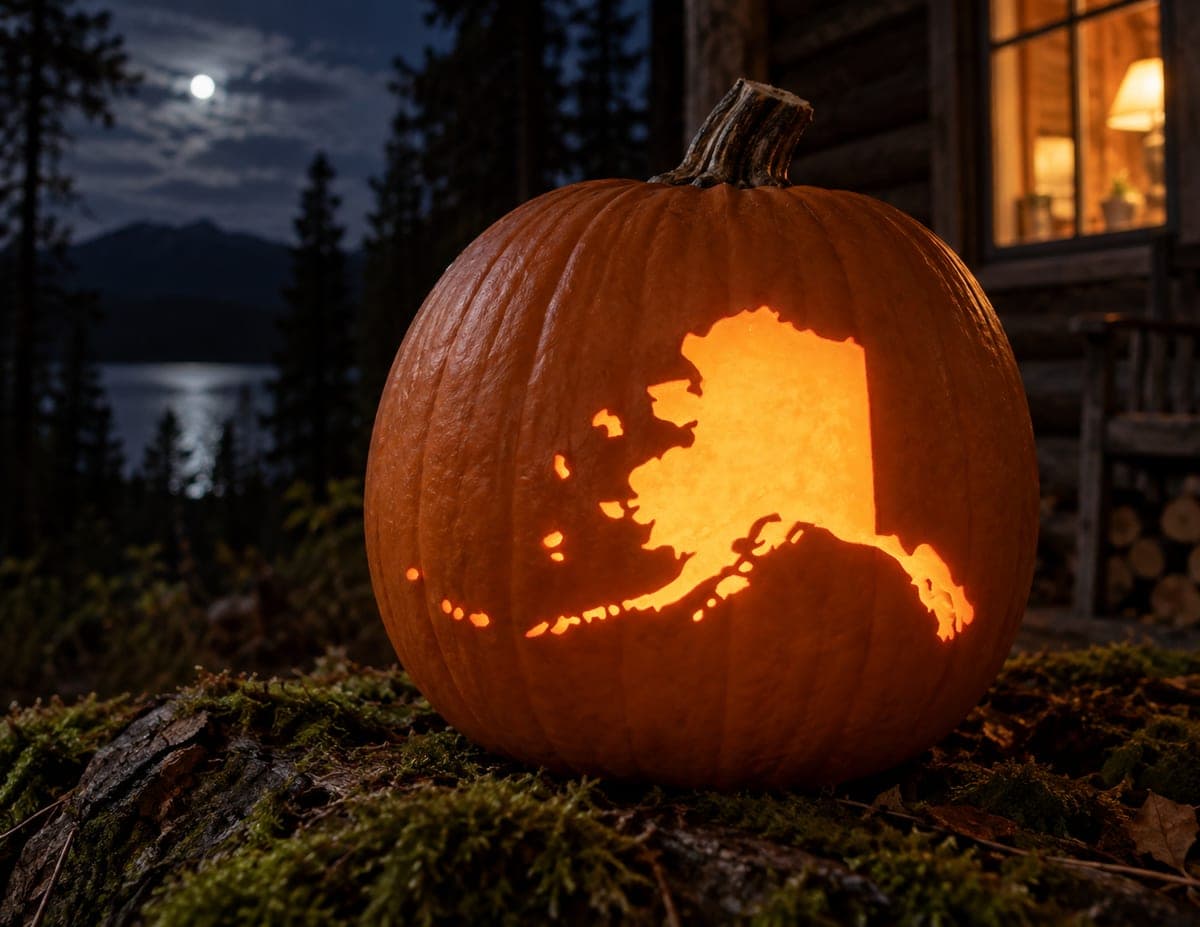
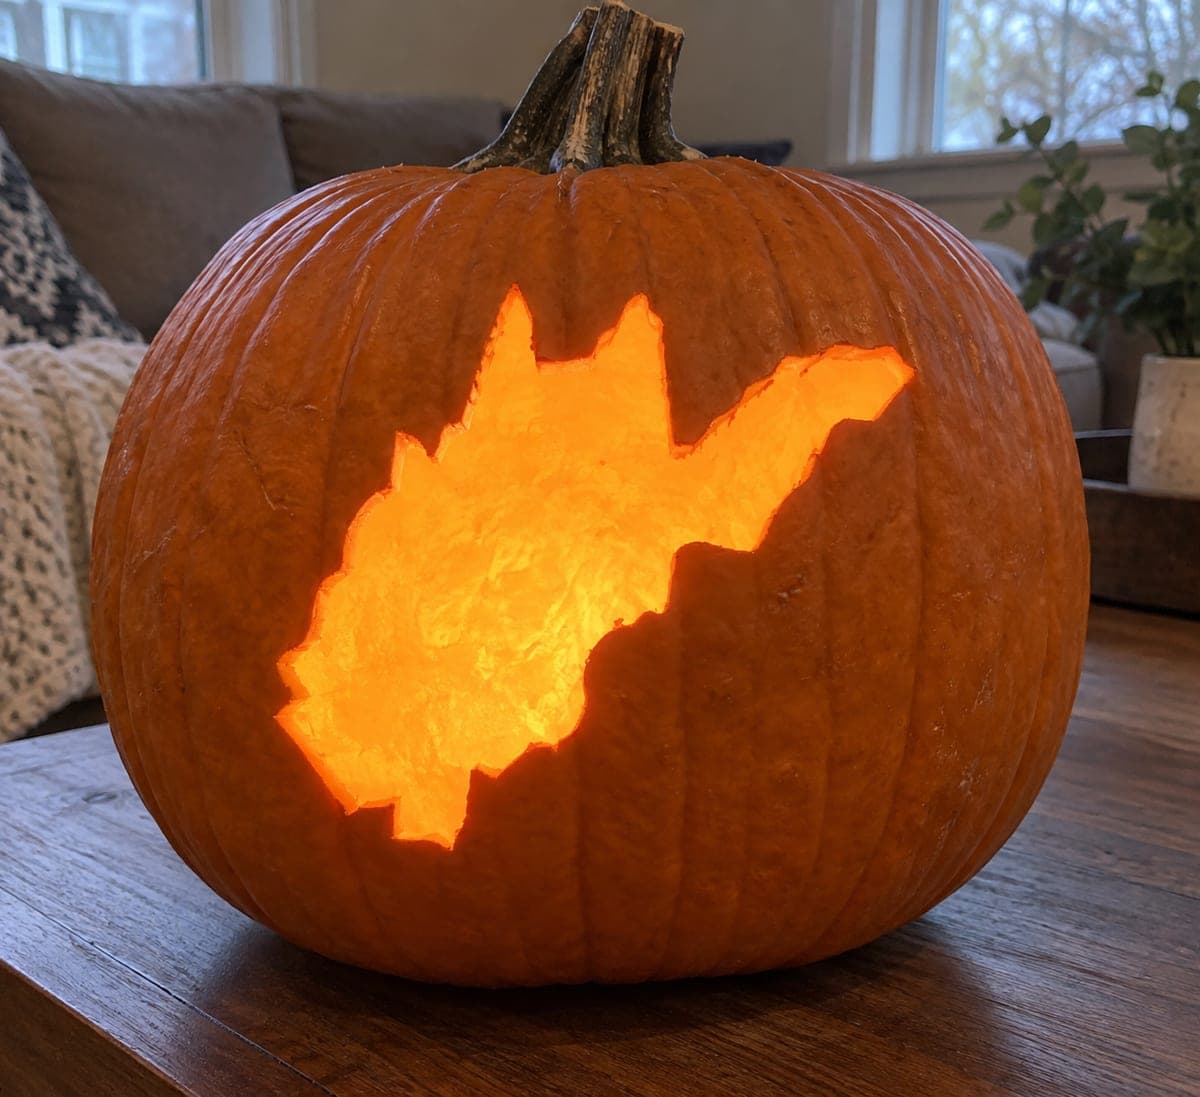
Alaska's wide mainland mass glows in the upper right of the design, with the Aleutian Island chain trailing off in a curve of small separate cutout islands to the lower left, giving the pumpkin carving idea an instantly recognizable spread. Because the islands are isolated cutout pieces, the wall between them is thin and easy to snap. Transfer the mainland shape first and carve it completely before cutting the island chain, working from the largest island toward the smallest so the weakest sections are carved last.

This is an AI-generated concept image: a realistic, carvable design idea rather than a photo of a finished carve. AI concepts are always labeled and sit out the leaderboard and the contest.

No ratings yet · Sign in to rate
Comments (0)

  • No comments yet — be the first.

Save without an account. Sign in to like or comment.

Our tips for carving a similar design

The core trick here is turning a state outline into a single bright silhouette, with the solid Alaska mainland glowing large in the upper right and the Aleutian chain trailing off as tiny separate cutouts toward the lower left. Because the islands are isolated openings, the walls between them stay fragile, so the plan is to carve the big mainland shape first and save the smallest islands for last. Working strongest to weakest keeps the thin sections supported for as long as possible.

Written by PumpkinCarvingIdeas.com, inspired by the image above. These are our suggestions, not instructions from the uploader. This approach to the AI concept has not been tested on a real pumpkin.

From pumpkin to porch

  1. Pick a smooth pumpkin and open it from the top

    Choose a round pumpkin with a broad, even face and few deep ribs so the map reads clearly. Cut a lid at an angle so it rests without falling in, then scoop the insides out. Thin the carving wall on the front to about one inch using a scraper or large spoon. A thinner wall makes both the solid glow and the tiny island cutouts far easier to control.

  2. Transfer the mainland shape first

    Tape your Alaska stencil to the pumpkin, centering the bulky mainland mass in the upper right of the face. Poke the outline of the mainland only with a pin or transfer tool, leaving the island chain for later. Keep the stencil taped in place so the islands stay lined up when you return to them. Marking the big shape first gives you a clear anchor for the whole design.

  3. Cut the mainland completely

    Using a fine saw blade, cut fully through along the mainland outline and remove the piece so the interior opens to full light. Take slow, short strokes on the curved panhandle and inlet edges rather than forcing long cuts. Support the pumpkin wall with your free hand near the cut, not in the blade path. Finish this whole shape before touching the island chain.

  4. Work the island chain largest to smallest

    Re-mark the Aleutian islands from your stencil, then cut them one at a time starting with the biggest island nearest the mainland. Leave the thin pumpkin walls between islands intact so each cutout has neighbors to lean on. Save the tiniest specks for last, when the most fragile sections have the least carving left around them. If a wall feels weak, widen the gap slightly rather than risk a snap.

  5. Clean edges and add a peeled glow if you like

    Bevel the inside edge of each opening slightly so more light spills out and the shapes look crisp. For extra depth you can skin-peel a faint halo of surface around the mainland, though a plain dark field also looks sharp. Wipe away crumbs and check every island opening from a few feet back. Trim any ragged spots with the tip of your knife.

  6. Light it and photograph

    Drop in one or two battery LED lights, never a candle, since the thin island walls dry fast. Aim a light toward the mainland so the large opening glows brightest and the tiny islands read as sparks. Shoot in a dark setting to let the shapes pop, ideally against a simple background. A little moisture wiped off the surface keeps reflections from washing out the map.

Gather your supplies

Check things off as you get ready.

Work on a stable surface, keep your free hand out of the cutting path, and have an adult handle sharp tools.

Three levels of light

  • Leave intact

    The untouched orange skin across the rest of the face, keeping the map isolated and readable

  • Peel & shade

    An optional shaved halo around the mainland for a soft dim ring of orange

  • Cut through

    The full Alaska mainland and each Aleutian island, opened all the way through for the brightest glow

Learn the carving basics

Before you start cutting

How do I keep the tiny islands from breaking off?

Leave the thin pumpkin walls between islands fully intact and treat them like natural bridges. Carve from the largest island toward the smallest so the weakest specks are cut last, when there is the least work left to jostle them. If a wall feels too thin, make the gap a touch wider instead of pushing your blade through a fragile spot.

Should I carve the mainland or the islands first?

Always the mainland first. It is the strongest, largest shape, so cutting it early gives you a solid anchor and does not weaken the pumpkin. The delicate island chain should come last, largest to smallest, so the fragile sections stay supported for as long as possible.

This is a concept image, so how thin should the real walls be?

No real pumpkin exists in the picture, so treat the layout as a target you build safely. Thin the front wall to about one inch for clean cutting, and keep the gaps between islands wide enough that the walls do not crumble. Widen or simplify the smallest specks if your pumpkin flesh feels soft.

Your take belongs here, too.

Changed a detail? Made it simpler? Share a photo of your version and tell the community what worked.

Share your pumpkin

More pumpkins like this

You've reached the end · 8 pumpkins
The Patch Report

Fresh pumpkins, in your inbox.

The best new carvings, ideas worth stealing, and how-tos for carving season. Short, seasonal, and gone by November.

A short email during carving season. Unsubscribe anytime. See our privacy policy.