Halloween Pumpkin Carving Contest · Starts October 1st · $500 in prizes
← Back to ideas
@ai_concepts
Sep 14, 2026
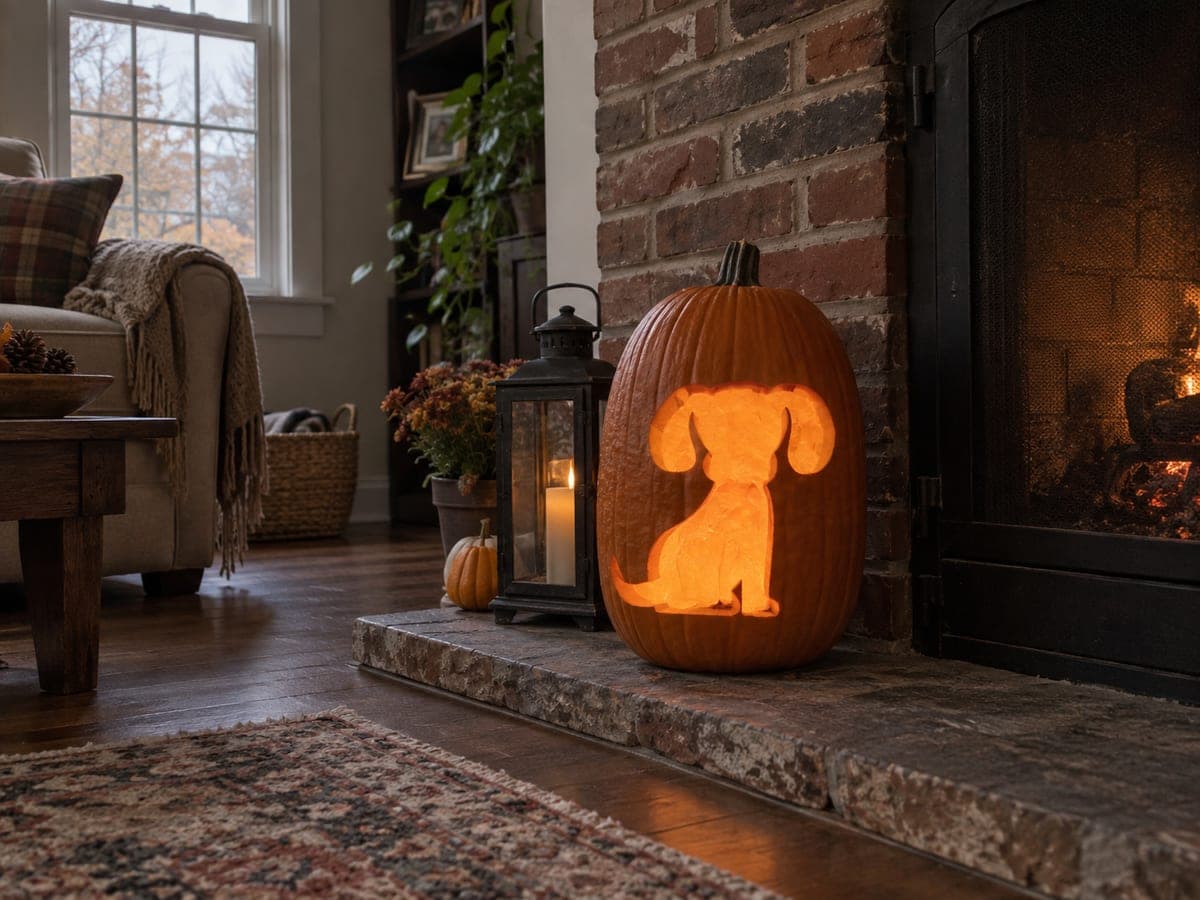
Big-Muzzled Sitting Pug PumpkinAI
0

Big-Muzzled Sitting Pug Pumpkin

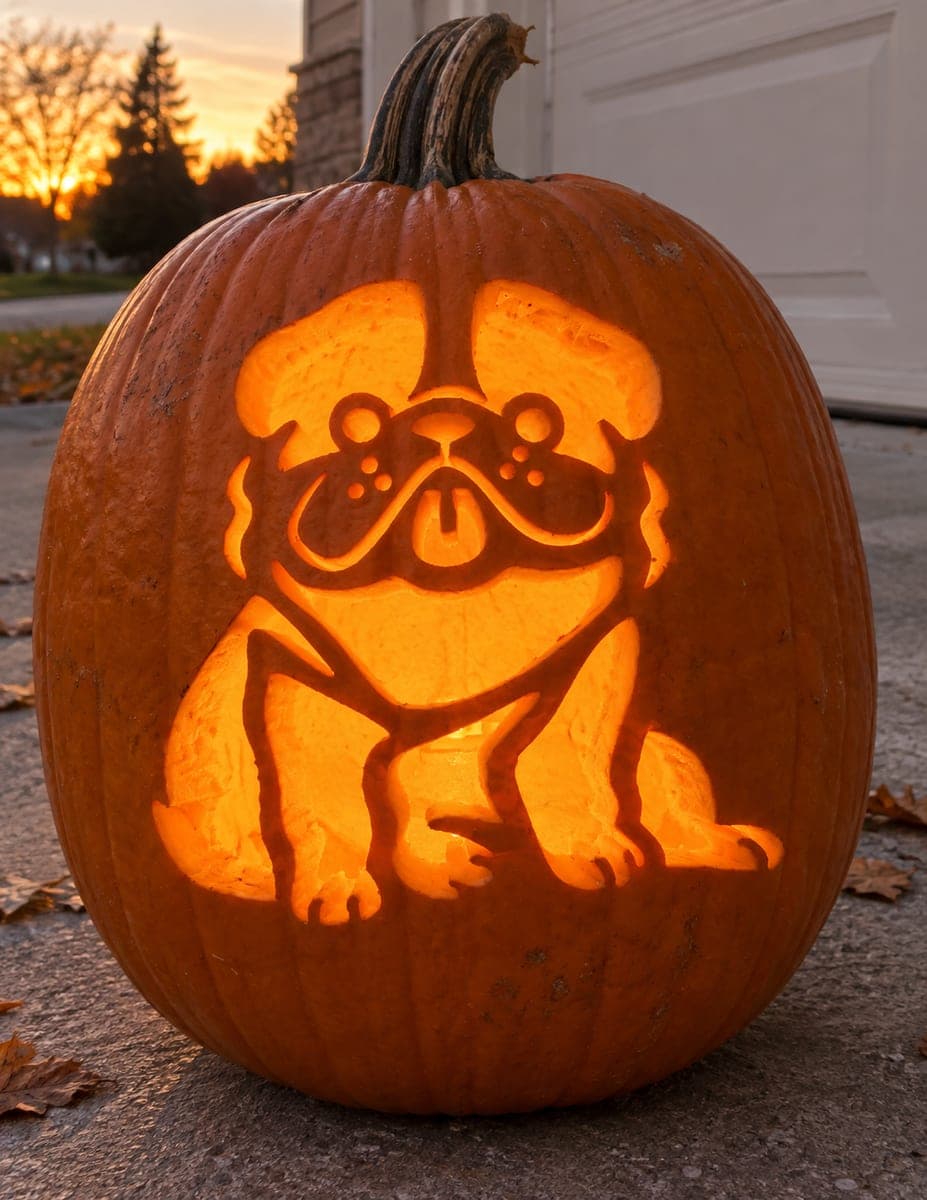
An oversized pug face dominates this cutout pumpkin carving, with a massive round wrinkled head, two circular eye rings with dot pupils, a wide flat nose, front paws at the bottom, and a wavy skirt of fur around the body. The broad glowing areas are the pug's forehead and chest, framed by a dark rind outline that gives the dog its chunky cartoon shape. Carve the paired eye circles carefully so the spacing looks symmetrical, using a small pumpkin saw to cut each ring before opening the larger face areas around them.

This is an AI-generated concept image: a realistic, carvable design idea rather than a photo of a finished carve. AI concepts are always labeled and sit out the leaderboard and the contest.

No ratings yet · Sign in to rate
Comments (0)

  • No comments yet — be the first.

Save without an account. Sign in to like or comment.

Our tips for carving a similar design

The trick here is a bold cutout silhouette where the pug's chunky body reads entirely from the dark rind outline you leave behind. You cut the big glowing areas, the forehead and chest, so the light shows the shape, then keep thin rind lines as bridges to define the wrinkles, eye rings, nose, and paws. Plan the pattern so every dark line connects to the surrounding skin and never floats free.

Written by PumpkinCarvingIdeas.com, inspired by the image above. These are our suggestions, not instructions from the uploader. This approach to the AI concept has not been tested on a real pumpkin.

From pumpkin to porch

  1. Pick a big pumpkin and transfer the pattern

    Choose a tall, round pumpkin with a broad flat front so the wide pug face has room to sit. Tape your printed stencil to the front and poke the outlines with a pin or transfer tool, making dots close together along every curve. Pay special attention to marking the two eye rings and the nose so the spacing stays even. Step back and check that the face looks centered before you cut anything.

  2. Open the pumpkin and clean the wall

    Have an adult cut a lid from the bottom or the back rather than the top, so the stem stays intact and the pumpkin sits flat. Scoop out the seeds and pulp, then thin the carving wall to about one inch where the face will be. A thinner wall cuts more cleanly and lets more light through the cutout areas. Keep the wall even so the glow is consistent across the big open shapes.

  3. Cut the small eye rings first

    Use a small pumpkin saw to cut each circular eye ring and its dot pupil before you open anything larger nearby. Small details are easiest to keep symmetrical while the surrounding pumpkin is still solid. Work slowly and let the saw do the cutting instead of forcing it. Compare the two eyes as you go so they match in size and placement.

  4. Carve the nose, mouth, and wrinkle lines

    Cut the wide flat nose and the narrow lines that separate the muzzle, jowls, and forehead wrinkles. These thin strips of leftover rind act as bridges that hold the whole face together, so cut on the correct side of each line and do not let two cuts meet and drop a section. If a bridge feels flimsy, leave it a touch wider. Keep checking that dark lines still connect to the outer skin.

  5. Open the large face and chest areas last

    Now cut the big glowing shapes, the forehead, cheeks, chest, and the spaces around the paws and fur skirt. Cutting these last keeps the pumpkin strong while you handle the fine work. Push each freed piece out gently from the inside to avoid tearing the edges. Trim any ragged spots with a paring knife for clean lines.

  6. Light it and take your photo

    Set a battery LED light or two inside and skip real candles, since the sealed body traps heat. Turn it on in a dark room to spot any thin spots or bridges that need trimming. Rub a little petroleum jelly on cut edges to slow drying and keep the shape crisp. Photograph it at dusk on a porch step for that warm glow.

Gather your supplies

Check things off as you get ready.

Work on a stable surface, keep your free hand out of the cutting path, and have an adult handle sharp tools.

Three levels of light

  • Leave intact

    The outer rind outline of the body, ears, wrinkle lines, and the bridges between the eyes and muzzle stay as dark skin.

  • Peel & shade

    Optional shallow skin-peeling on the fur skirt or lower belly gives a soft dim halo without a full cutout.

  • Cut through

    The forehead, cheeks, chest, eye rings, nose, and gaps around the paws are cut through for the brightest glow.

Learn the carving basics

Before you start cutting

How do I keep the two eye rings looking even?

Mark both rings from the stencil with closely spaced dots before cutting, and measure their distance from the center nose line. Cut them first while the pumpkin is still solid, and stop often to compare the two. If one drifts slightly, you can widen the smaller one to match.

Will the thin wrinkle and muzzle lines hold up?

Yes, as long as each dark line stays connected to the surrounding skin and acts as a bridge. Avoid letting two neighboring cuts join and drop out a strip. If any line feels weak, leave it a little wider than the pattern shows.

This is a concept image, so how would I get this exact look?

No real pumpkin exists for this picture, so treat it as inspiration for a similar carve. Use a bold seated-pug stencil, keep the wall around one inch thick, and rely on cutouts for the big glowing shapes. Real rind is sturdy enough for this design if your bridges stay attached.

Your take belongs here, too.

Changed a detail? Made it simpler? Share a photo of your version and tell the community what worked.

Share your pumpkin

More pumpkins like this

You've reached the end · 8 pumpkins
The Patch Report

Fresh pumpkins, in your inbox.

The best new carvings, ideas worth stealing, and how-tos for carving season. Short, seasonal, and gone by November.

A short email during carving season. Unsubscribe anytime. See our privacy policy.