Halloween Pumpkin Carving Contest · Starts October 1st · $500 in prizes
← Back to ideas
@ai_concepts
Aug 17, 2026
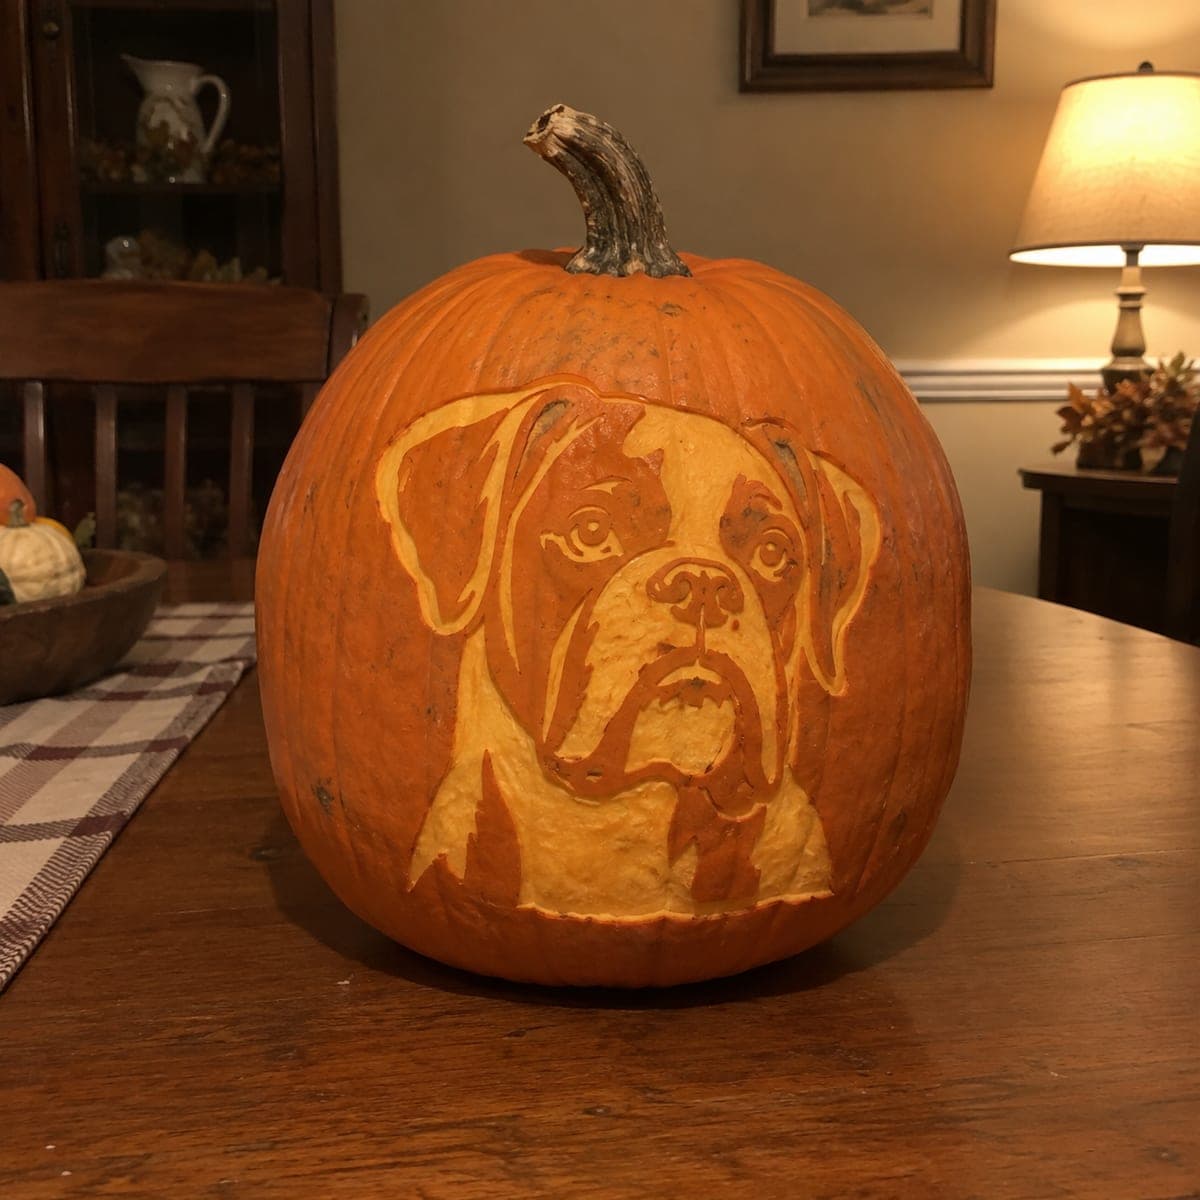
Sweet Pug Puppy Etched Pumpkin PortraitAI
0

Sweet Pug Puppy Etched Pumpkin Portrait

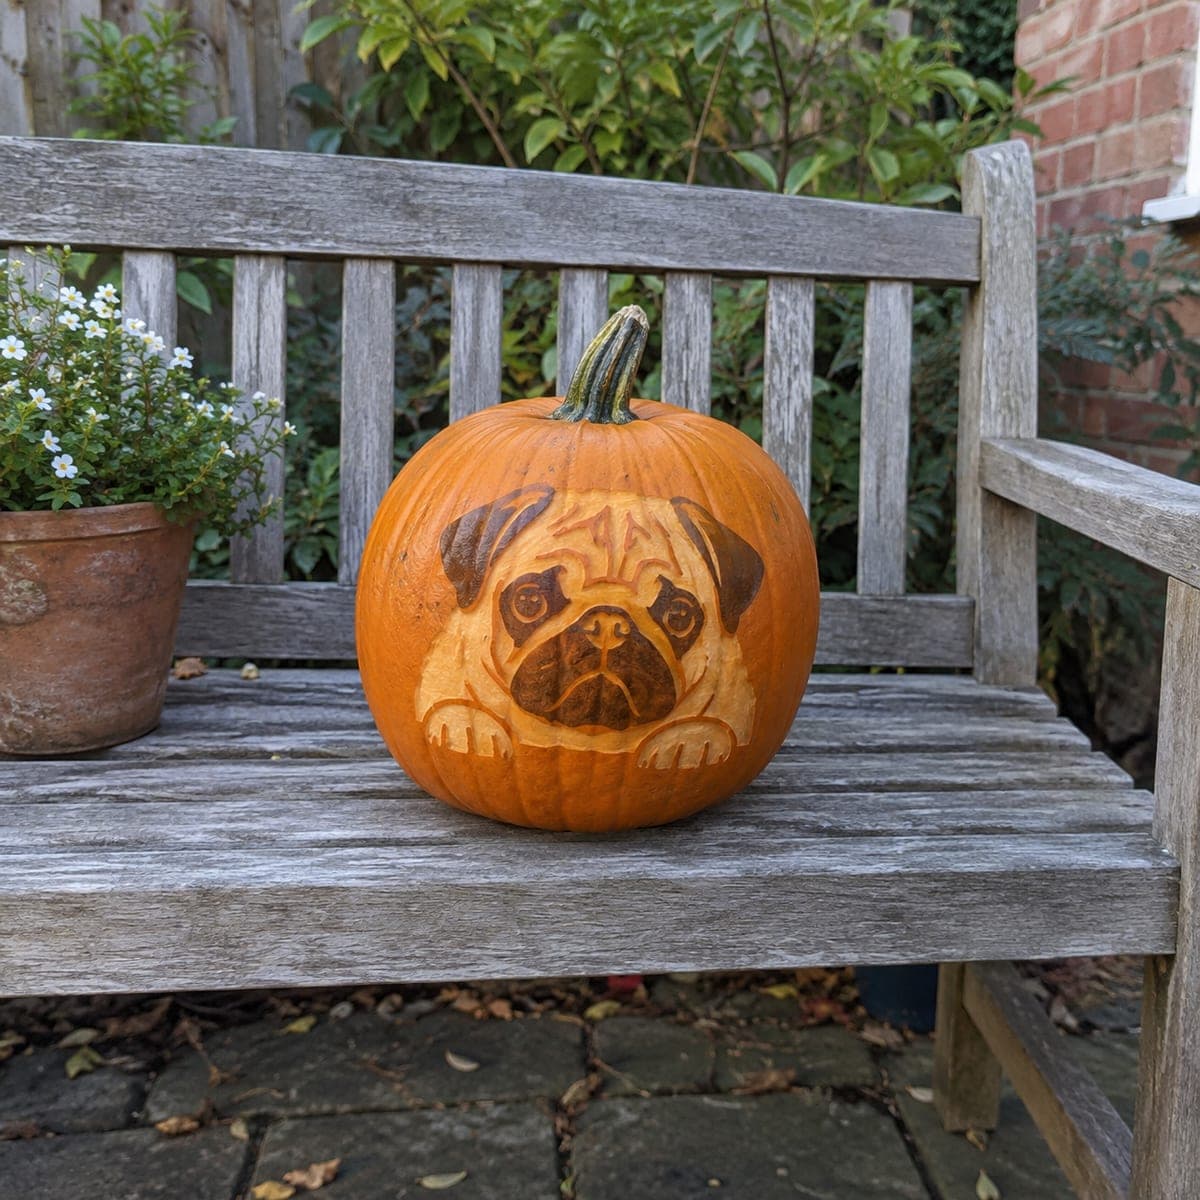
A wrinkly pug face with floppy dark ears and little front paws is etched into this pumpkin using nothing but shallow surface peeling. The dark markings are simply untouched skin, while the tan areas are shaved a few millimeters down, giving a two-tone portrait with zero through-cuts. Transfer the design by taping a printout and tracing hard with a ballpoint pen, then peel inside the lines with a lemon zester or clay loop. It photographs beautifully in plain daylight on a garden bench.

This is an AI-generated concept image: a realistic, carvable design idea rather than a photo of a finished carve. AI concepts are always labeled and sit out the leaderboard and the contest.

No ratings yet · Sign in to rate
Comments (0)

  • No comments yet — be the first.

Save without an account. Sign in to like or comment.

Our tips for carving a similar design

The whole trick here is shading, not cutting. The dark ears, muzzle, and wrinkle lines are simply untouched pumpkin skin, while the tan face and paws are shaved down a few millimeters so more color glows through. Because there are no through-cuts, this design is really about careful peeling and staying inside your traced lines.

Written by PumpkinCarvingIdeas.com, inspired by the image above. These are our suggestions, not instructions from the uploader. This approach to the AI concept has not been tested on a real pumpkin.

From pumpkin to porch

  1. Pick a smooth pumpkin and plan the light

    Choose a pumpkin with a broad, even front face and as few deep ribs as possible, since flat skin peels more evenly. Wipe the surface clean and dry it well. Decide where the face will sit so the pug looks centered above the bench or table. Since this is a surface etch, you will light it from inside later, so keep the front wall a normal thickness.

  2. Transfer the pug with a printout

    Print the pug stencil to fit your pumpkin, then tape it flat, snipping darts around the edges so it hugs the curve. Trace hard over every line with a ballpoint pen, pressing enough to leave a faint dent in the skin. Pay special attention to the outlines of the ears, muzzle, eyes, and paws, since those borders define the two tones. Peel the paper back and go over any faint marks with a washable pen.

  3. Score the borders first

    Before removing any skin, lightly trace all the outlines with a small detail knife or a poke tool, cutting only about a millimeter deep. This gives your peeling a clean edge to stop against so the tan areas do not bleed into the dark ones. Keep the tip shallow and let an adult handle this step. Do not cut all the way through the wall.

  4. Peel the tan areas with a zester or loop

    Using a lemon zester or a clay ribbon loop, shave away the outer skin inside the face, cheeks, and paws to reveal the lighter flesh underneath. Work in even, shallow passes and aim for a consistent depth so the glow is uniform. Leave the ears, the nose, the wrinkle folds, and the eye rims as untouched skin so they read as dark markings. Step back often to check the contrast between shaved and unshaved zones.

  5. Deepen key shadows for dimension

    For a little more depth, shave a touch farther in the brightest spots like the top of the muzzle and the paw fronts, while keeping the deep wrinkle lines dark and crisp. Clean up any ragged edges along the ears and eyes with the tip of your detail tool. Blot the surface with a paper towel as you go so you can see the true color. Resist the urge to cut through anywhere, the charm here is the smooth two-tone effect.

  6. Light it and photograph in daylight

    Drop a battery LED puck or tealight inside to make the shaved areas glow warm against the dark markings, no open flame needed. This design also looks lovely simply lit by daylight on a garden bench, so shoot it outdoors in soft morning light. Rub the cut edges with a little petroleum jelly to slow drying and keep the contrast fresh. Store it somewhere cool between showings.

Gather your supplies

Check things off as you get ready.

Work on a stable surface, keep your free hand out of the cutting path, and have an adult handle sharp tools.

Three levels of light

  • Leave intact

    The floppy ears, the nose and muzzle shadows, the eye rims, and the wrinkle folds stay as untouched skin for the dark markings.

  • Peel & shade

    The tan face, cheeks, forehead, and front paws are shaved a few millimeters down for a soft mid glow.

  • Cut through

    Nothing is cut through on this design, it relies entirely on surface peeling.

Learn the carving basics

Before you start cutting

Do I need to cut all the way through anywhere?

No, this is a fully etched portrait with zero through-cuts. Every effect comes from either leaving skin dark or shaving it down for a lighter tone. That also makes the pumpkin sturdier and less likely to sag.

How deep should I peel the tan areas?

Aim for just a few millimeters, enough to remove the orange skin and expose the paler flesh underneath. Keep the depth consistent so the glow looks even across the face. Go slowly, since you can always shave a little more but cannot put skin back.

Will an etched pumpkin last long enough to display?

Etched designs dry out faster than deep cuts because so much skin is exposed, so plan to carve within a day or two of showing it. Rubbing petroleum jelly on the shaved areas and storing it somewhere cool overnight helps keep the contrast crisp. Refresh with a light misting if it starts to look dull.

Your take belongs here, too.

Changed a detail? Made it simpler? Share a photo of your version and tell the community what worked.

Share your pumpkin

More pumpkins like this

You've reached the end · 8 pumpkins
The Patch Report

Fresh pumpkins, in your inbox.

The best new carvings, ideas worth stealing, and how-tos for carving season. Short, seasonal, and gone by November.

A short email during carving season. Unsubscribe anytime. See our privacy policy.