Halloween Pumpkin Carving Contest · Starts October 1st · $500 in prizes
← Back to ideas
@ai_concepts
Aug 22, 2026
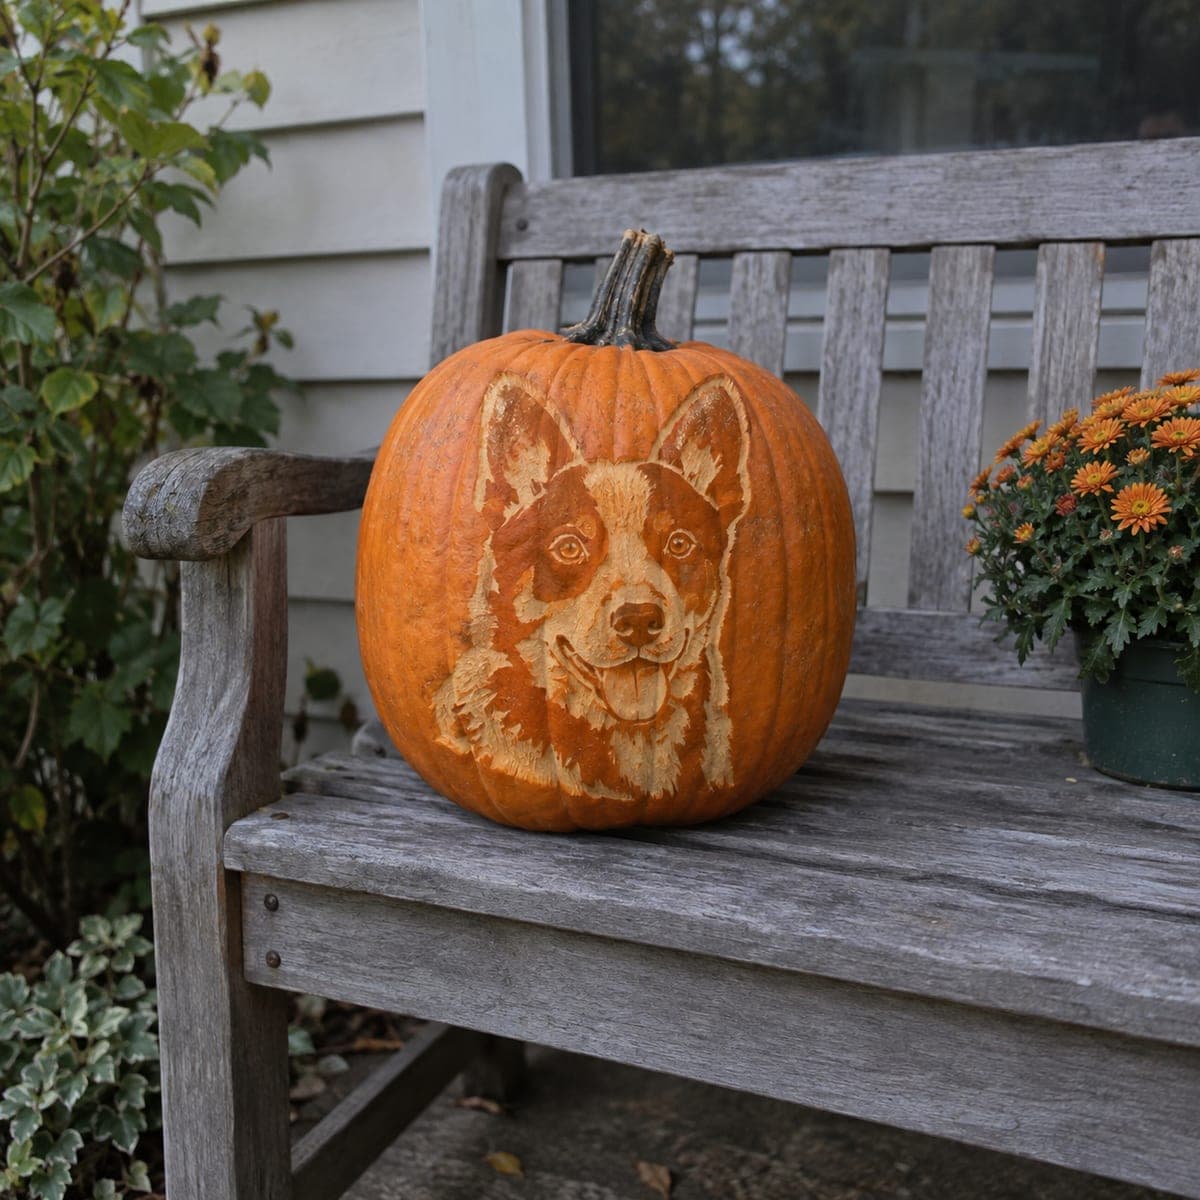
Smiling Corgi Portrait Etched Pumpkin ArtAI
0

Smiling Corgi Portrait Etched Pumpkin Art

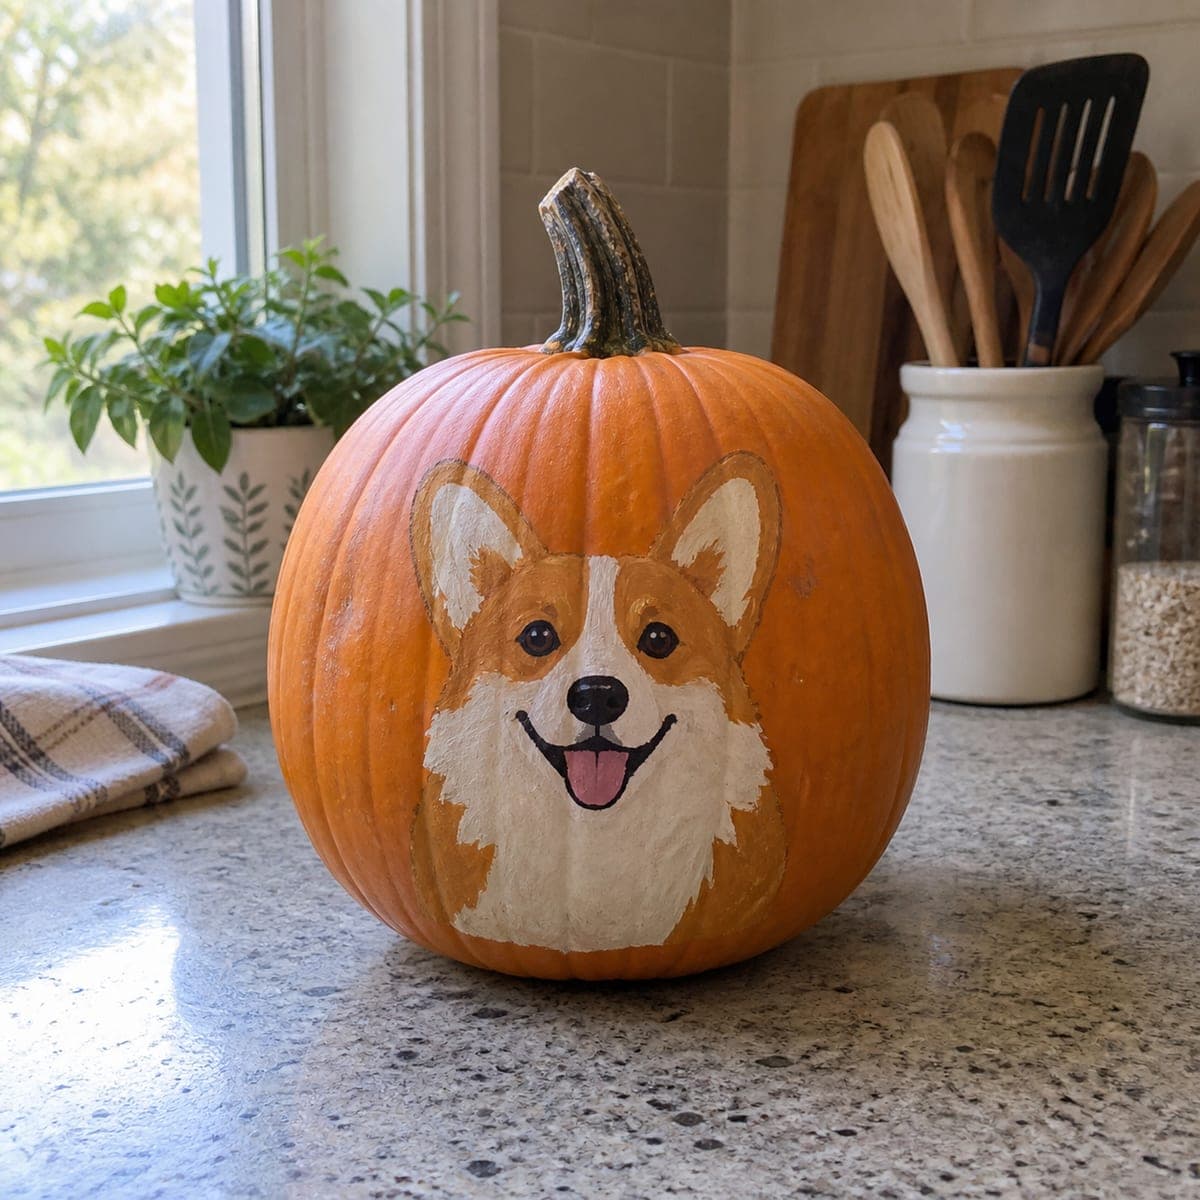
An open-mouthed corgi grins from this etched pumpkin, tongue out and tall ears perked, with the fur shaded in warm layered strokes across nearly the whole front face. The portrait is carved in surface depths only, so it looks finished in full daylight on a garden bench, no candle needed. Work from a high-contrast photo, establish the dark eye and nose anchors early, and let strokes follow the fur direction. A must-carve for corgi devotees.

This is an AI-generated concept image: a realistic, carvable design idea rather than a photo of a finished carve. AI concepts are always labeled and sit out the leaderboard and the contest.

No ratings yet · Sign in to rate
Comments (0)

  • No comments yet — be the first.

Save without an account. Sign in to like or comment.

Our tips for carving a similar design

The core trick here is that the whole corgi is etched into the pumpkin skin at different depths, so it reads as a finished portrait in plain daylight without any light behind it. You lock in the darkest anchors first, the eyes and nose, then build the fur outward with shallow scraping strokes that follow the direction the coat grows. Nothing is cut all the way through, which keeps the design forgiving and structurally solid.

Written by PumpkinCarvingIdeas.com, inspired by the image above. These are our suggestions, not instructions from the uploader. This approach to the AI concept has not been tested on a real pumpkin.

From pumpkin to porch

  1. Pick your pumpkin and transfer the pattern

    Choose a tall, smooth pumpkin with a broad flat front and few deep ribs so the face has room to sit without distortion. Tape a high-contrast corgi photo or stencil to the front and trace the main outlines with a poker tool or a pin wheel. Mark the eyes, nose, tongue, and the outer edge of the ears and ruff. Keep the reference nearby so you can check tone and fur direction as you work.

  2. Set the dark anchors first

    Leave the eyes, the nose, and the shadow line inside the open mouth as untouched skin so they stay the darkest points of the portrait. These anchors give the face its life, so get their placement and size right before you remove any material elsewhere. Lightly outline them so you do not accidentally scrape into them later. Everything else will be lightened relative to these dark spots.

  3. Rough in the mid tones with a shallow peel

    Using a ribbon or loop tool, scrape away just the top orange skin across the general fur areas to create a soft mid glow. Work in short strokes that follow the fur direction, sweeping outward from the face and down the chest. Keep the depth even and shallow at this stage, since you can always go deeper for the brightest spots. Stand back often to compare your tones against the reference photo.

  4. Carve the brightest fur and highlights

    Go deeper on the lightest areas, the white blaze on the face, the muzzle, the chest ruff, and the sunlit tips of fur. Removing more flesh exposes paler pulp that reads brightest, so reserve these deep passes for true highlights. Use the tip of the tool to flick individual fur strokes at the edges of the ears and cheeks for a soft, layered coat. Let the strokes fan out naturally rather than making hard lines.

  5. Refine the smile and eyes

    Shape the open mouth by keeping the deep mouth shadow dark and etching the tongue slightly lighter with a subtle center groove. Add a small bright highlight scraped into each eye to give the corgi its friendly, alert look. Soften any harsh transitions by feathering the edges between light and dark zones. Take your time here, since the face is where the whole portrait comes together.

  6. Clean up and stage for daylight

    Brush away loose pulp with a dry paint brush and wipe the surface so the shading reads clearly. This design is made for daytime display, so set it on a bench or step where natural light rakes across the etched fur. If you want a faint evening glow you can hollow the back and add a battery LED, but no flame is needed. Coat the cut areas with a little petroleum jelly to slow drying and photograph it the same day for the freshest contrast.

Gather your supplies

Check things off as you get ready.

Work on a stable surface, keep your free hand out of the cutting path, and have an adult handle sharp tools.

Three levels of light

  • Leave intact

    The eyes, nose, and the deep shadow inside the open mouth stay as untouched skin for the darkest accents.

  • Peel & shade

    The general reddish fur across the face, ears, and body gets a shallow peel for a warm mid tone.

  • Cut through

    The white blaze, muzzle, chest ruff, and fur highlights are scraped deepest for the brightest pale tone, but nothing is cut fully through.

Learn the carving basics

Before you start cutting

Do I need to cut all the way through the pumpkin for this?

No, this is a surface etching design, so you only scrape at different depths and never cut a hole. Keeping the skin intact is what lets the portrait read clearly in daylight. It also makes the pumpkin sturdier and more forgiving for beginners to intermediate carvers.

How do I keep the fur from looking flat?

Work in short strokes that follow the direction the coat grows and vary your depth so some fur is mid tone and some is bright. Step back every few minutes to compare against your reference photo. The layered light and dark strokes are what create the soft, dimensional coat.

Will an etched pumpkin last long enough to display?

Etched pumpkins dry out faster than cut ones because you expose a lot of flesh, so plan to display it within a day or two of carving. Rubbing the scraped areas with petroleum jelly slows moisture loss. Keep it in a cool, shaded spot when it is not on show.

Your take belongs here, too.

Changed a detail? Made it simpler? Share a photo of your version and tell the community what worked.

Share your pumpkin

More pumpkins like this

You've reached the end · 8 pumpkins
The Patch Report

Fresh pumpkins, in your inbox.

The best new carvings, ideas worth stealing, and how-tos for carving season. Short, seasonal, and gone by November.

A short email during carving season. Unsubscribe anytime. See our privacy policy.