Halloween Pumpkin Carving Contest · Starts October 1st · $500 in prizes
← Back to ideas
@ai_concepts
Aug 26, 2026
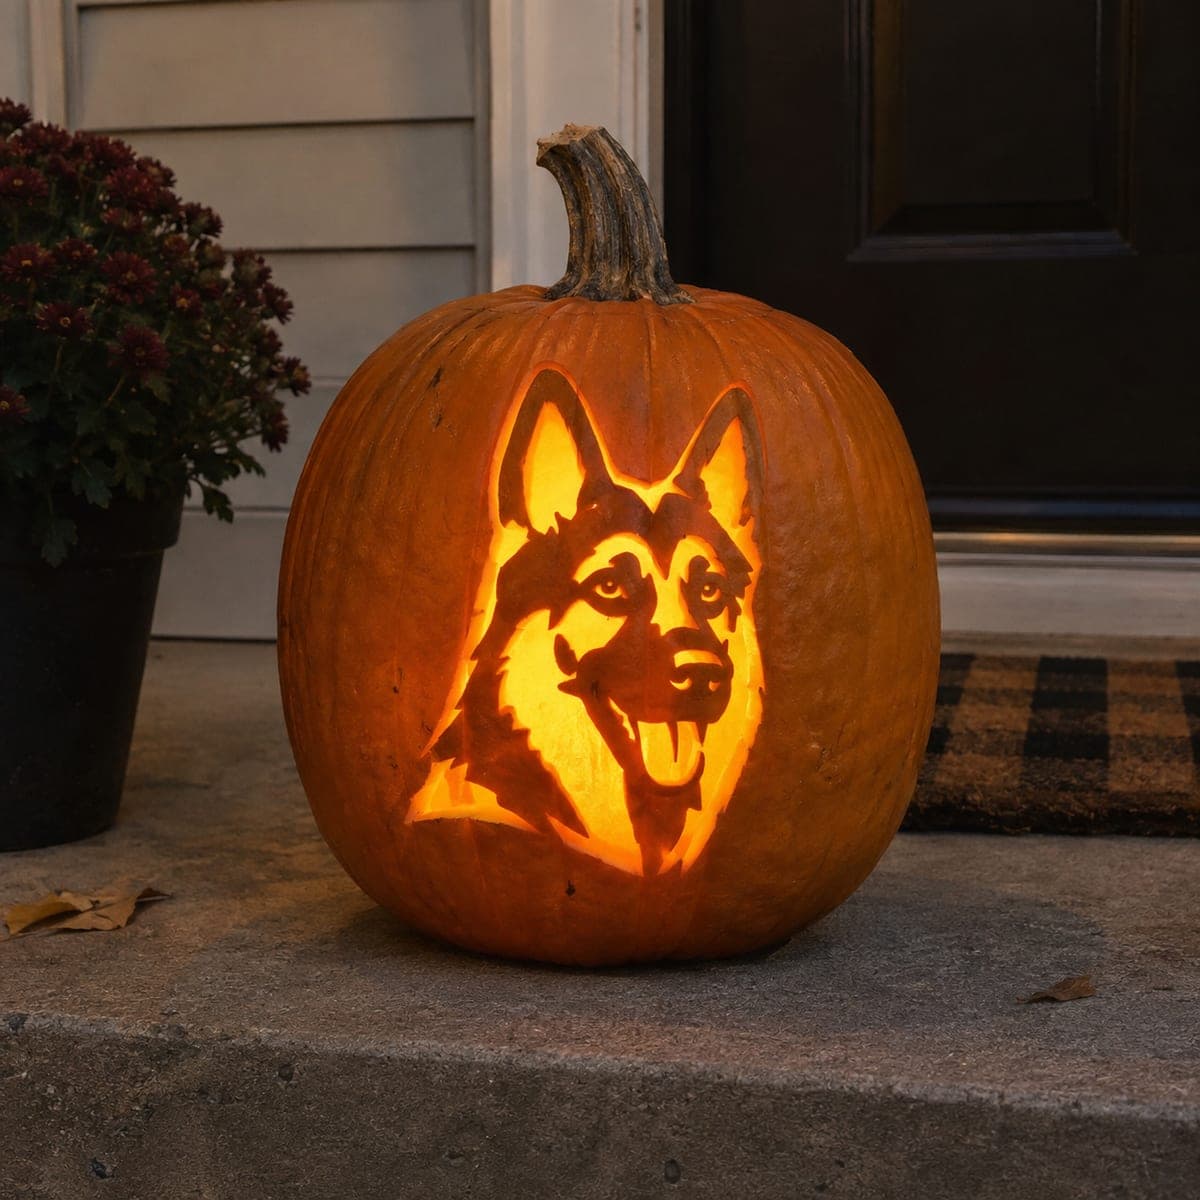
Boxer Dog Portrait Etched PumpkinAI
0

Boxer Dog Portrait Etched Pumpkin

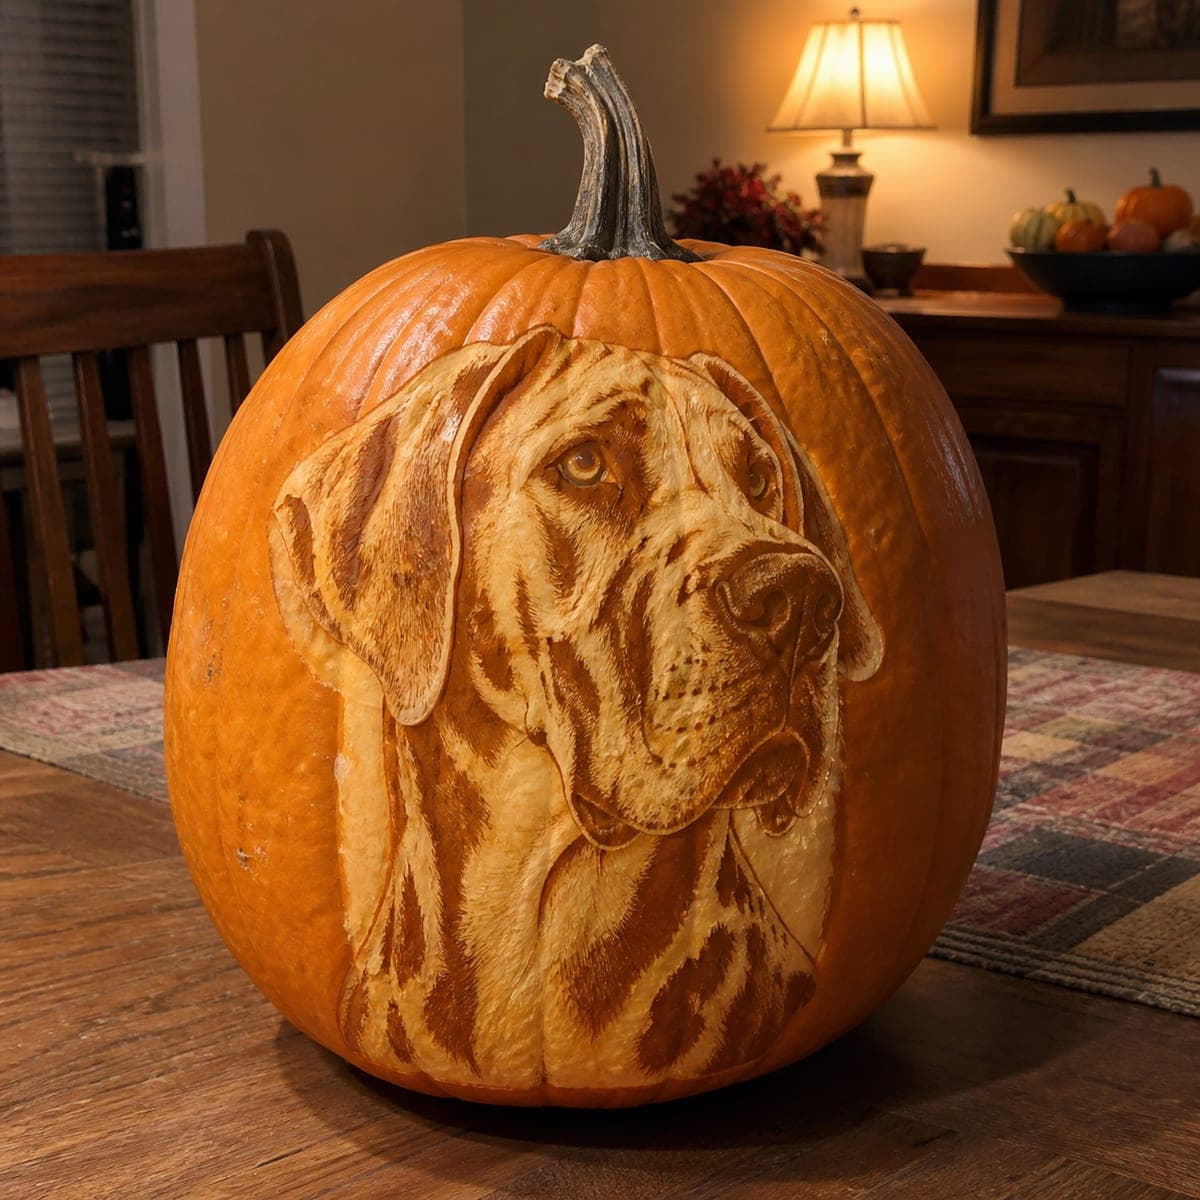
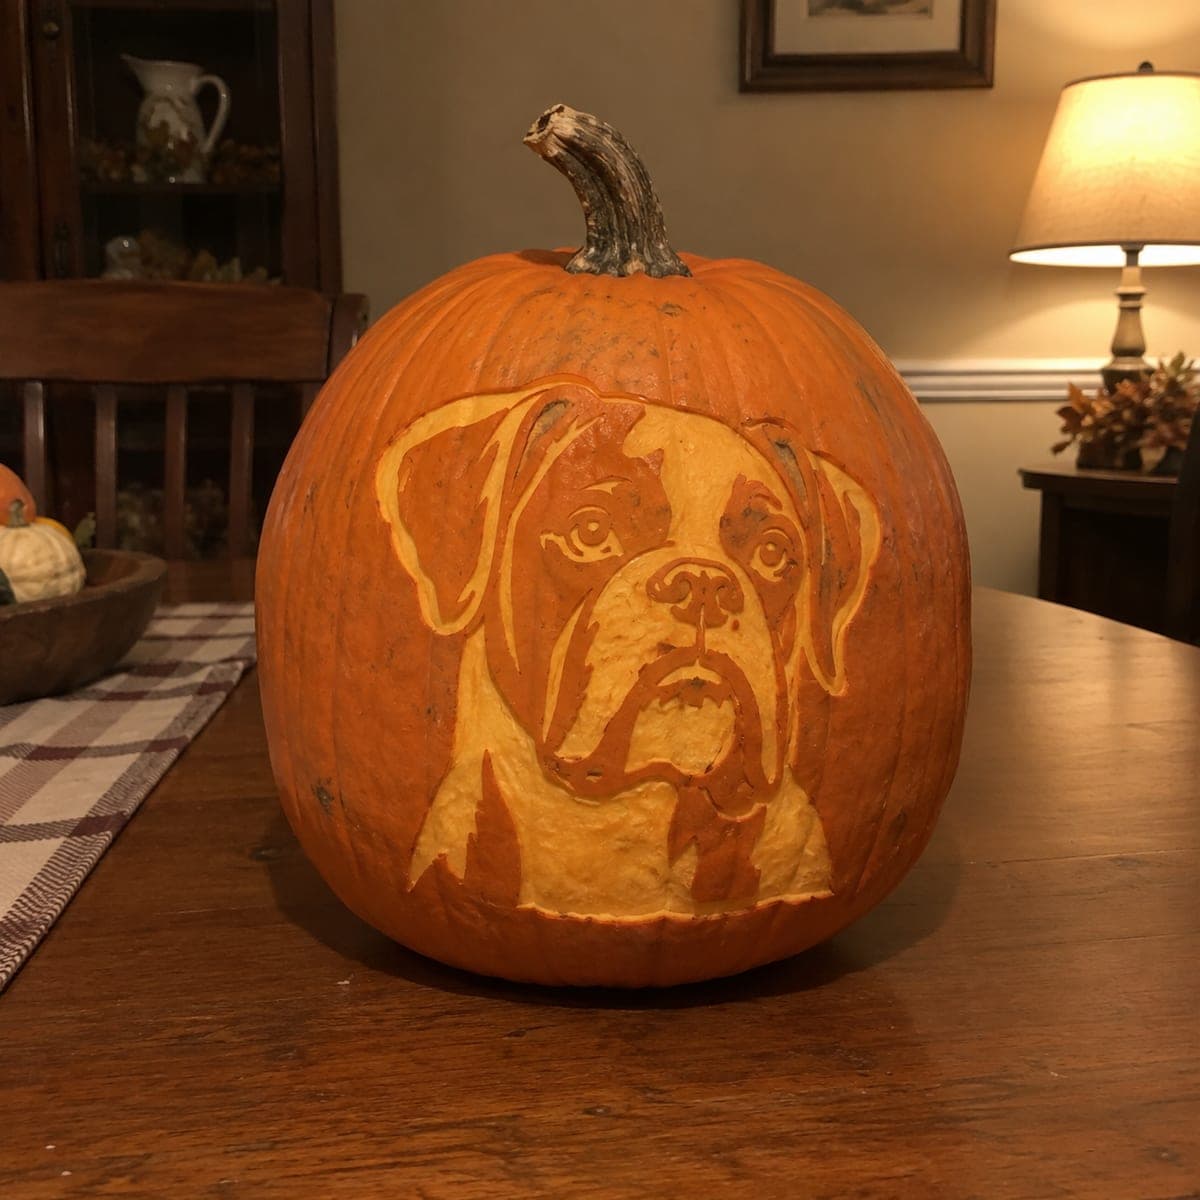
A soulful boxer with floppy ears, a wrinkled brow, and a broad jowly muzzle is etched into this pumpkin in two carved tones. The portrait works unlit because the exposed flesh contrasts sharply with the untouched skin, making it a great pet tribute for an entry table. Work from a high-contrast photo of your own dog, and carve the eyes first; if the eyes land right, everything else follows.

This is an AI-generated concept image: a realistic, carvable design idea rather than a photo of a finished carve. AI concepts are always labeled and sit out the leaderboard and the contest.

No ratings yet · Sign in to rate
Comments (0)

  • No comments yet — be the first.

Save without an account. Sign in to like or comment.

Our tips for carving a similar design

This is a portrait built almost entirely from surface shading, so the whole trick is contrast between untouched dark skin and peeled-away flesh rather than big holes. You map the boxer's face in two tones, dark skin for the shadows in the ears, muzzle folds, and brow, and peeled flesh for the glowing highlights on the forehead and chest. Start with the eyes and the wrinkled brow, because those two features carry the dog's expression and everything else lines up around them.

Written by PumpkinCarvingIdeas.com, inspired by the image above. These are our suggestions, not instructions from the uploader. This approach to the AI concept has not been tested on a real pumpkin.

From pumpkin to porch

  1. Pick your photo and transfer the map

    Choose a straight-on, high-contrast photo of your own boxer where the eyes are sharp and the light and shadow areas are clear. Simplify it in your head into just two values: what stays dark and what glows. Tape your printed pattern to a clean, dry front face of the pumpkin and poke the main outlines with a pin or transfer tool. Focus your dots on the eyes, the muzzle folds, the ear edges, and the chest line so you have a reliable roadmap.

  2. Carve the eyes first

    Connect your dots around each eye with a fine detail blade, then peel a thin layer of skin off the highlight areas to make them catch light. Leave the pupil and the shadow above the eye as untouched dark skin so the gaze reads. Keep the two eyes level and the same size, since a boxer's soulful stare is the whole point. Step back often and check that the expression feels right before moving on.

  3. Shade the brow and muzzle folds

    Work outward from the eyes into the wrinkled brow, peeling skin on the raised folds and leaving the creases dark. For the broad jowly muzzle, peel the lighter cheeks and lips while keeping the deep folds and the nose as untouched skin. Use light, shallow strokes with a shaving loop tool so you remove only the orange skin and expose the pale flesh underneath. This tonal contrast is what makes the portrait visible even unlit.

  4. Define the ears and outline

    The floppy ears frame the face, so peel their lighter surfaces and leave the shadowed inner edges dark to give them depth. Score a clean outline around the whole head and chest so the portrait sits cleanly against the surrounding dark skin. Avoid cutting all the way through anywhere on the face; keep everything as peeled shading so no thin section is left unsupported. Leave the pumpkin ribs and background skin completely untouched.

  5. Peel the chest highlights

    Bring the light down into the chest and lower body with broad peeled areas, letting a few dark patches stay to suggest the boxer's markings. This large glowing zone anchors the face and balances the composition. Keep your peel depth even so the whole lit area glows at one steady brightness. Smooth any rough spots with the flat of your tool for a soft, fur-like finish.

  6. Light it and photograph

    Drop a battery LED or two inside through a hole cut in the bottom, never a candle, so the flame stays away from all that thin peeled flesh. Set the pumpkin on an entry table and dim the room to see the two-tone portrait come alive. Rub a little petroleum jelly on the cut edges to slow drying and keep the highlights bright for a few days. Snap your photo the first night, when the contrast is at its best.

Gather your supplies

Check things off as you get ready.

Work on a stable surface, keep your free hand out of the cutting path, and have an adult handle sharp tools.

Three levels of light

  • Leave intact

    Background skin, the nose, the deep muzzle folds, the pupils, and shadowed inner ear edges stay untouched and dark.

  • Peel & shade

    The forehead, brow highlights, cheeks, ear surfaces, and broad chest are skin-peeled for a soft mid glow.

  • Cut through

    No full cutouts are needed; keep this portrait as shading so the whole face stays supported.

Learn the carving basics

Before you start cutting

Do I need to cut all the way through anywhere?

No, this design works entirely as peeled shading, which is safer and keeps the face structurally solid. Full cutouts would blow out the subtle tones that make the portrait read. If you want a touch more brightness, peel a little deeper in the chest rather than punching a hole.

How do I keep it from looking like a generic dog?

Work from your own boxer's photo and treat the eyes and brow wrinkles as the priority. Those features carry the individual expression, so get their spacing and shadow right first. The muzzle and ears fall into place once the eyes are convincing.

Since this is a concept image, how do I adapt it to a real pumpkin?

Pick a pumpkin with a smooth, fairly flat front face so the shading stays even. Simplify your reference into just two tones before you start, because trying to copy every hair will muddy the result. Keep all details as peeled areas with no unsupported thin bridges.

Your take belongs here, too.

Changed a detail? Made it simpler? Share a photo of your version and tell the community what worked.

Share your pumpkin

More pumpkins like this

You've reached the end · 8 pumpkins
The Patch Report

Fresh pumpkins, in your inbox.

The best new carvings, ideas worth stealing, and how-tos for carving season. Short, seasonal, and gone by November.

A short email during carving season. Unsubscribe anytime. See our privacy policy.