Halloween Pumpkin Carving Contest · Starts October 1st · $500 in prizes
← Back to ideas
@ai_concepts
Sep 25, 2026
Black-and-Cream Soccer Ball Painted PumpkinAI
0

Report this carving

Tell us what is wrong. Reports are private.

Black-and-Cream Soccer Ball Painted Pumpkin

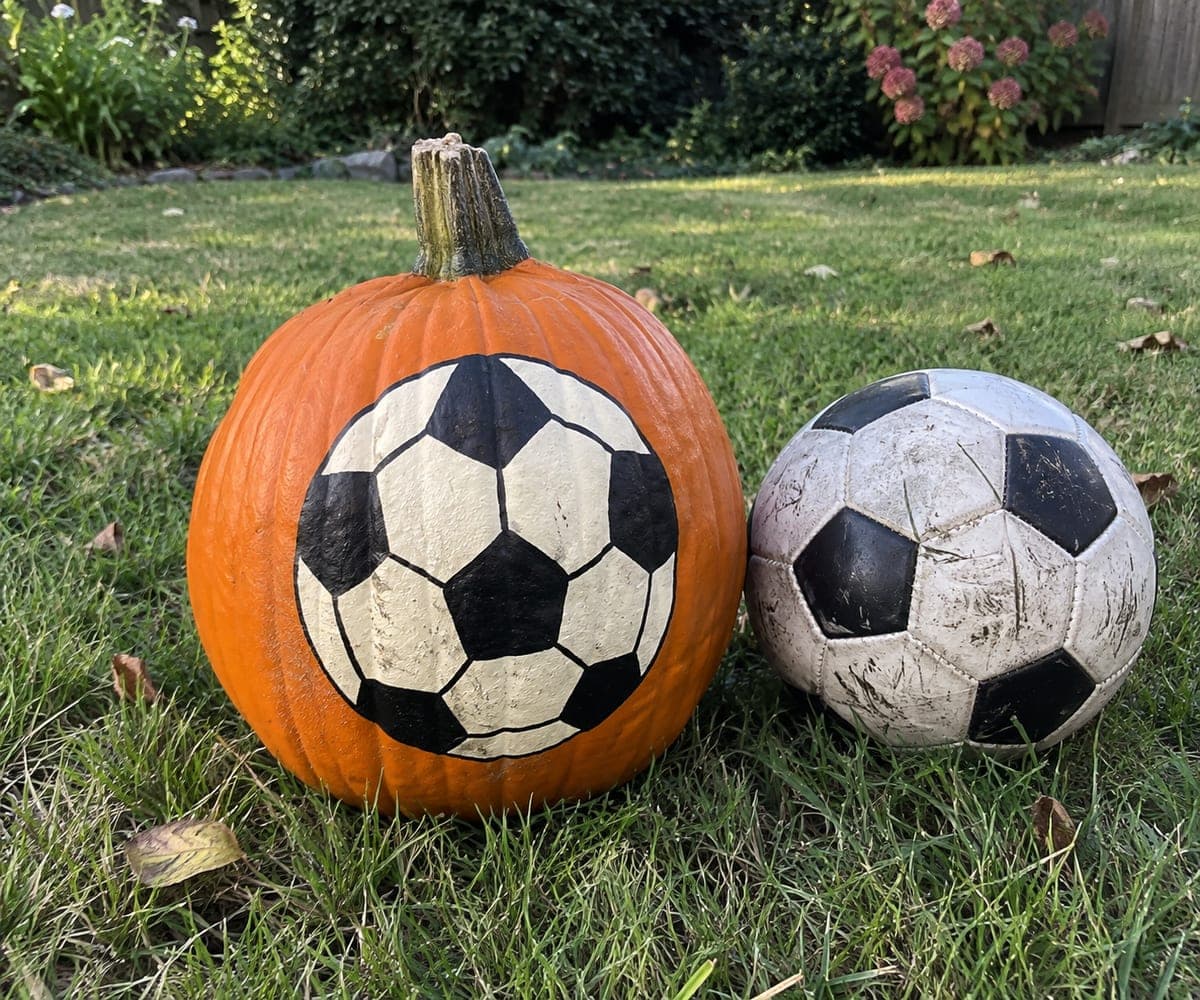
A cream circle with black pentagon patches turns an intact orange pumpkin into a convincing soccer ball in this no-carve pumpkin idea. Paint the cream base circle first and allow it to cure overnight before adding the black pentagons, as wet paint layers can blend at the edges. Use a small flat brush and tape straight edges where needed to keep the patches tidy. A coat of gloss varnish gives the finished ball a slightly inflated sheen.

No ratings yet · Sign in to rate

Comments (0)

  • No comments yet — be the first.

Save without an account. Sign in to like or comment.

Our tips for carving a similar design

A cream base circle painted first creates the ball body against the orange rind, and black pentagon patches are added on top once the cream has fully cured. The overnight cure step between layers is what prevents color bleeding at the edges. A final coat of gloss varnish gives the ball its inflated, shiny look.

From pumpkin to porch

  1. Clean and dry the pumpkin

    Wipe the pumpkin surface clean with a damp cloth and let it dry completely. If the rind feels slightly waxy, wipe it lightly with isopropyl alcohol on a cloth to improve paint adhesion. Allow full air-drying before applying any paint.

  2. Sketch the ball circle

    Use a pencil or chalk marker to draw the large circular ball boundary centered on the pumpkin face. A round plate or bowl of the right diameter makes a useful template. Sketch the pentagon patch positions lightly inside the circle using a standard soccer ball reference.

  3. Paint the cream base circle

    Block in the entire cream circle with a wide flat brush and cream or off-white acrylic. Two coats will be needed for full opacity over the orange. Allow the first coat to dry before adding the second, and let the completed cream circle cure overnight before proceeding.

  4. Paint the black pentagon patches

    Use a medium flat brush to paint the black pentagon patches in their sketched positions. Work from the center outward so your hand does not rest on a freshly painted patch. The black over cream gives a clean, high-contrast edge without needing tape.

  5. Add a fine edge outline if needed

    If the cream-to-orange boundary at the edge of the circle looks soft, use a small round brush and the cream color to sharpen the outer edge. A thin white highlight dot near the top of the ball suggests a gloss finish.

  6. Seal and display

    Apply two coats of gloss acrylic spray varnish, allowing each coat to dry for twenty minutes. Gloss varnish gives the finished ball a slightly inflated, sporty sheen that suits the subject. Display outdoors on a covered step or indoors on a ledge.

Written with AI to match this design

Gather your supplies

Check things off as you get ready.

Work on a stable surface, keep your free hand out of the cutting path, and have an adult handle sharp tools.

Three levels of light

  • Leave intact

    The unpainted orange rind outside the cream circle stays visible as background.

  • Peel & shade

    None; the shell is fully intact.

  • Cut through

    None; use an outside spotlight or porch light to see the painted design after dark.

Learn the carving basics

Before you start cutting

Why is the overnight cure step necessary before painting the black patches?

Acrylic paint feels dry to the touch within thirty minutes but is not fully cured for several hours. Painting a dark layer over an under-cured light layer can cause the two to blend at edges, giving a muddy grey border instead of a clean black-on-cream contrast. Overnight cure time eliminates this problem entirely.

How do I paint accurate pentagon shapes without a template?

Print a small soccer ball reference image and use it to sketch the patches onto the cream circle in chalk before painting. Each pentagon has five roughly equal sides, so count your sides as you sketch to keep the shape accurate. Slight irregularities are not noticeable on the finished pumpkin.

Can I use gloss varnish on the whole pumpkin, or just the painted area?

Applying gloss varnish to the whole pumpkin gives it a uniform surface finish that looks intentional and adds a slight layer of moisture protection to the uncoated rind as well. If you prefer the contrast of a matte orange rind against a glossy painted ball, apply the varnish only over the cream-and-black painted circle.

Your take belongs here, too.

Changed a detail? Made it simpler? Share a photo of your version and tell the community what worked.

Share your pumpkin

More pumpkins like this

You've reached the end · 8 pumpkins
The Patch Report

Fresh pumpkins, in your inbox.

The best new carvings, ideas worth stealing, and how-tos for carving season. Short, seasonal, and gone by November.

A short email during carving season. Unsubscribe anytime. See our privacy policy.