Halloween Pumpkin Carving Contest Β· Starts October 1st Β· $500 in prizes
← Back to ideas
@ai_concepts
Aug 25, 2026
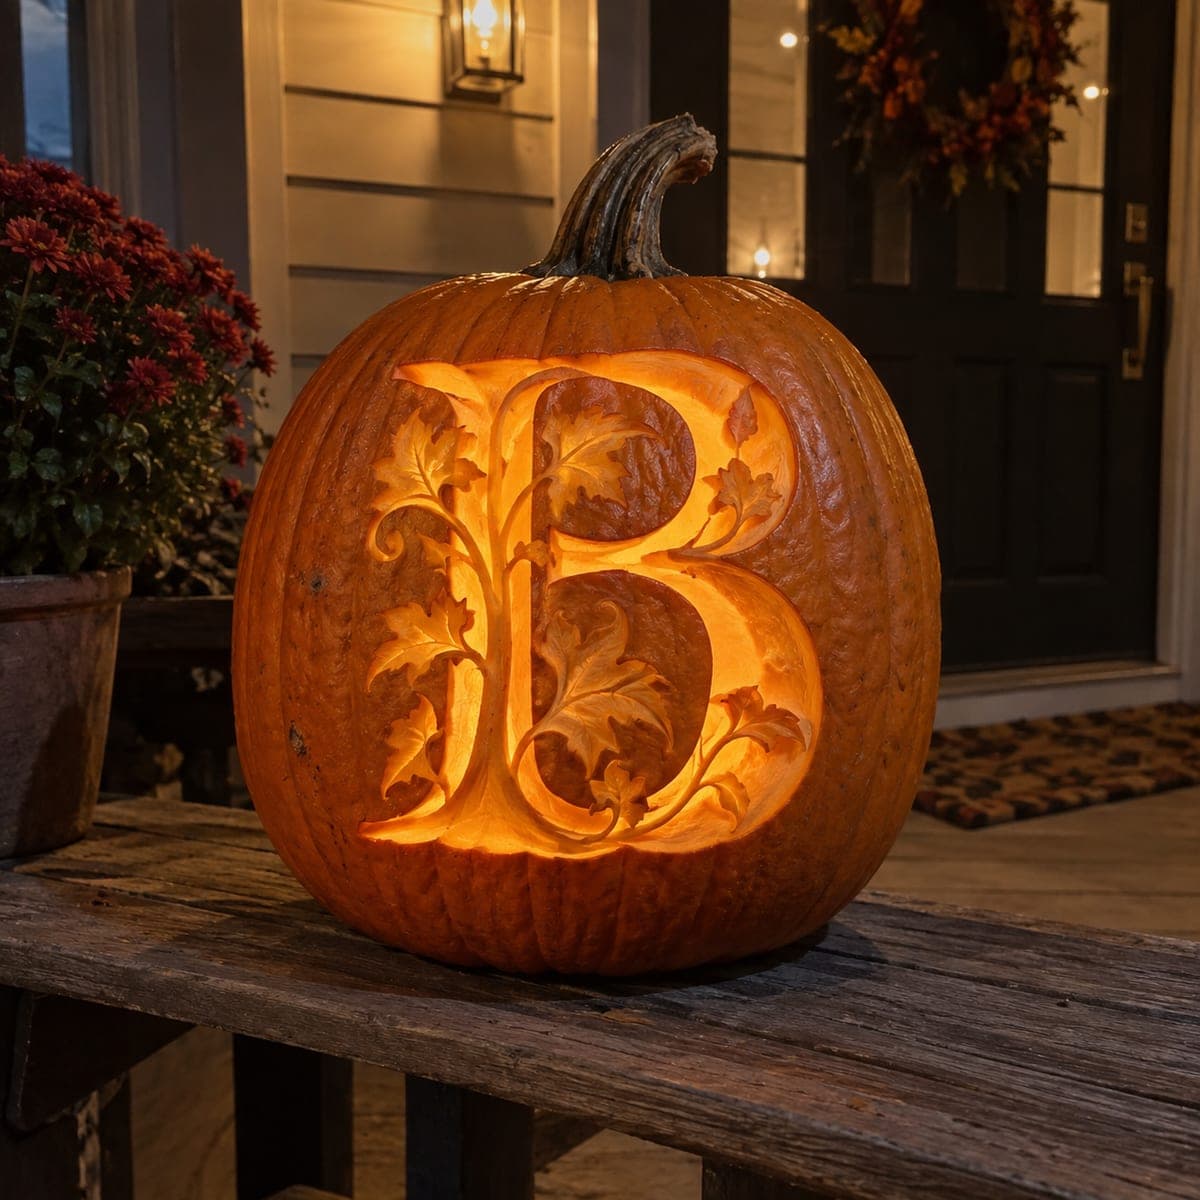
Carved Monogram Letter B Porch PumpkinAI
0

Carved Monogram Letter B Porch Pumpkin

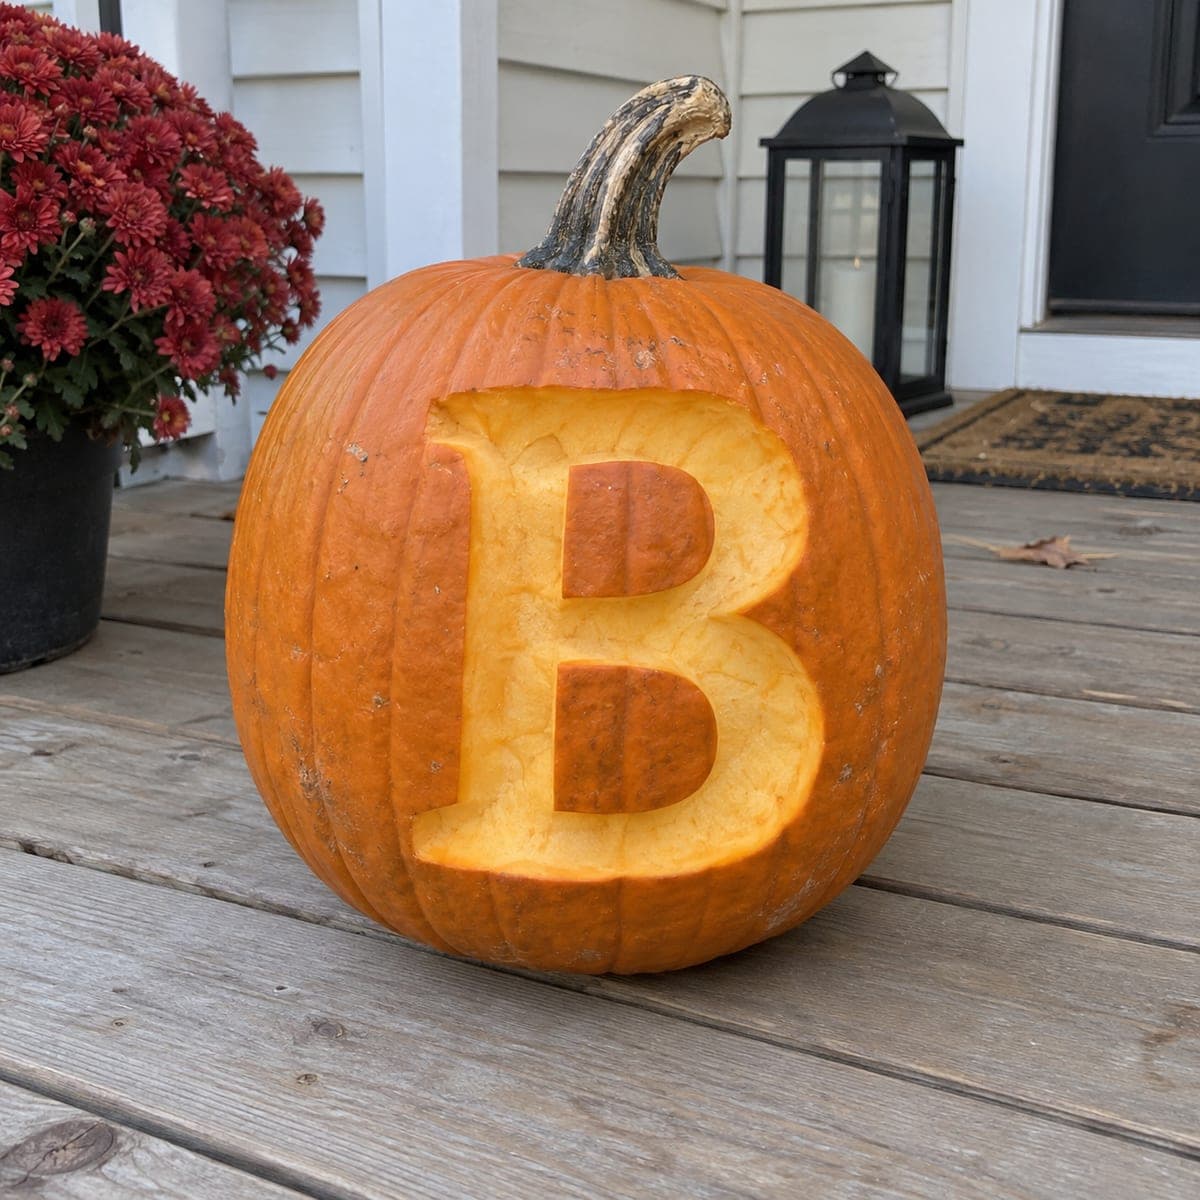
A bold serif letter B stands out in raised relief against a peeled panel, turning a plain pumpkin into personalized front porch decor. Carve the rectangle of skin away first, working around the letter so it stays proud of the surface, then smooth the background with a spoon or clay ribbon tool. Swap in any initial for a family monogram, and group several pumpkins to spell a name along the steps.

This is an AI-generated concept image: a realistic, carvable design idea rather than a photo of a finished carve. AI concepts are always labeled and sit out the leaderboard and the contest.

No ratings yet Β· Sign in to rate

Comments (0)

  • No comments yet β€” be the first.

Save without an account. Sign in to like or comment.

Our tips for carving a similar design

The trick here is relief carving: instead of cutting all the way through, you peel a rectangular panel of skin around a serif letter B so the letter stays raised and dark against a glowing background. Because this is an AI concept image, no real pumpkin exists, but the plan works on any sturdy, flat-faced pumpkin. Keep the whole design shallow and the letter fully attached to the wall for a piece that lasts on the front steps.

Written by PumpkinCarvingIdeas.com, inspired by the image above. These are our suggestions, not instructions from the uploader. This approach to the AI concept has not been tested on a real pumpkin.

From pumpkin to porch

  1. Pick a flat face and clean the pumpkin

    Choose a pumpkin with one broad, even side facing out so the panel reads clearly. Wipe the surface dry and cut a lid or a bottom-access hole rather than gutting through the front. Scrape the inside wall behind your design down to about one inch thick so light passes evenly through the peeled areas later. Set the guts aside and pat the cavity dry.

  2. Transfer a clean serif B

    Print a bold serif capital B sized to fill most of your panel, then draw a rectangle around it with even margins. Tape the pattern flat and poke closely spaced dots along both the letter outline and the rectangle edge. Remove the paper and connect the dots with a washable marker so you can see the letter island sitting inside the panel. Double check the two counters, the enclosed spaces inside the B, are marked so you leave those as skin too or peel them intentionally.

  3. Score the outlines

    With a small detail saw or a sharp craft knife, score along the marker lines about a quarter inch deep, tracing the letter and the rectangle but not cutting through the shell. Go slowly around the serifs and the curves of the B, where the skin is easy to overshoot. These score lines act as clean stops so the peeling in the next step does not tear into your letter. Adults should handle every cutting tool here.

  4. Peel the background panel

    Starting at a corner of the rectangle, use a lino cutter, ribbon tool, or the edge of a sturdy spoon to shave the skin off the background only, working right up to your score lines. Peel down to the pale flesh so the panel glows a soft orange, leaving the letter and its serifs standing proud with skin intact. Keep the depth shallow and even, about an eighth to a quarter inch, so no part goes all the way through. Smooth the peeled background with the back of the spoon for a clean, uniform surface.

  5. Refine the letter and counters

    Tidy the edges of the B so the raised skin has crisp, vertical walls, touching up any ragged spots with the knife tip. Decide on the two counters inside the B: leave them as skin to match the letter, or peel them level with the background for contrast. Brush away shavings and check the letter reads clearly from a few feet back. Rub a little petroleum jelly on all cut edges to slow drying.

  6. Light it and stage the porch

    Drop a battery LED puck or a short string of LEDs inside, never a candle, since the peeled panel is thin and can scorch. The letter face stays dark while the shaved background lifts into a warm glow around it. Set the pumpkin on the steps with a mum and a lantern for classic fall styling. To spell a name, carve a matching pumpkin for each letter and line them along the treads.

Gather your supplies

Check things off as you get ready.

Work on a stable surface, keep your free hand out of the cutting path, and have an adult handle sharp tools.

Three levels of light

  • Leave intact

    The raised serif B and its serifs, left with skin on so the letter reads dark against the glow

  • Peel & shade

    The rectangular background panel around the letter, shaved to pale flesh for a soft mid-level orange glow

  • Cut through

    This relief design uses no full cutouts, but if you want a brighter accent you can carve a couple of tiny vent holes in the panel corners, kept small so the wall stays strong

Learn the carving basics

Before you start cutting

How deep should I peel the background without going through?

Aim for about an eighth to a quarter inch, just enough to remove the tough skin and reach the pale flesh. Scoring your outlines first gives you a clean stop so you do not drift too deep. If you start to see light through a spot, you have gone too far, so ease off and smooth the area with a spoon.

Should the two enclosed spaces inside the B be peeled or left as skin?

Either works and it is a style choice. Leaving them as skin keeps the whole letter reading as one solid dark shape, which looks bold from the sidewalk. Peeling them level with the background makes the B feel lighter and more open, so try marking them and stepping back before you commit.

Will a relief carving like this last on the porch?

Relief pumpkins actually hold up well because you never cut through the wall, so the shell stays strong. The peeled panel will dry and darken over a few days, which some people like for an aged look. Rub petroleum jelly on the exposed flesh and keep it out of direct sun to stretch its life.

Your take belongs here, too.

Changed a detail? Made it simpler? Share a photo of your version and tell the community what worked.

Share your pumpkin

More pumpkins like this

You've reached the end Β· 8 pumpkins
The Patch Report

Fresh pumpkins, in your inbox.

The best new carvings, ideas worth stealing, and how-tos for carving season. Short, seasonal, and gone by November.

A short email during carving season. Unsubscribe anytime. See our privacy policy.