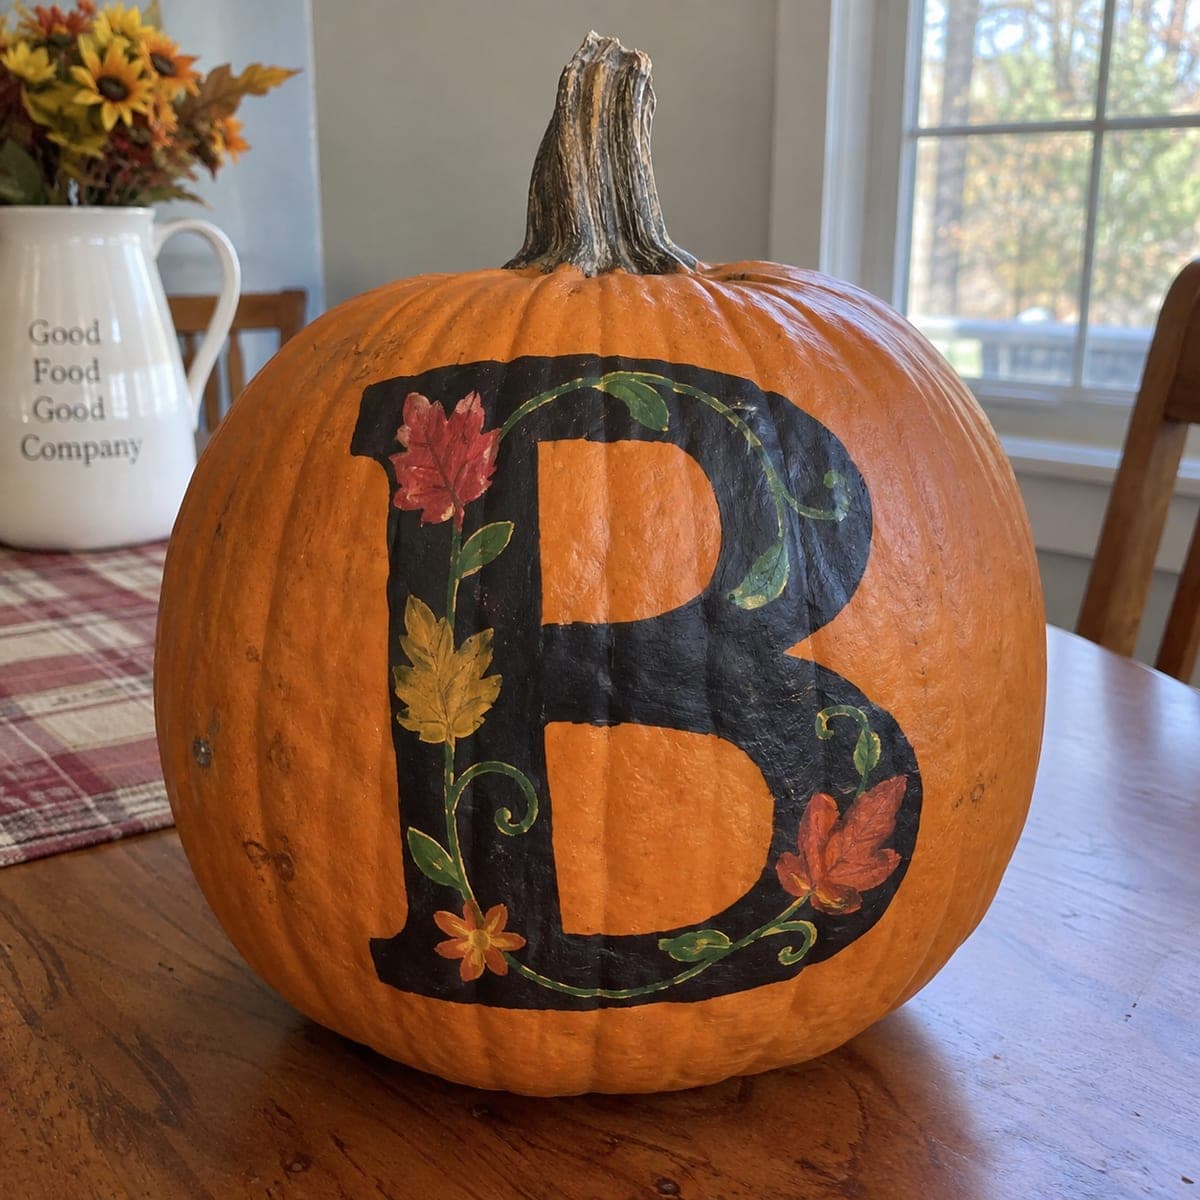
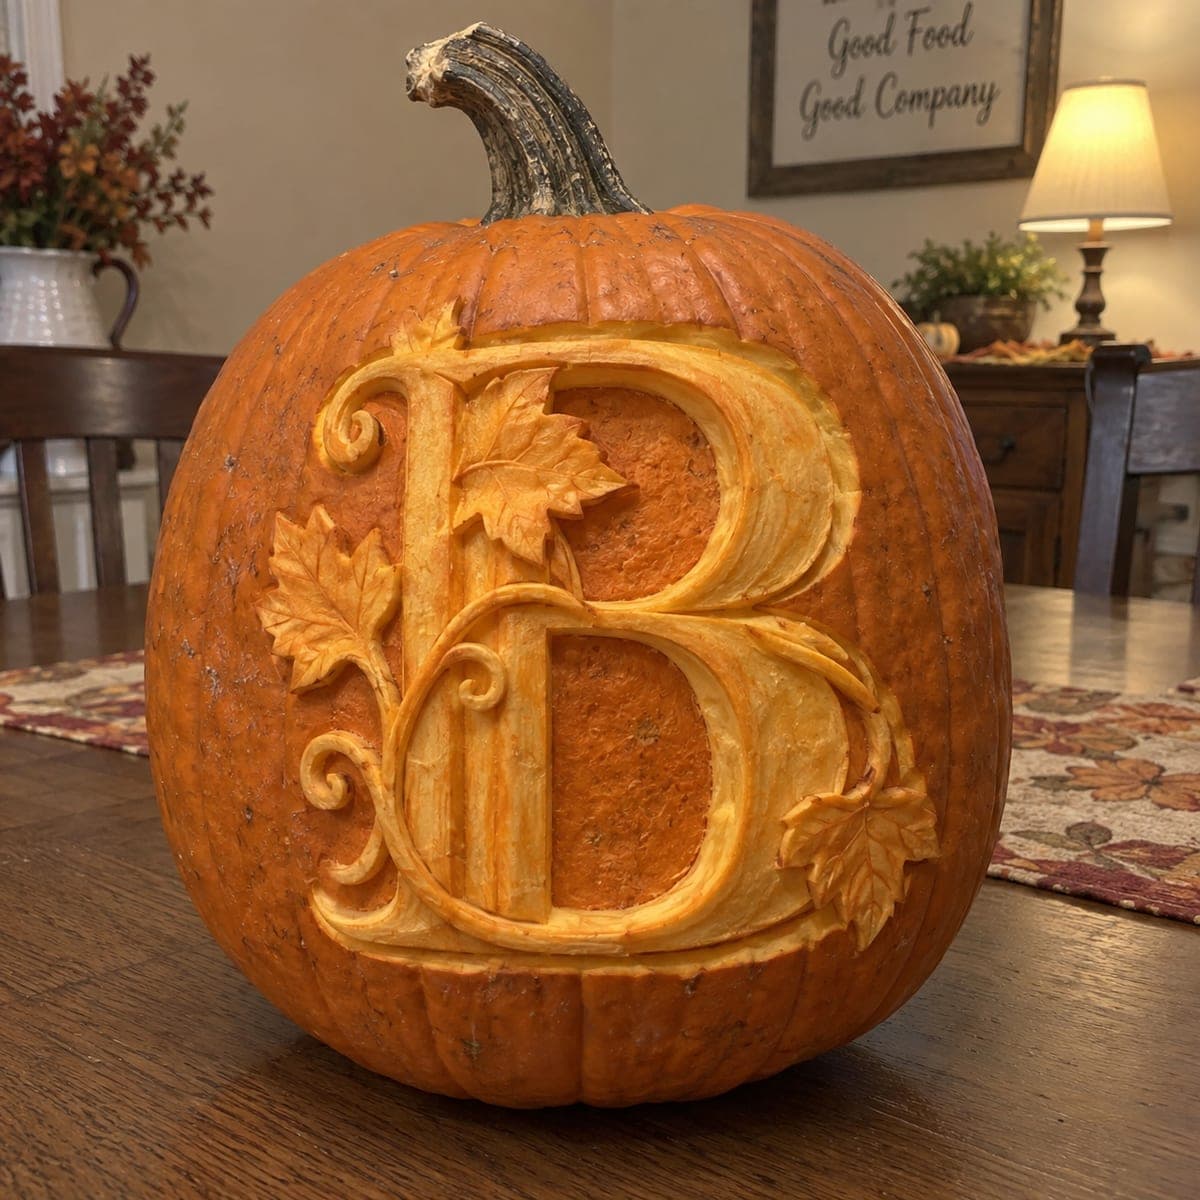
A tall black serif letter B wrapped in trailing vines, autumn leaves, and tiny flowers turns this pumpkin into elegant front-door decor. The monogram is painted first as a solid silhouette, then the botanical details are layered over it in red, gold, and green. Print your letter at full size and transfer it with graphite paper so the serifs stay true, and swap in any initial to personalize a porch or wedding display.
This is an AI-generated concept image: a realistic, carvable design idea rather than a photo of a finished carve. AI concepts are always labeled and sit out the leaderboard and the contest.
The core trick here is painting a bold serif letter as one flat black silhouette first, then layering the vines, leaves, and little flowers on top so the botanicals read crisply against the dark shape. Because nothing gets cut, the whole design lives on the surface, which means your transfer and your steady outlining do all the work. Pick any initial, keep the serifs clean, and let the fall colors trail around the letter.
Written by PumpkinCarvingIdeas.com, inspired by the image above. These are our suggestions, not instructions from the uploader. This approach to the AI concept has not been tested on a real pumpkin.
From pumpkin to porch
1
Prep and plan the surface
Wipe the pumpkin clean and dry so paint grips well. Choose the flattest, most upright face for the letter and set the pumpkin on a towel ring so it will not roll. Since this is a painted concept and no real pumpkin exists in the photo, plan your own letter size to fit the panel between the shoulder and the base. A tall serif shape looks best when it fills most of the front.
2
Transfer the letter at full size
Print your chosen initial as a solid serif shape at the size you want. Slide graphite or carbon transfer paper under the printout, tape it in place, and trace the outline so the serifs stay true. Go back over any faint lines by hand with a pencil. This outline is your painting boundary, so take your time keeping the curves smooth.
3
Paint the solid silhouette
Fill the letter with flat black acrylic using a medium round brush for the edges and a flat brush for the middle. Two thin coats give better coverage than one thick one, and thin coats dry faster without pooling in the pumpkin's ribs. Let each coat dry fully before the next. Keep your serif tips sharp by pulling the brush from inside the letter out to the point.
4
Sketch and layer the botanicals
Lightly pencil the vine path curling up one side of the letter and around the base. Paint the trailing vines in green first, then add maple and oak leaves in red and gold where they overlap the black. Work from back layers to front so leaves sit believably over the stems. Keep the flowers small and simple, just a few petals around a center dot.
5
Add highlights and fine outlines
Once the leaf shapes are dry, add lighter veins and edge highlights with a thin liner brush to make them pop against the black. Touch tiny curl tips onto the vines for that hand-lettered feel. Step back often to check balance so one side does not get crowded. A little negative space keeps the design elegant rather than busy.
6
Seal, light, and photograph
Let everything cure for a few hours, then brush on a thin coat of matte clear acrylic sealer to protect the art outdoors. If you want a nighttime glow, tuck a battery LED puck beside the pumpkin or set it in a lit doorway rather than cutting into the painted face. Photograph it in soft daylight to show the color. Displayed on a porch or entry table, it doubles as fall decor well past Halloween.
Gather your supplies
Check things off as you get ready.
Work on a stable surface, keep your free hand out of the cutting path, and have an adult handle sharp tools.
Three levels of light
Leave intact
The orange skin around the letter stays bare for warm contrast with the black silhouette.
Peel & shade
For a subtle glow you could lightly scuff and thin-wash the vine background, though the classic look keeps the surface painted only.
Cut through
No cutouts are needed on this no-carve design, so any illumination comes from an LED set beside the pumpkin.
How do I keep the serif letter looking crisp instead of wobbly?
Transfer the printed outline with graphite paper rather than freehanding, and paint the edges with a small round brush before filling the center. Pull each stroke from inside the letter outward to the serif points. Two thin coats keep the edges from bleeding into the pumpkin's texture.
Can I swap in a different initial or use this for a wedding?
Yes, that is the whole point of a monogram design. Print any letter at full size in a serif font and transfer it the same way. For weddings, match the leaf colors to your palette or trade the fall leaves for eucalyptus and small blooms.
Will acrylic paint hold up on a real pumpkin outdoors?
Acrylic sticks well to a clean, dry pumpkin, and a matte sealer coat helps it shed dew and light rain. Keep the pumpkin in a shaded, covered spot to slow spoilage. A foam craft pumpkin will let the painted keepsake last for years.
Your take belongs here, too.
Changed a detail? Made it simpler? Share a photo of your version and tell the community what worked.
 AI
AI




Comments (0)