Halloween Pumpkin Carving Contest · Starts October 1st · $500 in prizes
← Back to ideas
@ai_concepts
Aug 18, 2026
Cute Painted Zebra Face No-Carve PumpkinAI
0

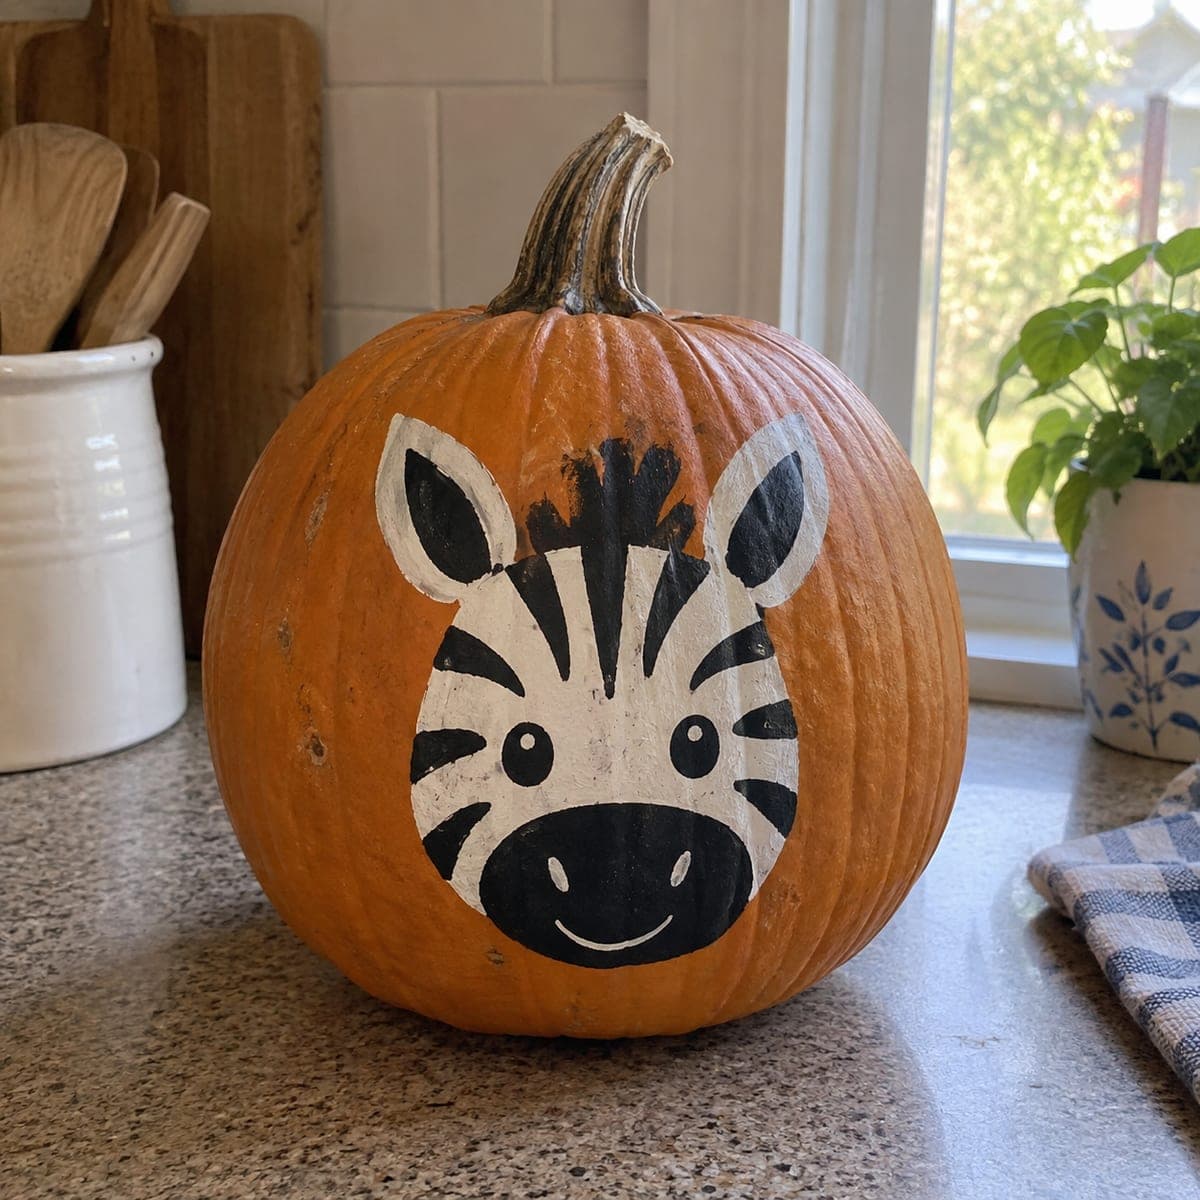
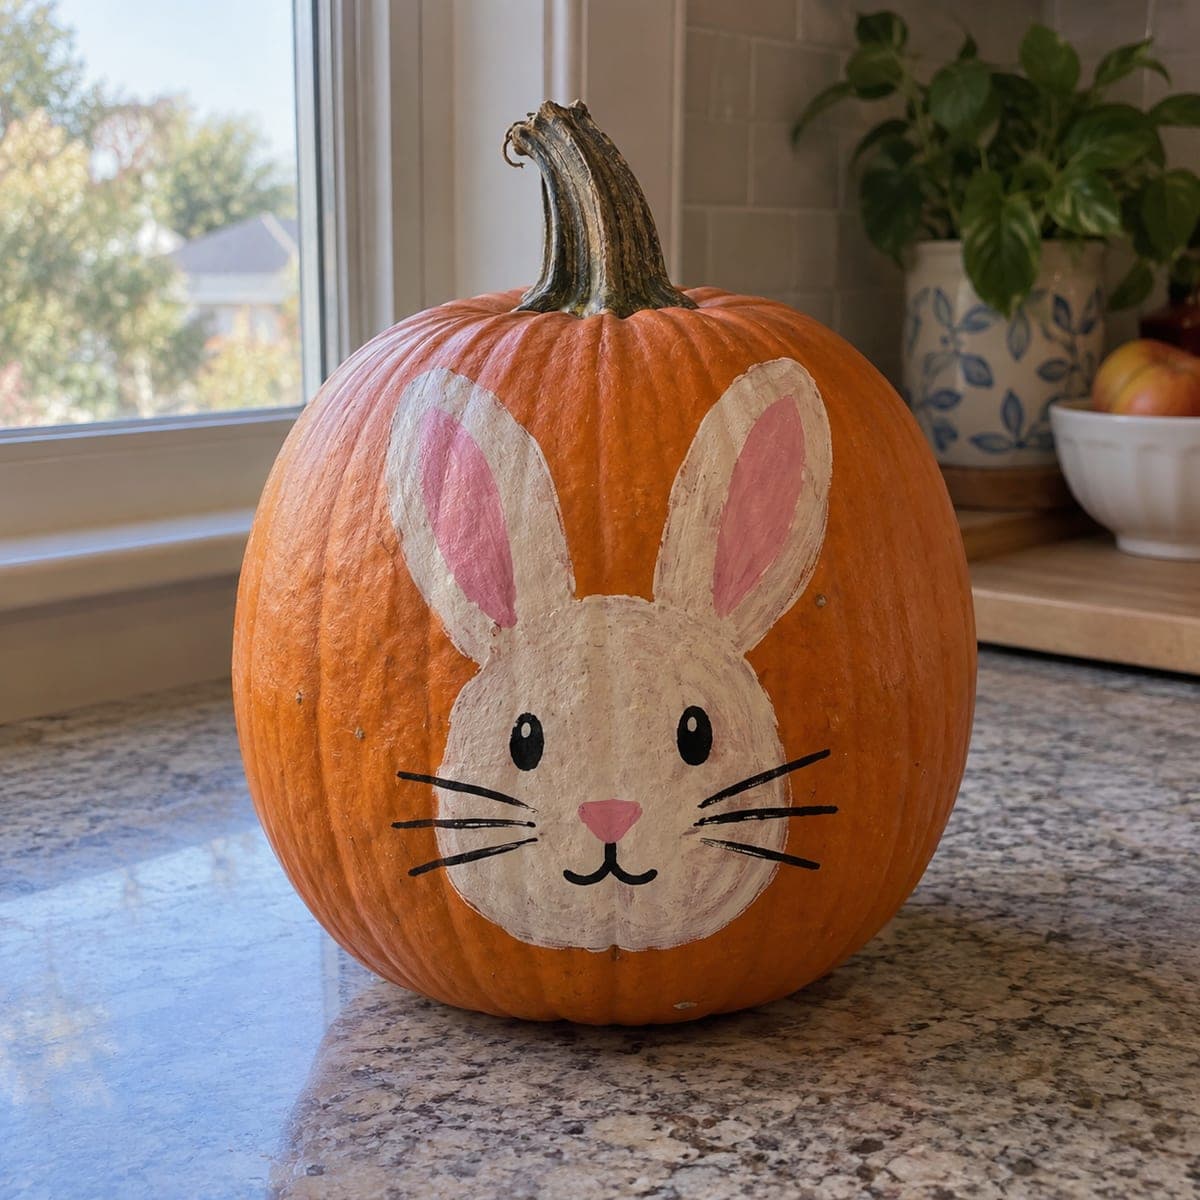
Cute Painted Zebra Face No-Carve Pumpkin

Bold black and white stripes and a round, cheerful face make this no-carve pumpkin an instant crowd-pleaser for kids. The design is painted directly on the pumpkin surface with acrylic craft paint, starting with a white oval for the face shape and adding black stripes, ears, and a wide nose once dry. No carving tools are needed at all, making it a safe and fun pumpkin decorating project for the whole family. Seal the finished face with a coat of clear matte spray to protect it through the season.

This is an AI-generated concept image: a realistic, carvable design idea rather than a photo of a finished carve. AI concepts are always labeled and sit out the leaderboard and the contest.

No ratings yet · Sign in to rate
Comments (0)

  • No comments yet — be the first.

Save without an account. Sign in to like or comment.

Our tips for carving a similar design

The whole trick here is layering flat craft paint, a big white oval face first, then bold black stripes, ears, and a wide muzzle once it is dry. Because nothing is cut, you can lean on clean shapes and high contrast to read from across the room. Plan your face placement on the smoothest front panel and let each color dry fully before adding the next.

Written by PumpkinCarvingIdeas.com, inspired by the image above. These are our suggestions, not instructions from the uploader. This approach to the AI concept has not been tested on a real pumpkin.

From pumpkin to porch

  1. Pick and prep the pumpkin

    Choose a rounded pumpkin with a smooth, flat front panel that faces out. Wipe the surface with a damp cloth and let it dry completely so paint grips well. A slightly squat, ball shaped pumpkin suits this round zebra face best. No cutting is needed, so leave the stem and top fully intact.

  2. Sketch the layout

    With a pencil or washable marker, lightly draw a large upright oval for the face in the center of the panel. Add two tall pointed ears at the top corners and a rounded muzzle across the lower third. Step back and check that the shapes are balanced before any paint goes down. Keep the eyes spaced evenly on either side of the center stripe.

  3. Paint the white base

    Fill the face oval with two thin coats of white acrylic craft paint, letting each coat dry before the next. Thin coats prevent drips and cover better than one heavy layer. Paint the inner ear ovals white as well. Give the base a full hour or more to dry so the black stripes stay crisp on top.

  4. Add the black stripes and features

    Once the white is dry, paint the black mane stripes fanning down from the top of the head, plus the curved cheek stripes and the outer ear edges. Fill in the wide black muzzle and add two round eyes with a small white dot in each. Use a fine brush for the smile line and nostril shapes on the muzzle. Work slowly and wipe your brush often to keep edges sharp.

  5. Clean up and touch up

    Look for any pencil lines peeking through and cover them with a dab of matching paint. Sharpen the border between black and white where the two meet, since that contrast is what sells the zebra. Let everything cure for at least an hour. Small chips are easy to fix now while your paints are still out.

  6. Seal and display

    In a ventilated spot, mist the finished face with a light coat of clear matte spray sealer to protect it through the season. Let it dry, then set the pumpkin where kids can admire it. For a soft glow at night, place a battery LED tea light nearby rather than inside, since this pumpkin is not opened. Snap a photo in daylight to catch the crisp black and white.

Gather your supplies

Check things off as you get ready.

Work on a stable surface, keep your free hand out of the cutting path, and have an adult handle sharp tools.

Three levels of light

  • Leave intact

    The bare orange pumpkin skin around the face stays untouched as the background.

  • Peel & shade

    No skin is peeled on this no-carve design, so there is no dim orange glow area.

  • Cut through

    Nothing is cut through, so light comes only from an LED placed beside the pumpkin.

Learn the carving basics

Before you start cutting

Do I need to cut the top off or hollow it out?

No, this is a fully no-carve project, so the pumpkin stays whole. Leaving it sealed actually helps it last longer since no cut edges are exposed to rot. If you want a glow, set a battery LED beside the pumpkin rather than inside.

How do I keep the black stripes from smearing into the white?

Let the white base dry completely, at least an hour, before adding any black. Use a fine brush and load it lightly so the paint does not flood past your lines. If you do get a smudge, wait for it to dry, then touch it up with the opposite color.

Will the paint survive being outdoors?

Acrylic paint holds up reasonably well once dry, and a coat of clear matte spray sealer adds real protection from dew and light rain. Bring the pumpkin inside during heavy storms or freezes to be safe. On a covered porch it should stay bright for weeks.

Your take belongs here, too.

Changed a detail? Made it simpler? Share a photo of your version and tell the community what worked.

Share your pumpkin

More pumpkins like this

You've reached the end · 8 pumpkins
The Patch Report

Fresh pumpkins, in your inbox.

The best new carvings, ideas worth stealing, and how-tos for carving season. Short, seasonal, and gone by November.

A short email during carving season. Unsubscribe anytime. See our privacy policy.