Halloween Pumpkin Carving Contest · Starts October 1st · $500 in prizes
← Back to ideas
@ai_concepts
Sep 7, 2026
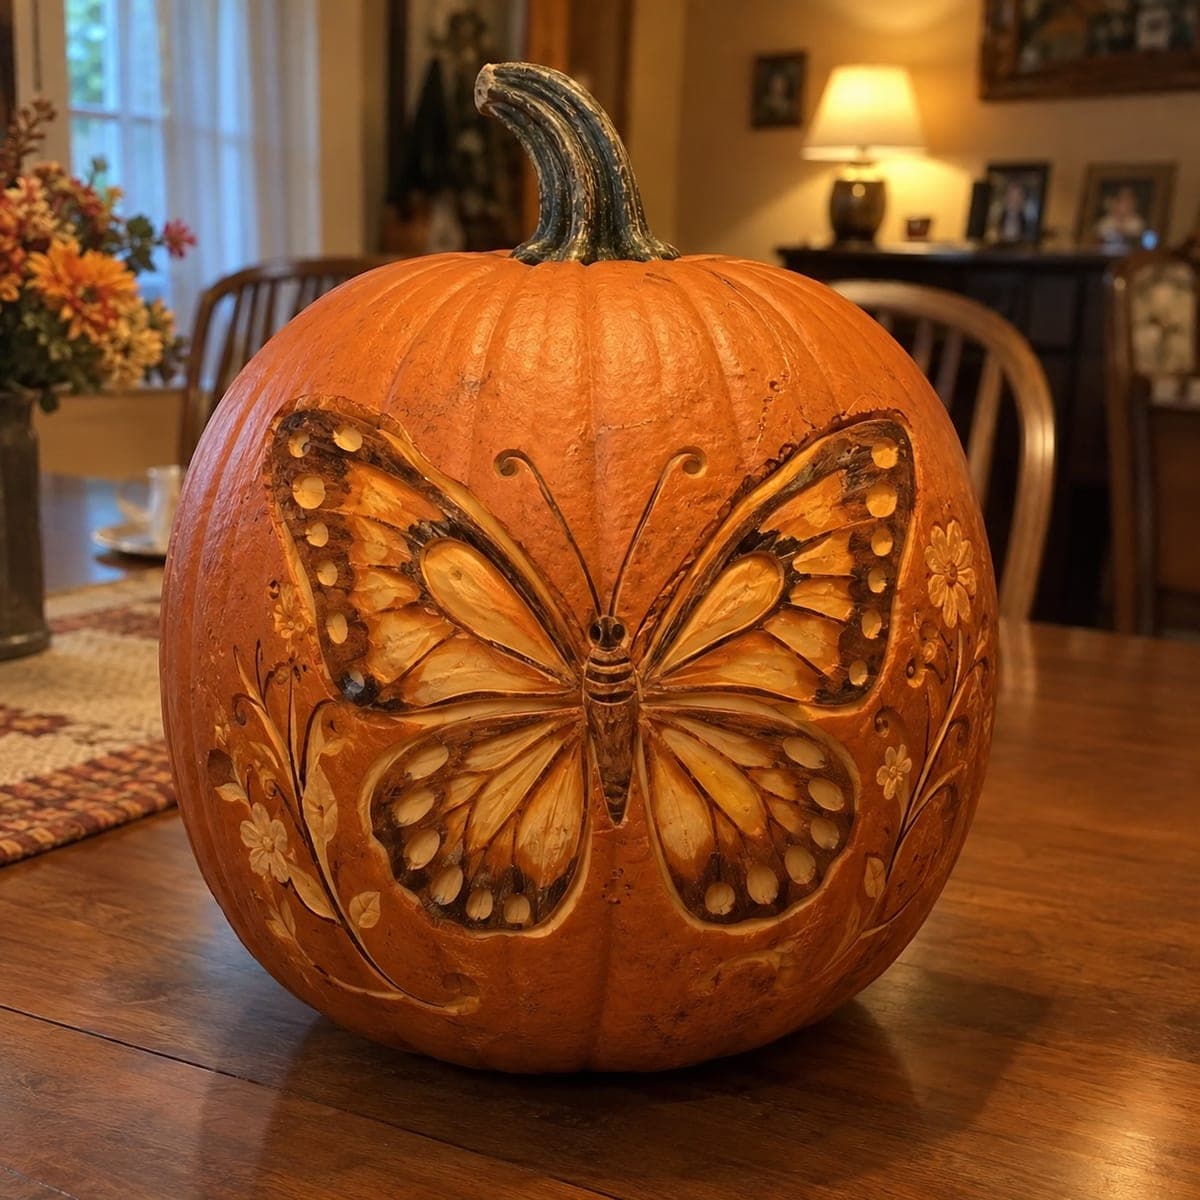
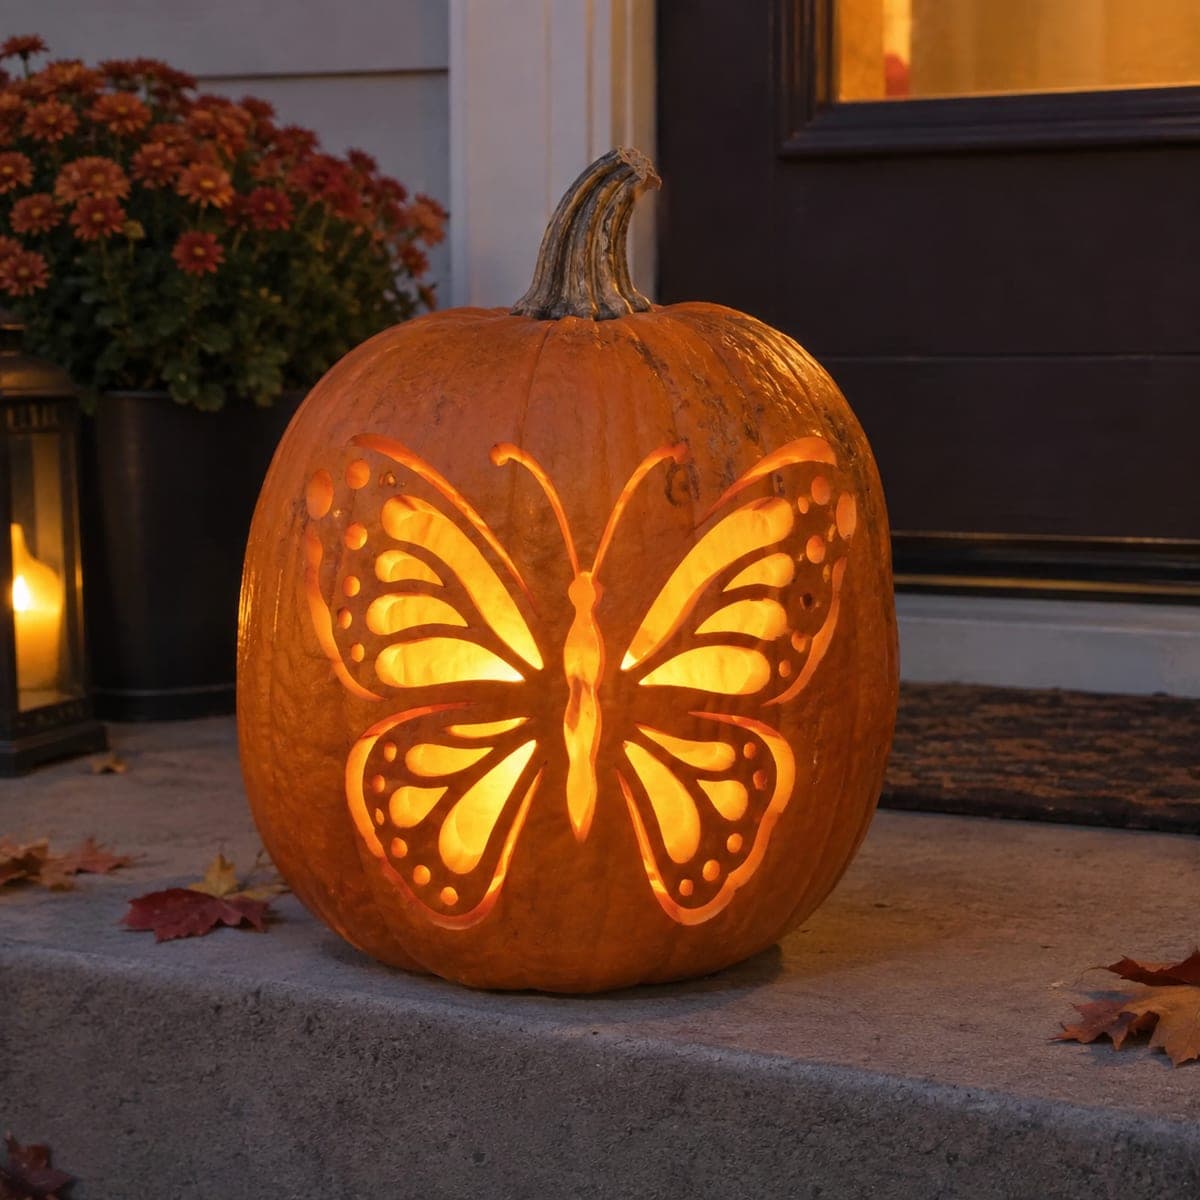
Detailed Butterfly Surface-Carved PumpkinAI
0

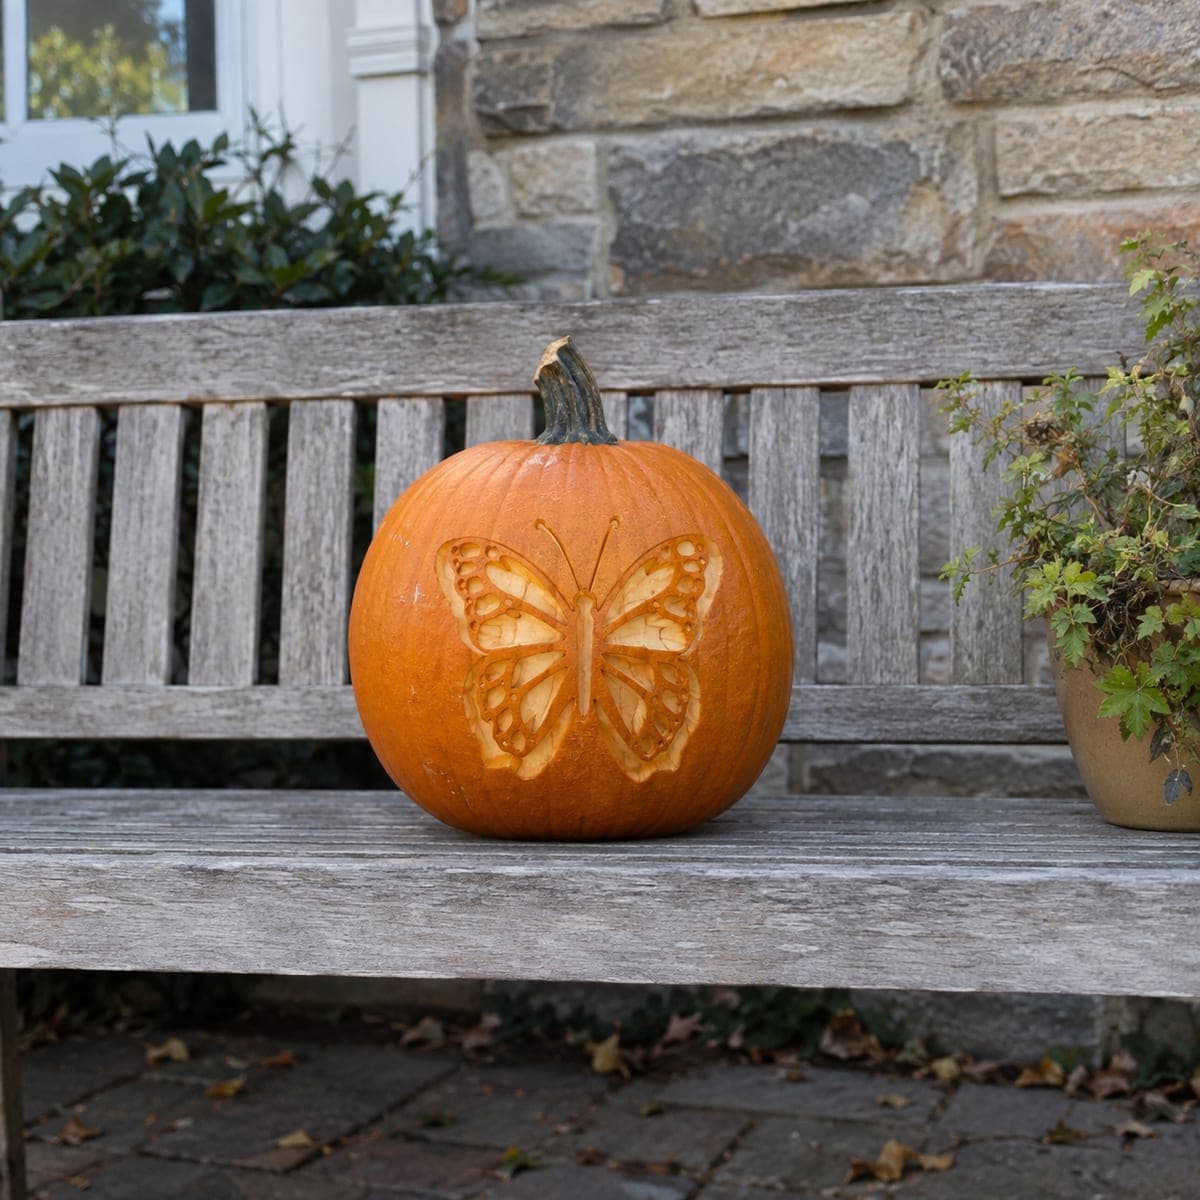
Detailed Butterfly Surface-Carved Pumpkin

Spread wings full of scalloped cells and spotted borders make this butterfly pumpkin a standout on a daytime porch bench. The design is etched into the skin rather than cut through, so the pumpkin stays sturdy and shows well without interior light. Transfer the pattern by taping a printout to the pumpkin and pricking the outline with a pin, then connect the dots with a fine V-gouge before clearing the wing cells.

This is an AI-generated concept image: a realistic, carvable design idea rather than a photo of a finished carve. AI concepts are always labeled and sit out the leaderboard and the contest.

No ratings yet · Sign in to rate
Comments (0)

  • No comments yet — be the first.

Save without an account. Sign in to like or comment.

Our tips for carving a similar design

The core trick here is etching rather than cutting all the way through, so the wings read as glowing detail on a solid, sturdy pumpkin. You transfer a symmetrical butterfly, then vary depth across the wing cells and spotted borders to build light and shadow. Because almost nothing is cut through, this design shows beautifully in daylight and needs no strong interior light.

Written by PumpkinCarvingIdeas.com, inspired by the image above. These are our suggestions, not instructions from the uploader. This approach to the AI concept has not been tested on a real pumpkin.

From pumpkin to porch

  1. Pick and prep the pumpkin

    Choose a smooth, rounded pumpkin with a broad flat-facing area for the wingspan. Wipe the surface clean and dry so tape and your pattern will stick. Since this design is mostly surface work, you can leave the pumpkin whole and skip gutting until the very end, or cut a small lid at the back if you want to add an LED later. Set it on a towel so it does not roll while you carve.

  2. Transfer the butterfly pattern

    Size your printout to fit the front, then tape it flat, snipping the paper edges so it hugs the curve. Prick along every outline and wing cell with a pin or a poking tool, spacing dots close together on tight curves. Peel the paper and check that both wings mirror each other before you commit. Connect the dots lightly with a fine V-gouge to lock in the drawing.

  3. Outline with a fine V-gouge

    Trace all the connected lines with steady, shallow passes of the V-gouge, keeping your free hand behind the blade. Define the body, antennae, wing borders, and the individual scalloped cells first. Go slow on the antennae and thin dividers so they stay intact and even. These grooves catch shadow and give the whole butterfly its crisp structure.

  4. Shade the wing cells

    Switch to a loop or ribbon tool and peel just the skin inside each wing cell for a soft mid glow. Vary how deep you scrape so inner cells look lighter than the darker border band. Leave the spotted dots along the wing edges as untouched skin so they pop against the peeled areas. Step back often to keep the two wings balanced in tone.

  5. Cut the brightest accents last

    If you want a few true cutouts, pierce only a handful of small cells near the upper wings for the brightest highlights. Cut these openings last, after all shading is done, so the surface stays firm while you work. Keep every cutout small and surrounded by bridges of skin so the wings do not sag. Clean the back edges of each hole with a gentle bevel to help light spread.

  6. Light it and photograph

    Slip a battery LED inside if you added a back opening, or simply display it in daylight where the etched detail shines on its own. Use a flameless light, never a candle, especially with thin dividers nearby. Coat cut and peeled areas with a little petroleum jelly to slow drying and keep the tones fresh. Shoot it on a bench or step in soft morning light for the best daytime look.

Gather your supplies

Check things off as you get ready.

Work on a stable surface, keep your free hand out of the cutting path, and have an adult handle sharp tools.

Three levels of light

  • Leave intact

    The spotted dots along the wing borders and the darker outer band stay as untouched skin.

  • Peel & shade

    The scalloped inner wing cells and body get skin-peeled for a soft mid glow.

  • Cut through

    A few small upper-wing cells can be cut through for the brightest accents.

Learn the carving basics

Before you start cutting

Do I need to hollow out the pumpkin for this design?

Not necessarily. Because the butterfly is etched into the skin, it shows well in daylight without any interior light. If you want a faint evening glow, cut a small lid at the back and add an LED, but keep most of the wings as surface shading.

How do I keep the two wings symmetrical?

Use a single printed stencil that is already mirrored, and prick the full outline before removing the paper. Check the dot pattern against the center body line and adjust before gouging. Work matching cells on both wings in pairs so the tones stay balanced.

The antennae and thin dividers look fragile. How do I protect them?

Keep them as shallow grooves rather than cut-through lines so they stay part of the solid skin. Carve them with light, slow passes of a fine V-gouge and avoid prying at them. If a divider between cells feels thin, leave it as a skin bridge instead of opening it up.

Your take belongs here, too.

Changed a detail? Made it simpler? Share a photo of your version and tell the community what worked.

Share your pumpkin

More pumpkins like this

You've reached the end · 8 pumpkins
The Patch Report

Fresh pumpkins, in your inbox.

The best new carvings, ideas worth stealing, and how-tos for carving season. Short, seasonal, and gone by November.

A short email during carving season. Unsubscribe anytime. See our privacy policy.