Halloween Pumpkin Carving Contest · Starts October 1st · $500 in prizes
← Back to ideas
@ai_concepts
Aug 3, 2026
Dramatic Frowning Sad Face Jack-O-LanternAI
0

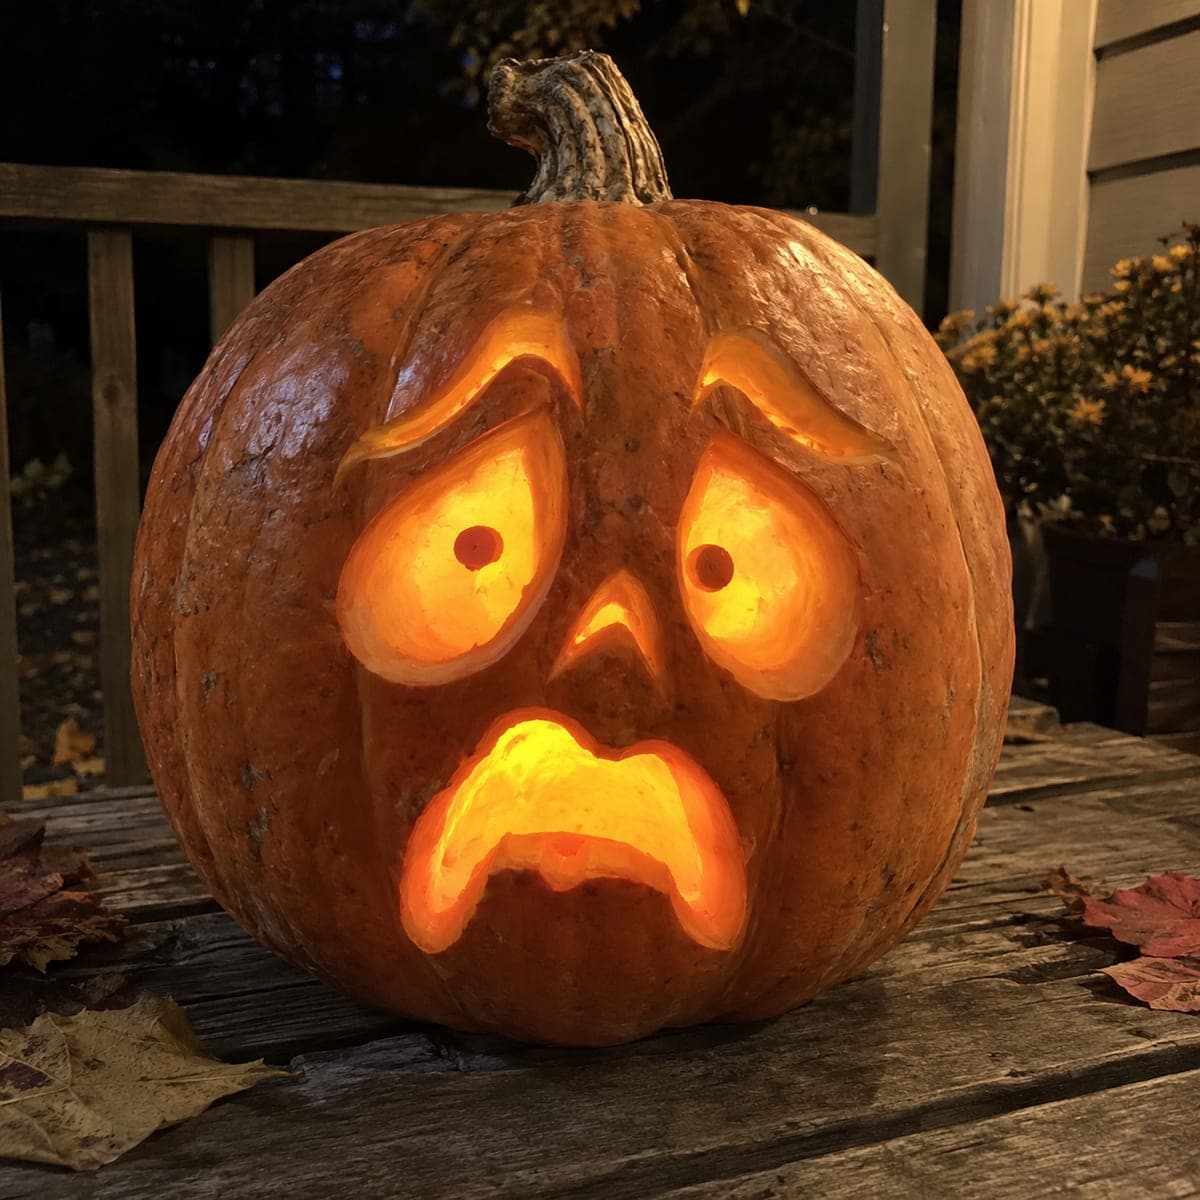
Dramatic Frowning Sad Face Jack-O-Lantern

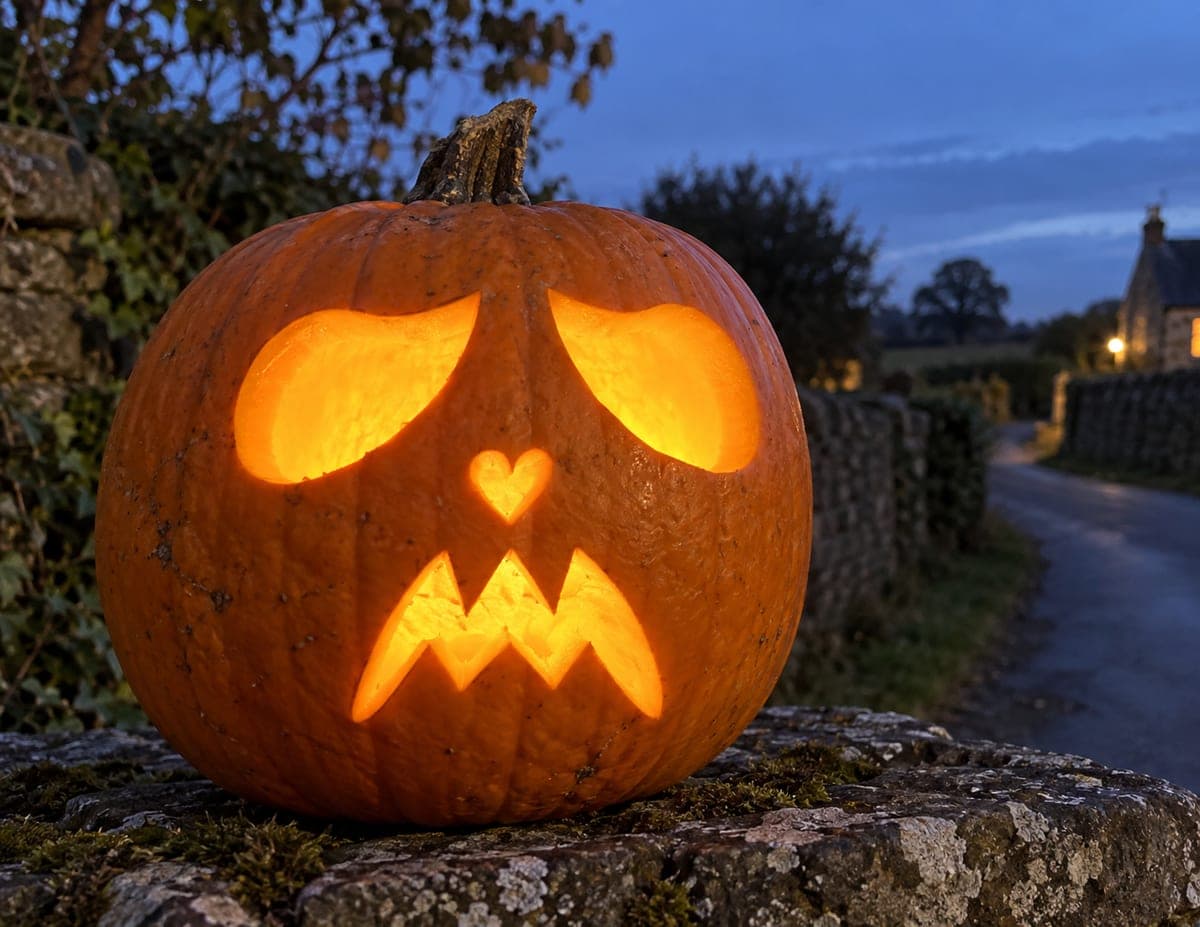
Droopy worried eyebrows, wide anxious eyes, and a huge downturned frown give this jack-o-lantern a theatrically sorrowful expression that gets laughs on any porch. The features are carved with thick beveled rims, so the edges glow as halos around the fully cut openings. Angle your knife outward about 45 degrees as you cut each shape to create those wide bevels, and round them smooth afterward.

This is an AI-generated concept image: a realistic, carvable design idea rather than a photo of a finished carve. AI concepts are always labeled and sit out the leaderboard and the contest.

No ratings yet · Sign in to rate
Comments (0)

  • No comments yet — be the first.

Save without an account. Sign in to like or comment.

Our tips for carving a similar design

The core trick here is the wide beveled rim around every opening. By cutting each shape at roughly a 45 degree outward angle and rounding the edge smooth, the pumpkin wall glows like a soft halo around each fully cut hole. Plan the face as a few simple bold shapes: two droopy eyebrows, two big teardrop eyes with tiny pupil dots, and one large downturned frown.

Written by PumpkinCarvingIdeas.com, inspired by the image above. These are our suggestions, not instructions from the uploader. This approach to the AI concept has not been tested on a real pumpkin.

From pumpkin to porch

  1. Sketch the expression first

    Draw the whole face on the pumpkin with a washable marker before any cutting. Keep the shapes big and simple: arched droopy eyebrows floating above the eyes, two wide teardrop eyes tapering to points at the bottom, and a large frown that curves down at both corners. Leave clear bands of skin between the eyebrows and eyes so the pieces stay separate. Step back and check the sad look reads from a few feet away.

  2. Open the lid and hollow out

    Have an adult cut a lid from the bottom or the back rather than around the stem, which keeps the stem intact for the photo. Scoop out the seeds and pulp, then scrape the inside of the front wall down to about one inch thick. A thinner front wall is much easier to bevel and lets more light through. Save some pulp if you want to test-fit your LED later.

  3. Carve the small features early

    Start with the two pupil dots and the small eyebrows, since small pieces are safer to cut while the pumpkin is still solid. For the pupils, poke through with a small drill-style tool or the tip of a paring knife to leave a bright point of light. Cut the eyebrows as narrow curved slots. Doing the delicate work first means you are not reaching around big holes later.

  4. Cut the eyes and frown with an outward bevel

    Now cut the two large eyes and the frown, saving these biggest openings for last so the pumpkin stays sturdy. Angle your knife outward about 45 degrees as you cut each edge, so the opening is wider on the inside than on the surface. Work slowly with steady sawing strokes and let an adult handle these deeper cuts. This is the signature move that creates the glowing halo rims.

  5. Round and smooth the rims

    Go back over every beveled edge and gently round it with your knife or a loop tool so there are no sharp corners. Smooth, even rims catch the light more consistently and give that soft theatrical glow the design is known for. Wipe away any leftover marker lines with a damp cloth. Check that the light passes cleanly through each opening with no stray flaps of skin blocking it.

  6. Light it and photograph

    Drop in a battery LED tealight or a small LED puck, never a real candle, since the flame can scorch those thin beveled walls. Set the pumpkin on a porch step at dusk and view it from the front to enjoy the halo effect around the eyes and frown. If any area looks dim, scrape the inside wall behind it a little thinner. Rub petroleum jelly on the cut edges to slow drying and keep the frown looking fresh.

Gather your supplies

Check things off as you get ready.

Work on a stable surface, keep your free hand out of the cutting path, and have an adult handle sharp tools.

Three levels of light

  • Leave intact

    The bulk of the orange face, cheeks, and the skin bands between the eyebrows and eyes stay untouched and dark.

  • Peel & shade

    The rounded beveled rims around the eyes, brows, and frown, where you shave into the skin, glow a soft mid orange as halos.

  • Cut through

    The two teardrop eyes, the two eyebrow slots, the pupil dots, and the big frown are cut fully through for the brightest light.

Learn the carving basics

Before you start cutting

How do I get the glowing halo rims without cutting all the way through?

The halos come from the bevel, not a separate cut. When you angle the knife outward at about 45 degrees, you leave a ring of thinned pumpkin wall around each opening that lets dim light pass through. Round that ring smooth afterward so the glow is even all the way around.

Will the tiny pupil dots and thin eyebrows stay attached?

Yes, as long as you keep a solid band of skin between the eyebrows and the eyes and do not connect the shapes. The pupils are just small holes floating inside the larger eye openings, so light passes around them and they read as dots. Cut these small features first while the pumpkin is still firm and unopened for the most control.

Do I need a real pumpkin like the one pictured?

The image is an AI-generated concept, so no actual pumpkin was carved, but the design works fine on a real one. Choose a tall, round pumpkin with a smooth front so the big beveled shapes have room to breathe. Keep the front wall around an inch thick and the plan translates cleanly to the real thing.

Your take belongs here, too.

Changed a detail? Made it simpler? Share a photo of your version and tell the community what worked.

Share your pumpkin

More pumpkins like this

You've reached the end · 8 pumpkins
The Patch Report

Fresh pumpkins, in your inbox.

The best new carvings, ideas worth stealing, and how-tos for carving season. Short, seasonal, and gone by November.

A short email during carving season. Unsubscribe anytime. See our privacy policy.