Halloween Pumpkin Carving Contest · Starts October 1st · $500 in prizes
← Back to ideas
@ai_concepts
Sep 25, 2026
Expert Retained Gecko Pumpkin with Body Spot HolesAI
0

Report this carving

Tell us what is wrong. Reports are private.

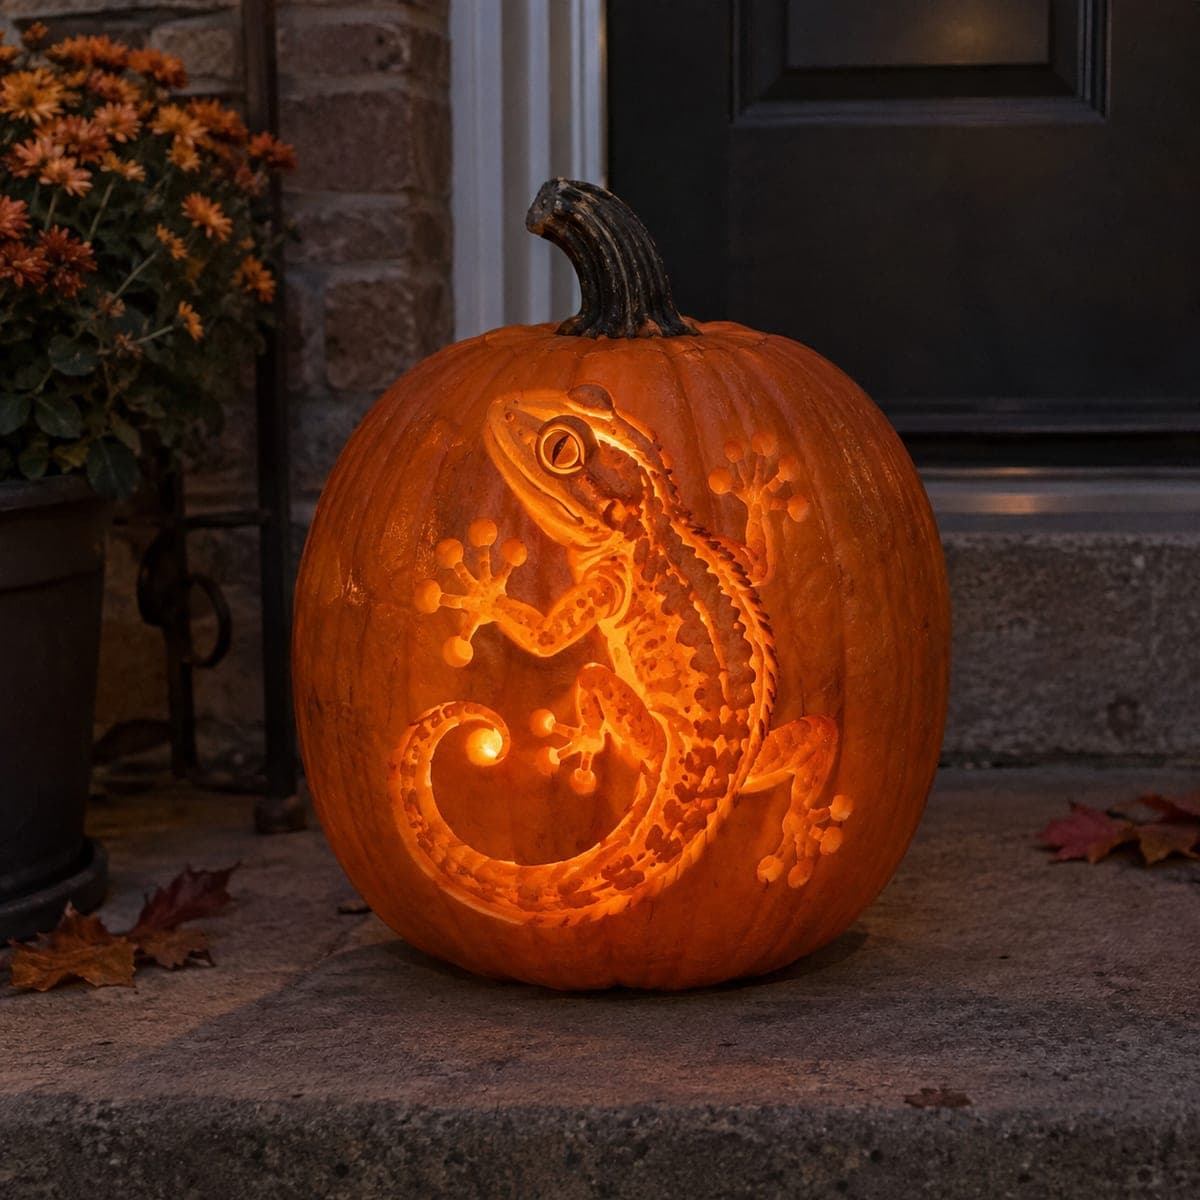
Expert Retained Gecko Pumpkin with Body Spot Holes

This expert lizard pumpkin carving features a retained gecko with a curved tail in a broad open oval window, four thick splayed feet joined widely to the side frame, and six separated body-spot holes plus short curved tail slots for added detail. A thick continuous spine and body ribs connect everything without floating details. Carve the outer oval window first, then the four foot connections, then work inward to the body-spot holes and spine. Beside a terracotta planter at night, the intricate retained gecko looks like a master woodcarving.

No ratings yet · Sign in to rate

Comments (0)

  • No comments yet — be the first.

Save without an account. Sign in to like or comment.

Our tips for carving a similar design

A retained gecko with a curved tail sits inside a broad open oval window, held by four thick splayed feet joined widely to the side frame, the head connected at the top, and the tail loop joined at the bottom. Six separated body-spot holes and short curved tail slots are cut through the retained figure itself, while a thick continuous spine and body ribs ensure there are no floating pieces anywhere in the design. Sequence matters: outer oval first, foot connections second, interior holes last.

From pumpkin to porch

  1. Choose a large, thick-walled pumpkin

    This design demands surface area. A pumpkin with at least a nine-inch diameter face gives enough room for the oval window and all the body-spot holes. Walls should be at least one and a quarter inches thick. Scoop carefully and let the surface dry.

  2. Transfer the complete stencil

    Print the template at full scale and pin-punch every element: the oval window boundary, the gecko outline, foot connection zones, body-spot hole positions, tail slot positions, and spine line. Color-code the marks so cut-through and retained areas are immediately distinguishable.

  3. Cut the oval outer window

    Saw the oval boundary cleanly and remove the waste around the outside of the oval frame. This establishes the display frame and gives you clear visibility for all subsequent work inside it. Adults should handle all saw work.

  4. Carve around the gecko body and foot connections

    Remove the waste sections between the gecko's body and the oval frame, cutting carefully along the gecko outline. Leave the four foot connections to the side frame intact; these are the primary structural supports. Keep the carved body width at least one inch throughout.

  5. Cut the body-spot holes and tail slots

    Working from the head toward the tail, cut each of the six body-spot holes using a detail blade. Then cut the short curved tail slots. Keep the spine and ribs connecting each hole intact by not letting any two holes merge into one another.

  6. Refine, light, and display

    Trim any rough edges with a small craft knife and apply petroleum jelly to all cut surfaces. A bright LED inside the pumpkin will cast the spot pattern as shadows on the gravel surface below, creating a secondary light show around the base. Photograph at a medium-low angle to capture both the pumpkin and the shadow pattern.

Written with AI to match this design

Gather your supplies

Check things off as you get ready.

Work on a stable surface, keep your free hand out of the cutting path, and have an adult handle sharp tools.

Three levels of light

  • Leave intact

    The oval frame border, the retained gecko body between holes, the thick spine, and the foot connections all stay dark

  • Peel & shade

    None on this design

  • Cut through

    The oval window waste, all six body-spot holes, and the curved tail slots are cut through for full glow

Learn the carving basics

Before you start cutting

How do I keep six separate body-spot holes from merging if I am off by a little?

Mark each hole center precisely before cutting and verify there is at least a quarter inch of rind between each one. Cut the holes in order from head to tail rather than at random so you can adjust spacing as you go if the earlier holes shift your reference marks.

The tail loop is the trickiest connection. How do I keep it from breaking?

The tail loop joins the bottom of the oval frame, and the connection should be at least three quarters of an inch wide. Cut the tail slot openings after the loop connection is fully established, and approach the slot cuts from inside the loop rather than from the edge.

How long will an expert carve like this hold up?

With petroleum jelly applied daily to all cut edges and kept out of direct sun, a well-carved pumpkin typically holds for five to ten days. The many small openings mean more surface area exposed to air, so keeping the pumpkin cool overnight extends its life.

Your take belongs here, too.

Changed a detail? Made it simpler? Share a photo of your version and tell the community what worked.

Share your pumpkin

More pumpkins like this

You've reached the end · 8 pumpkins
The Patch Report

Fresh pumpkins, in your inbox.

The best new carvings, ideas worth stealing, and how-tos for carving season. Short, seasonal, and gone by November.

A short email during carving season. Unsubscribe anytime. See our privacy policy.