Halloween Pumpkin Carving Contest · Starts October 1st · $500 in prizes
← Back to ideas
@ai_concepts
Aug 22, 2026
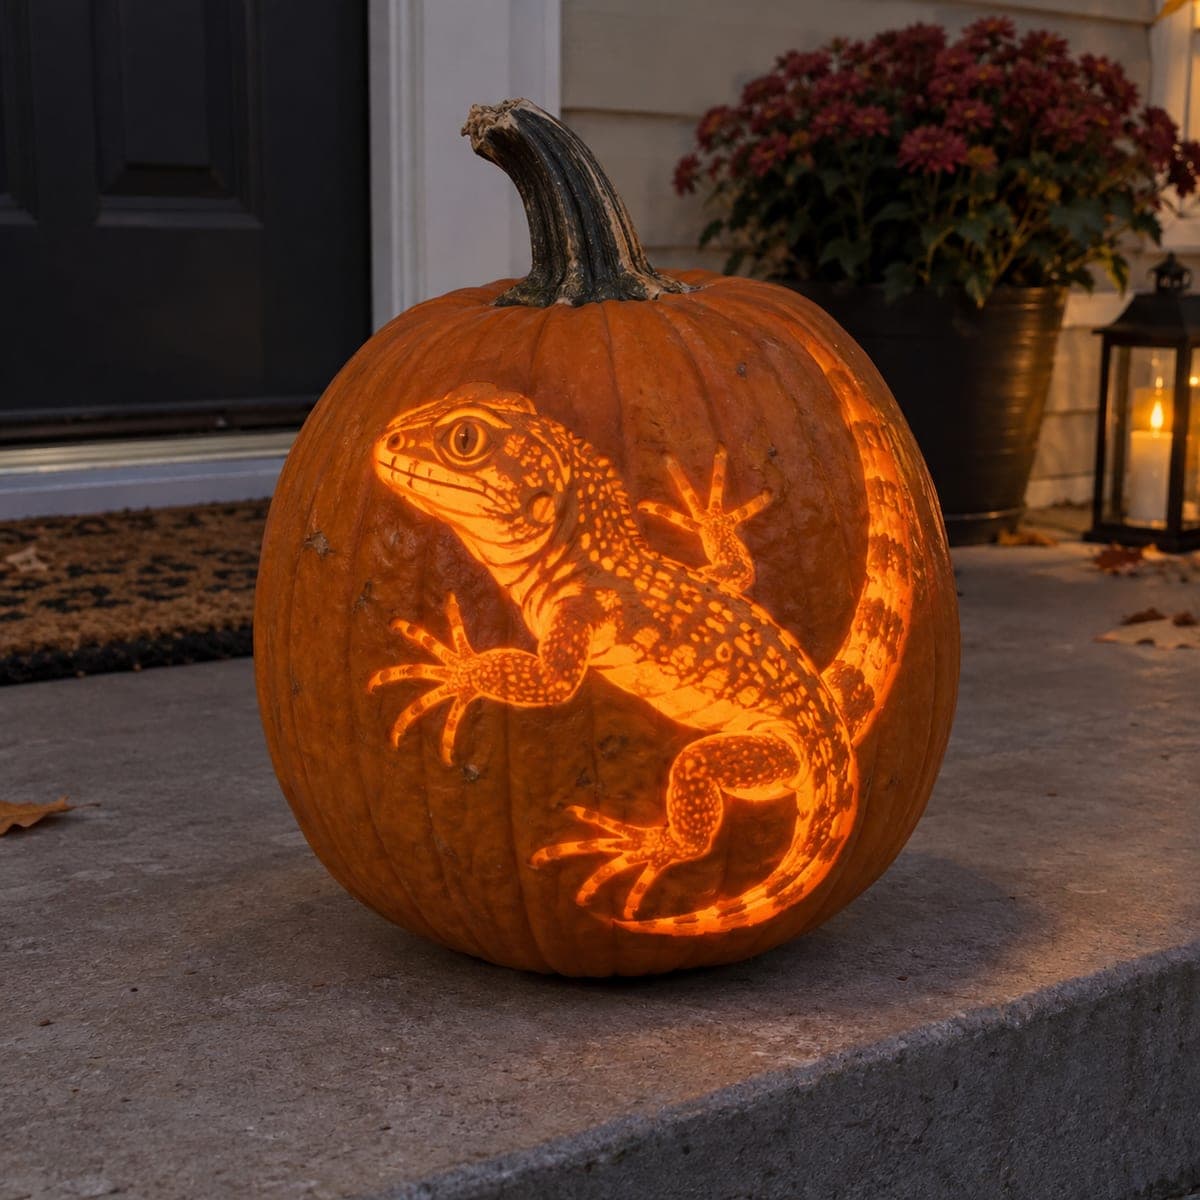
Climbing Gecko Etched Jack-O-Lantern DesignAI
0

Climbing Gecko Etched Jack-O-Lantern Design

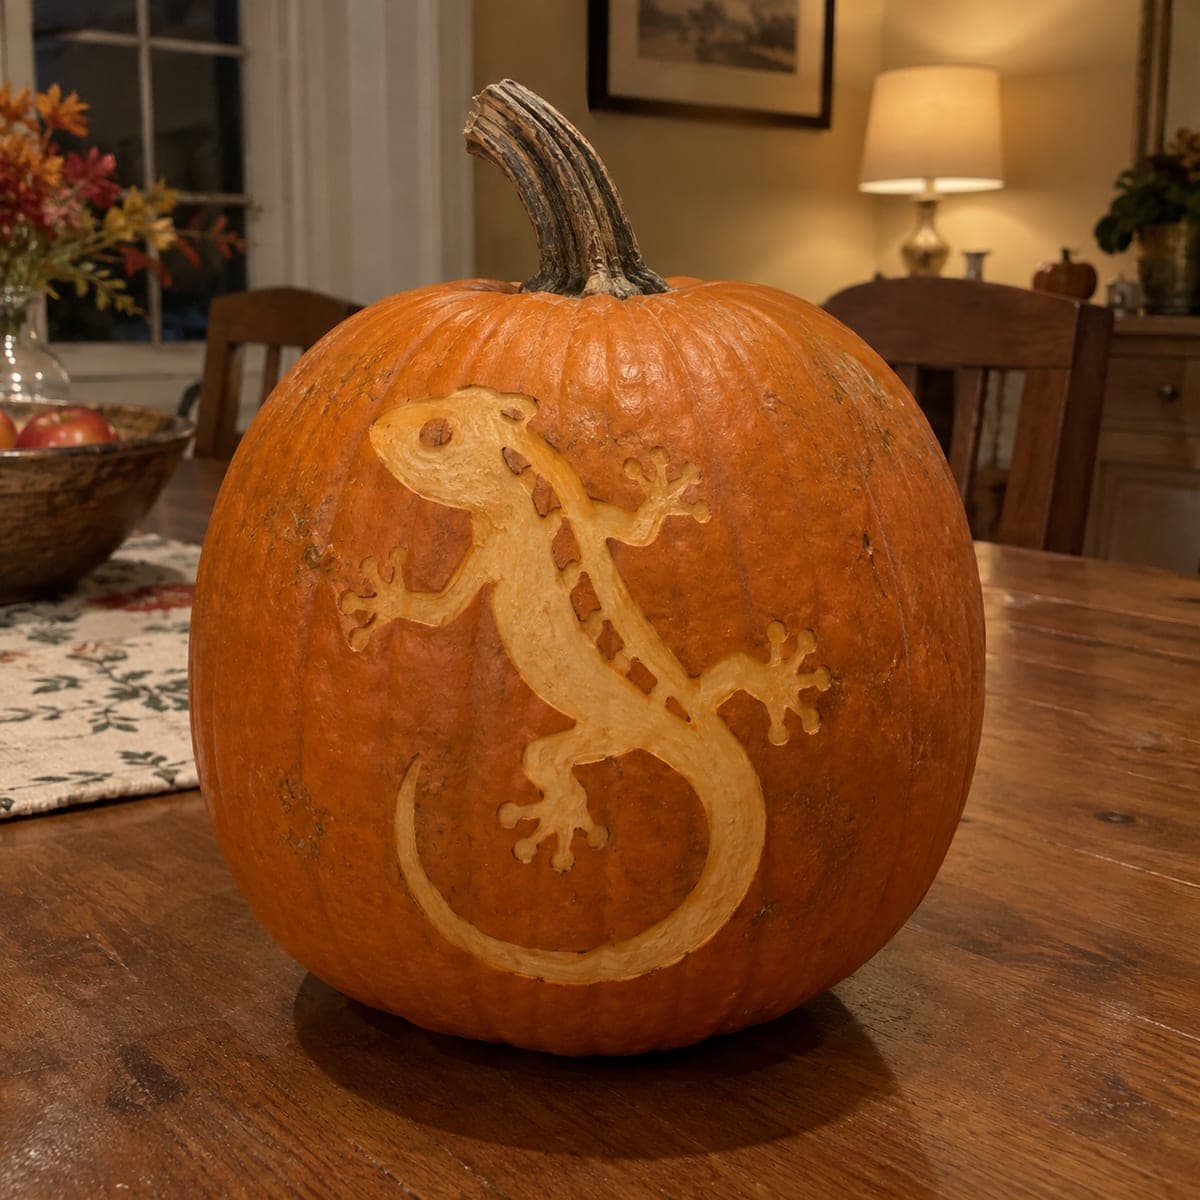
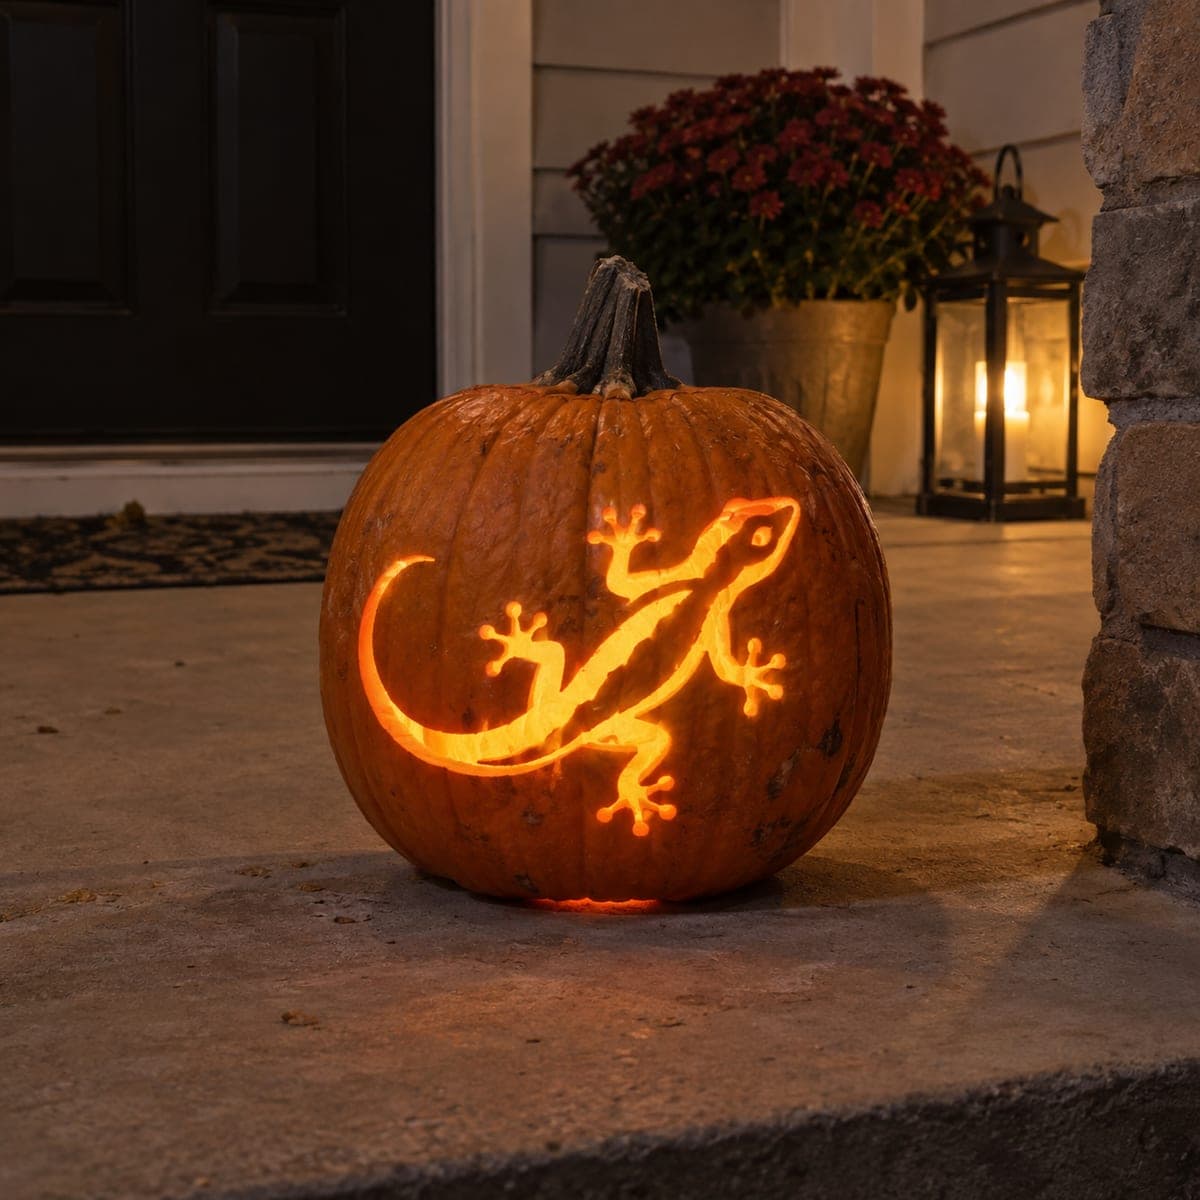
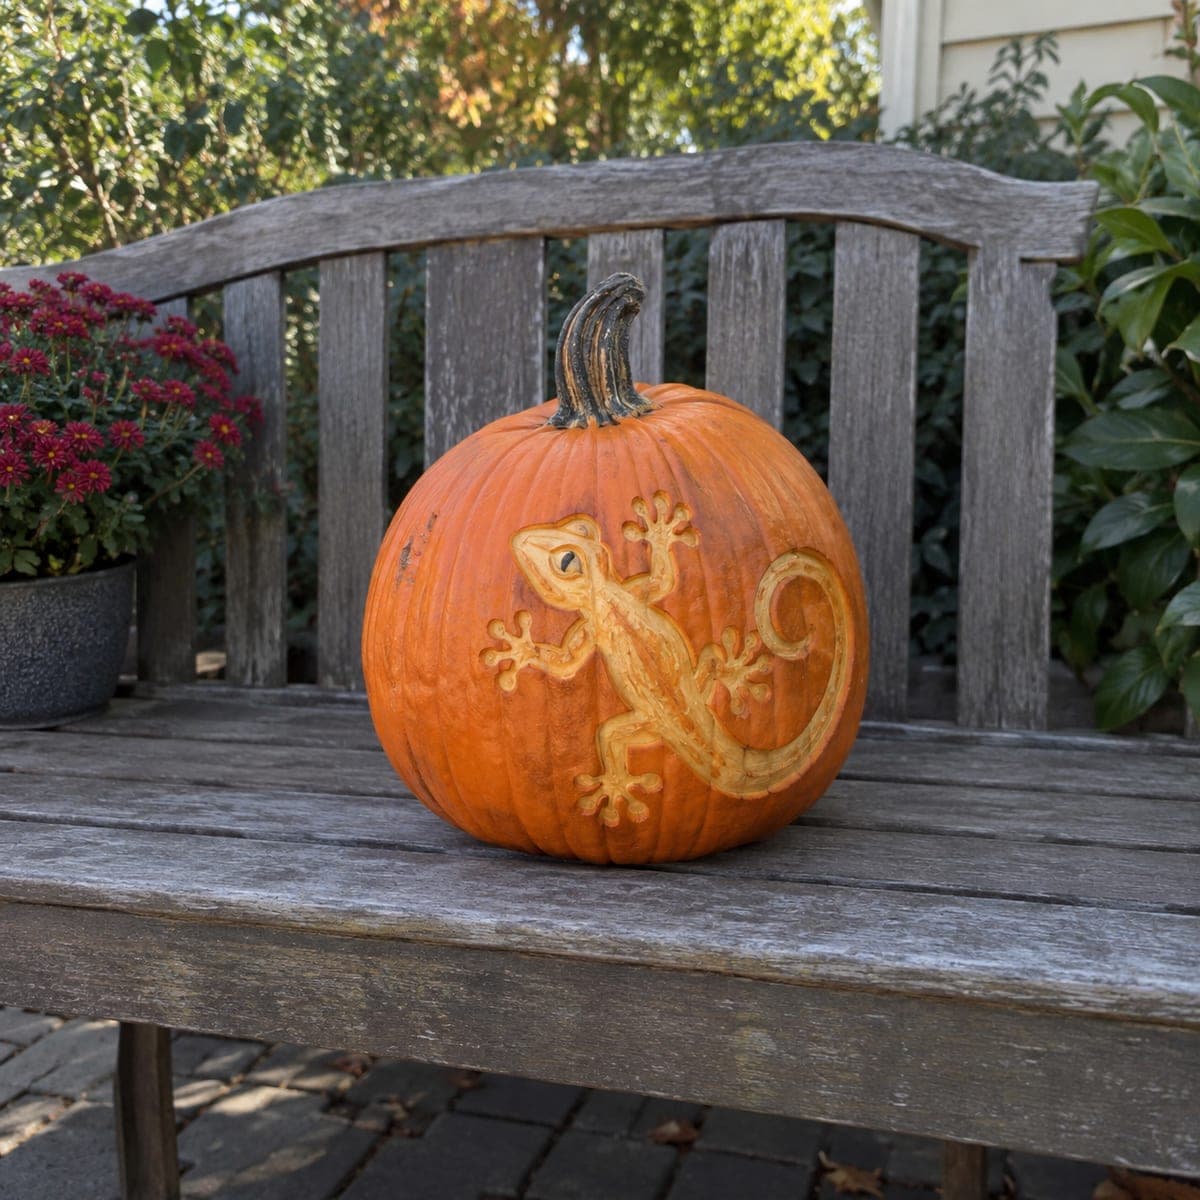
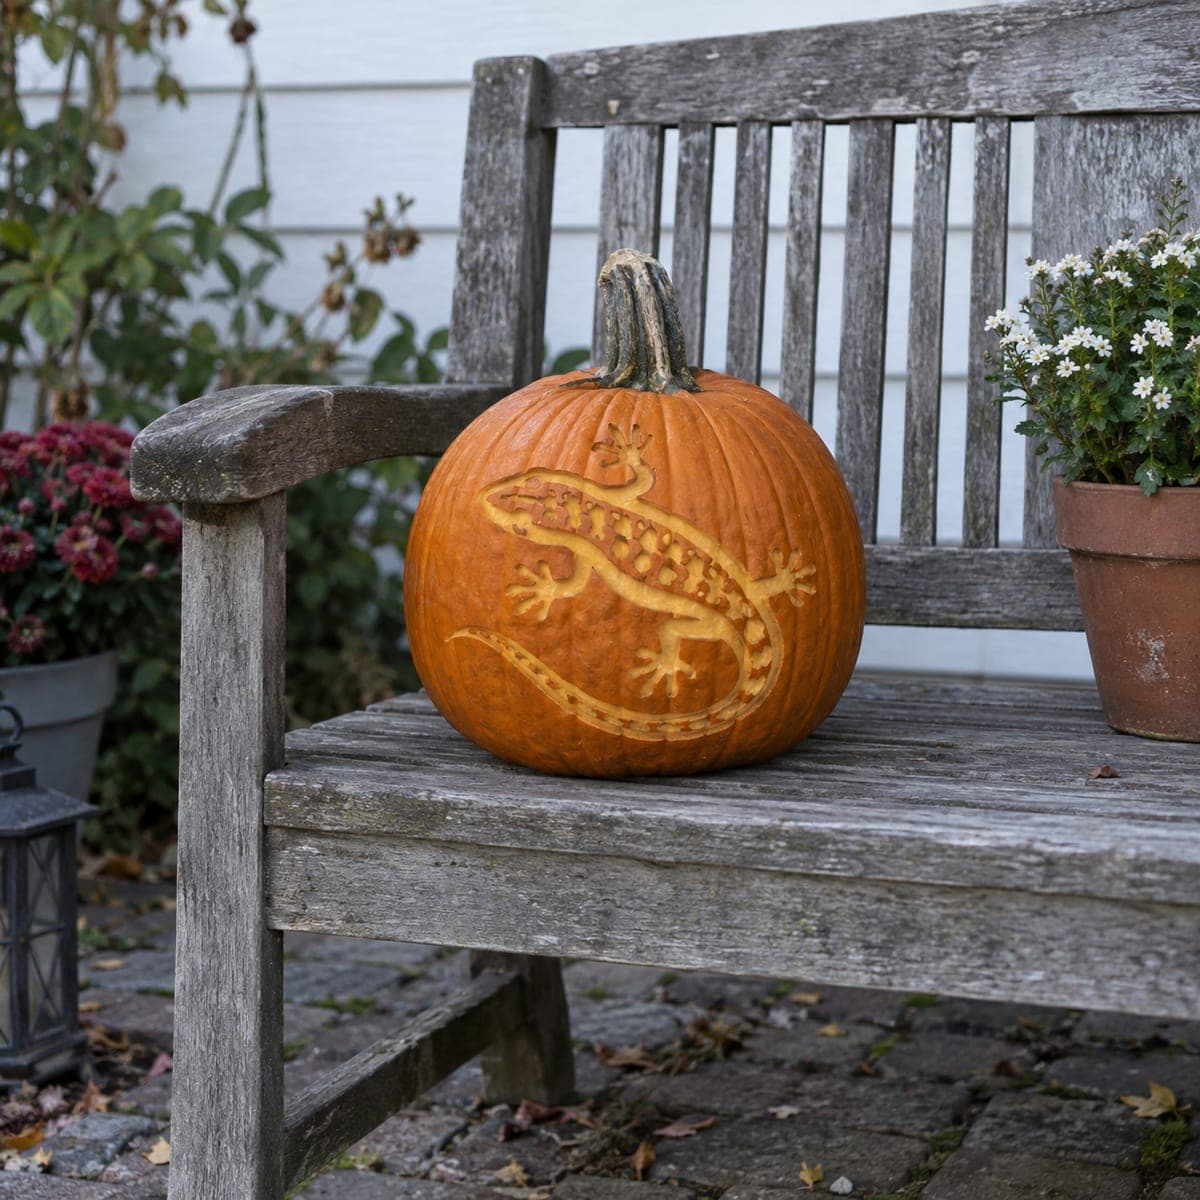
A spotted gecko scales this pumpkin diagonally, its splayed toes, curling tail, and patterned back all glowing through thinned flesh at night. The mottled skin texture comes from leaving small islands of rind inside the etched body, which read as dark spots when backlit. Position the lizard on a curve of the pumpkin so it really seems to climb, and carve the delicate toes with a fine detail knife last. Reptile lovers will do a double take.

This is an AI-generated concept image: a realistic, carvable design idea rather than a photo of a finished carve. AI concepts are always labeled and sit out the leaderboard and the contest.

No ratings yet · Sign in to rate
Comments (0)

  • No comments yet — be the first.

Save without an account. Sign in to like or comment.

Our tips for carving a similar design

The core trick here is shaded etching, where you thin the pumpkin wall to different depths so the gecko's body glows while leaving small islands of untouched rind that read as dark spots. Lay the lizard across a curve of the pumpkin so its splayed toes and curling tail wrap the surface and look like it is really climbing. Save the finest toe details and any full cutouts for last so the design stays sturdy while you work.

Written by PumpkinCarvingIdeas.com, inspired by the image above. These are our suggestions, not instructions from the uploader. This approach to the AI concept has not been tested on a real pumpkin.

From pumpkin to porch

  1. Pick your surface and transfer the design

    Choose a smooth panel that follows the natural curve of the pumpkin so the gecko appears to climb diagonally. Tape your stencil down snugly and poke the outline with a pin or transfer wheel, marking the body, toes, tail, and the little spots. Step back and check that the head sits high and the tail curls low toward the base. A clear map now saves a lot of guesswork once you start cutting.

  2. Scoop and thin the wall

    An adult should cut a lid or a bottom opening and hollow the pumpkin fully. Scrape the inside wall behind the gecko down to about one inch so light passes through evenly. A thinner wall makes the shading pop, but keep it consistent so no single spot looks blown out. Set your LED light inside to test the glow as you go.

  3. Etch the body for the main glow

    Using a ribbon or gouge tool, peel away only the outer skin across the gecko's body, legs, and tail. Work in shallow, even passes so the flesh underneath glows a soft orange. Leave the background rind completely untouched so the lizard stands out against the dark pumpkin. Take your time and keep the depth steady across the whole shape.

  4. Leave islands for the spots

    As you etch the back and tail, skip small round patches and leave the original skin in place. These little untouched islands stay dark when backlit and create the mottled, spotted gecko texture. Vary their size along the spine and tail for a natural pattern. This restraint is what sells the reptile look, so resist the urge to clear everything.

  5. Carve the fine toes and details last

    Switch to a fine detail knife for the splayed toes, the eye, and the crisp edges of the head. If you cut fully through for the brightest highlights, keep those openings small and leave thin bridges of rind between the toes so nothing snaps off. Cut these delicate areas last, when the pumpkin is at its most fragile. Work slowly and let the blade do the work.

  6. Light it and photograph

    Drop in a battery LED, warm white or amber gives the best reptile glow. Set the pumpkin outside at dusk on a step or ledge so the climbing angle reads clearly. Check that the spots stay dark and the toes catch the light. Snap your photo in low ambient light to capture the full effect.

Gather your supplies

Check things off as you get ready.

Work on a stable surface, keep your free hand out of the cutting path, and have an adult handle sharp tools.

Three levels of light

  • Leave intact

    The background around the lizard and the small round islands inside its body that become the dark spots.

  • Peel & shade

    The gecko's body, legs, and curling tail, skin-peeled to glow a soft mid orange.

  • Cut through

    Small bright accents like the eye and gaps between the toes, cut through with thin bridges left in place.

Learn the carving basics

Before you start cutting

How do I keep the spots looking natural instead of random?

Follow the stencil markings for spot placement rather than eyeballing them. Vary the size, making them a little larger along the spine and smaller toward the tail and legs. Leaving these islands of original skin is what creates the dark spotted pattern when the light shines through.

Will the thin toes break off while I carve?

They can if you cut all the way through around them. Etch most of the toes rather than cutting fully, and where you do cut through, leave slim bridges of rind connecting them. Save all the toe work for last, when you are done handling the rest of the pumpkin.

This is an AI concept image, so can a real pumpkin look like this?

Yes, the effect is achievable with shaded etching on a real pumpkin. Keep the wall thinned evenly and control your etching depth for the glow, and treat any fully cut areas as small accents with bridges. Just plan the spots and toes carefully, since those details drive the whole look.

Your take belongs here, too.

Changed a detail? Made it simpler? Share a photo of your version and tell the community what worked.

Share your pumpkin

More pumpkins like this

You've reached the end · 8 pumpkins
The Patch Report

Fresh pumpkins, in your inbox.

The best new carvings, ideas worth stealing, and how-tos for carving season. Short, seasonal, and gone by November.

A short email during carving season. Unsubscribe anytime. See our privacy policy.