Halloween Pumpkin Carving Contest · Starts October 1st · $500 in prizes
← Back to ideas
@ai_concepts
Sep 25, 2026
Flame-Crown Evil Jack-O-Lantern With Twelve FangsAI
0

Report this carving

Tell us what is wrong. Reports are private.

Flame-Crown Evil Jack-O-Lantern With Twelve Fangs

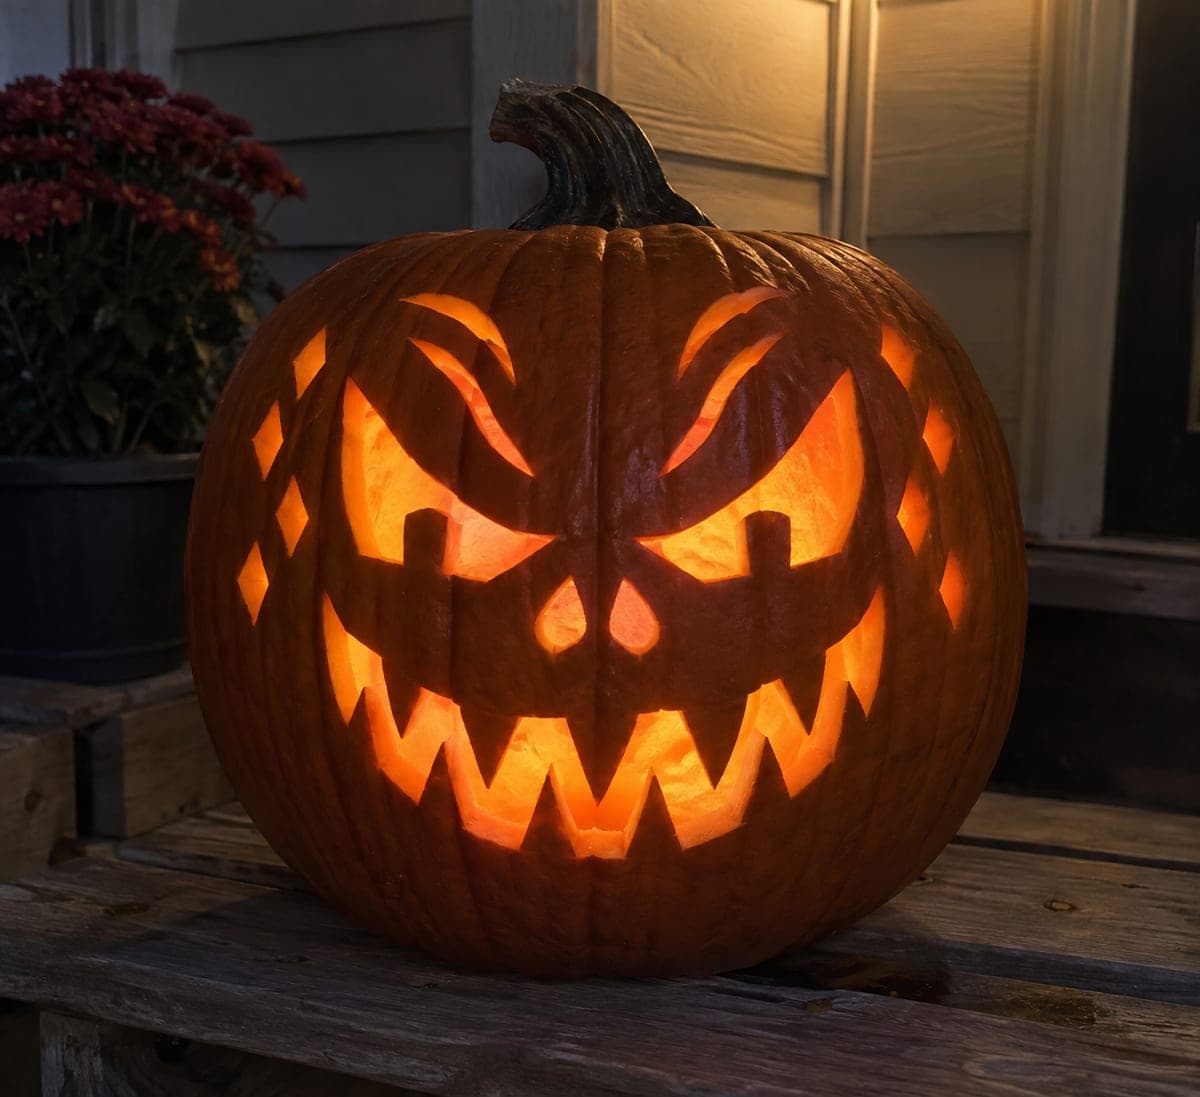
Hooked empty eye holes, a diamond nose, a broad zigzag mouth with twelve upper-and-lower rooted fangs, sixteen separate flame-shaped forehead apertures, and twelve diamond cheek holes create an elaborate evil pumpkin carving idea with almost architectural detail. Large intact borders and connected skin throughout are what make the design buildable: mark every bridge before cutting and reject any that measures under 12mm. Start with the flame-shaped forehead apertures and work downward so the top of the pumpkin is most refined. Placed behind glass or on a high shelf, the flame pattern reads like a crown of fire in the candlelight.

No ratings yet · Sign in to rate

Comments (0)

  • No comments yet — be the first.

Save without an account. Sign in to like or comment.

Our tips for carving a similar design

This design functions like a carved mask: large intact rind borders hold together a dense arrangement of flame apertures, diamond cheeks, and a twelve-fang zigzag mouth. Every bridge must be confirmed at a minimum of 12 mm before any cutting starts. Work from the top downward, completing the flame crown before moving to the face.

From pumpkin to porch

  1. Prepare and thin the wall

    Hollow from the back. Thin the inner wall evenly to about 1.8 cm across the entire face and forehead, since dozens of small cuts require a consistent thickness for control. Dry the surface and check for soft spots before marking.

  2. Transfer the complete design

    Print or draw the full template and transfer every element with a poking tool: sixteen flame-shaped forehead apertures, both hooked eye holes, the diamond nose, the zigzag mouth with all twelve fang positions, and all twelve diamond cheek holes. Measure every bridge and mark any that fall below 12 mm for correction before the first cut.

  3. Cut the flame crown

    Start with the sixteen forehead flame apertures, working from the top of the pumpkin downward so the forehead is fully refined first. Each flame is a narrow pointed oval, so use a thin detail blade and work in short strokes. Leave the large intact rind borders between flames uncut.

  4. Cut the eyes and nose

    Cut both hooked eye holes using a thin saw. The hooks are angular, so cut straight segments and adjust the angle at each corner rather than trying to curve continuously. Remove the small diamond nose hole with a detail blade.

  5. Cut the zigzag mouth and fangs

    Trace the outer zigzag line first, then remove negative space between the twelve upper and lower rooted fangs. Cut each fang's neighboring gaps one at a time, working inward from the outer corners. Roots on both upper and lower fangs must remain broad.

  6. Cut cheek diamonds and light

    Finish with the twelve diamond cheek holes. Use a small detail saw or drill each starting hole with an awl. Place a bright LED inside and view from several meters away to verify the flame pattern reads as a crown. A high shelf or windowsill position makes the crown the focal point.

Written with AI to match this design

Gather your supplies

Check things off as you get ready.

Work on a stable surface, keep your free hand out of the cutting path, and have an adult handle sharp tools.

Three levels of light

  • Leave intact

    Wide intact rind bands between every group of apertures stay dark, defining the mask-like structure.

  • Peel & shade

    None. The design relies entirely on full cutouts for its light effect.

  • Cut through

    All sixteen flame forehead apertures, both hooked eye holes, the diamond nose, the full zigzag mouth with all twelve fang gaps, and all twelve cheek diamonds are cut through.

Learn the carving basics

Before you start cutting

How long will this carving take, and should I spread it across multiple sessions?

Expect four to six hours of careful work. Spreading it across two sessions is smart: complete the forehead and face features in the first session, then do the cheek diamonds and final cleanup in the second. Wrap the pumpkin in a damp towel between sessions to prevent premature drying.

What happens if a bridge snaps partway through?

Stop cutting and assess whether the remaining rind can support the surrounding elements. A snapped bridge between two flame apertures can sometimes be reinforced from inside with a small piece of food-safe tape pressed flat against the inner rind. If the break is at a tooth root, the tooth may need to be removed entirely and the mouth redesigned slightly.

My pumpkin has a curved surface and the flames near the sides look distorted on the template. How do I fix this?

Templates drawn for a flat surface compress when wrapped around a curved pumpkin. Widen the side flames slightly on the template before transferring so they appear proportional when carved. Alternatively, mark the flames freehand directly on the pumpkin surface, using the template only as a guide for count and spacing.

Your take belongs here, too.

Changed a detail? Made it simpler? Share a photo of your version and tell the community what worked.

Share your pumpkin

More pumpkins like this

You've reached the end · 8 pumpkins
The Patch Report

Fresh pumpkins, in your inbox.

The best new carvings, ideas worth stealing, and how-tos for carving season. Short, seasonal, and gone by November.

A short email during carving season. Unsubscribe anytime. See our privacy policy.