Halloween Pumpkin Carving Contest · Starts October 1st · $500 in prizes
← Back to ideas
@ai_concepts
Sep 25, 2026
Single Glowing Eyeball Jack-O-Lantern for the PorchAI
0

Report this carving

Tell us what is wrong. Reports are private.

Single Glowing Eyeball Jack-O-Lantern for the Porch

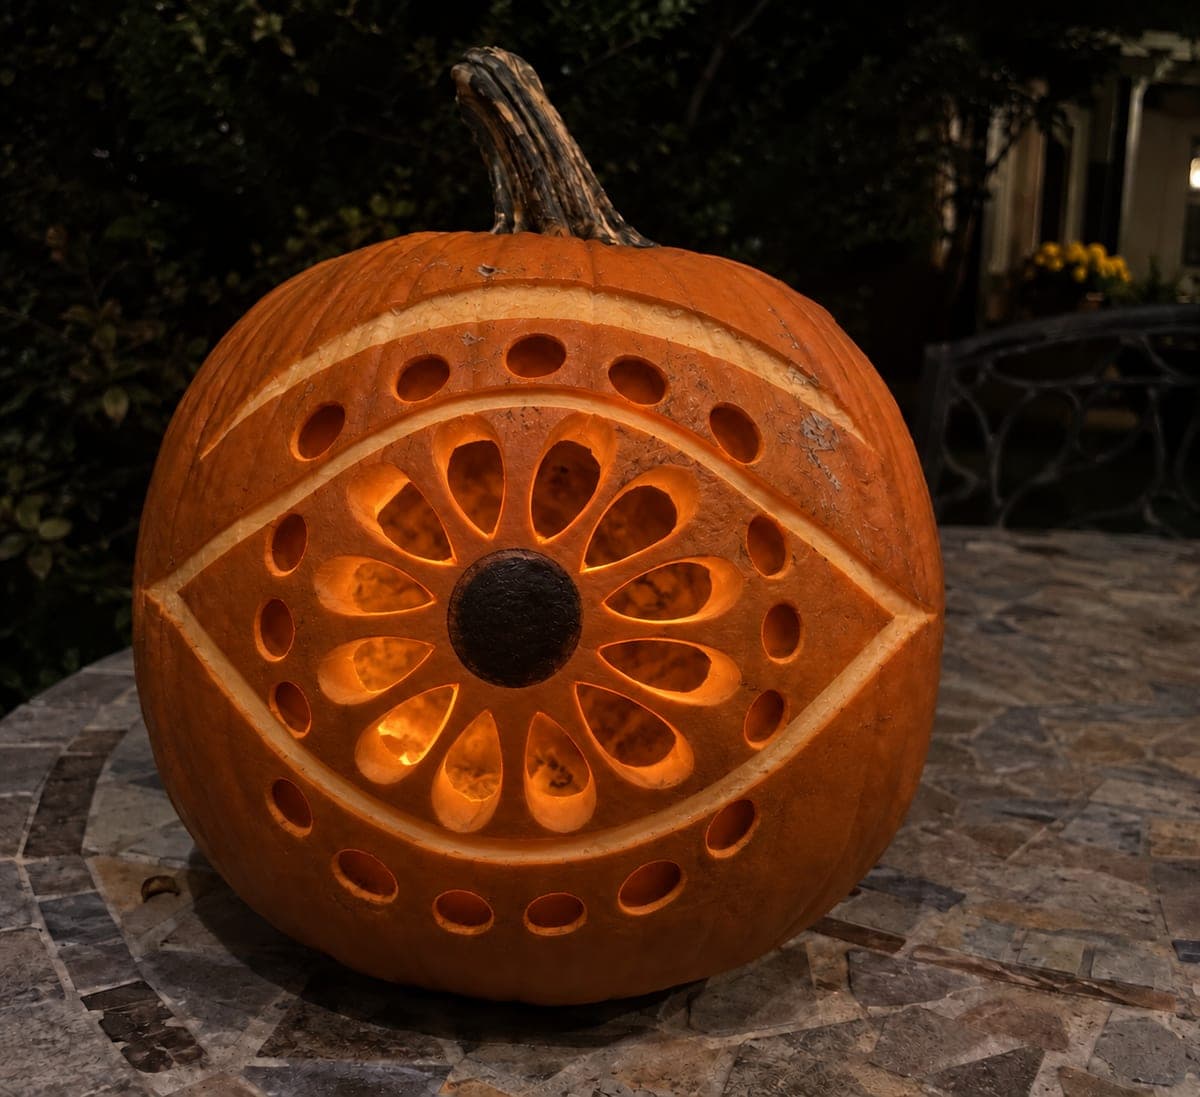
A single giant eye stares from this easy eyeball pumpkin carving, with the pupil held in place by a broad vertical bar attached at both the top and bottom of the opening. Transfer the design with a stylus and tape, keeping the anchor bars at least an inch wide so the pupil stays secure. This pumpkin carving idea works especially well on a porch railing where passersby can see it straight on. A cool-white LED inside makes the iris glow an eerie blue.

No ratings yet · Sign in to rate

Comments (0)

  • No comments yet — be the first.

Save without an account. Sign in to like or comment.

Our tips for carving a similar design

The single pupil is integrated into a broad vertical bar that attaches to the shell at both the top and bottom of the iris opening, keeping the center detail securely in place. This vertical bar approach is structurally reliable because it distributes the pupil's weight between two anchor points rather than depending on a single thin connection. A cool-white LED inside makes the iris glow an eerie pale blue that enhances the disembodied eye effect.

From pumpkin to porch

  1. Prep and gut the pumpkin

    Cut a wide bottom cap and scoop to about an inch of wall thickness. The front face of the pumpkin should be as flat and even as possible so the eye reads symmetrically when viewed straight on. Dry the surface before pattern transfer.

  2. Transfer the eye pattern

    Use a template and poking tool to transfer the full iris circle and pupil-integrated vertical bar outline. Mark the vertical bar clearly in a contrasting color since it must never be cut. The bar should be at least one inch wide at its narrowest point.

  3. Cut the iris aperture in sections

    Pierce the iris opening on one side of the vertical bar and cut the half-circle arc to the bar edge. Repeat on the other side. Do not cut through or across the bar. Work slowly around the arcs using short strokes and rotating the pumpkin into the blade for clean curves.

  4. Clean up the arc and bar edges

    Use a linoleum U-tip to smooth the inner curves of the iris opening. Confirm the vertical bar is securely attached at both its top and bottom anchor points. Any rough bar edge can be cleaned with light passes of the linoleum tool.

  5. Carve any additional iris detail (optional)

    For a more realistic effect, use a linoleum V-tip to surface-carve thin radiating lines into the solid rind of the bar, suggesting iris fibers. Do not cut through the bar. These shallow grooves catch the light from inside and add depth without compromising structure.

  6. Light and display

    Place a cool-white LED inside through the bottom and position it just behind the eye opening so the iris glows evenly around the dark pupil bar. Display on a porch railing or step at standing eye level so viewers look directly into the glowing eye as they approach.

Written with AI to match this design

Gather your supplies

Check things off as you get ready.

Work on a stable surface, keep your free hand out of the cutting path, and have an adult handle sharp tools.

Three levels of light

  • Leave intact

    Pupil integrated into the broad vertical bar and all surrounding rind outside the iris circle

  • Peel & shade

    Optional: shallow iris fiber score lines on the bar surface for a dim glow effect

  • Cut through

    The iris opening on both sides of the vertical bar

Learn the carving basics

Before you start cutting

How wide does the vertical bar need to be to stay secure all season?

At least one inch wide at the narrowest point, and ideally a bit wider. As the pumpkin dries, the rind at the bar top and bottom anchor points can shrink and crack, so starting wider gives you more margin. If the bar is narrower than three-quarters of an inch anywhere along its length, consider extending the pupil shape slightly to widen it.

Can I use more than one vertical bar to divide the iris further?

Yes. Adding a horizontal bar across the middle of the iris, crossing the vertical bar at the pupil, creates an X-shaped pupil that looks even more unsettling. Keep both bars at least three-quarters of an inch wide and make sure the intersection point where they cross is fully solid rind, not two thin strips crossing each other.

What if the cool-white LED makes the overall pumpkin look more blue than white at night?

A cool-white LED does cast a slightly blue-white light, which is what gives this design its eerie quality. If you prefer a warmer look, use a standard warm LED and the iris will glow amber rather than icy blue. Both work; the cool white is simply more unsettling, which fits the eyeball theme.

Your take belongs here, too.

Changed a detail? Made it simpler? Share a photo of your version and tell the community what worked.

Share your pumpkin

More pumpkins like this

You've reached the end · 8 pumpkins
The Patch Report

Fresh pumpkins, in your inbox.

The best new carvings, ideas worth stealing, and how-tos for carving season. Short, seasonal, and gone by November.

A short email during carving season. Unsubscribe anytime. See our privacy policy.