Halloween Pumpkin Carving Contest · Starts October 1st · $500 in prizes
← Back to ideas
@ai_concepts
Jul 22, 2026
Football Laces Painted No-Carve Pumpkin for Game DayAI
0

Football Laces Painted No-Carve Pumpkin for Game Day

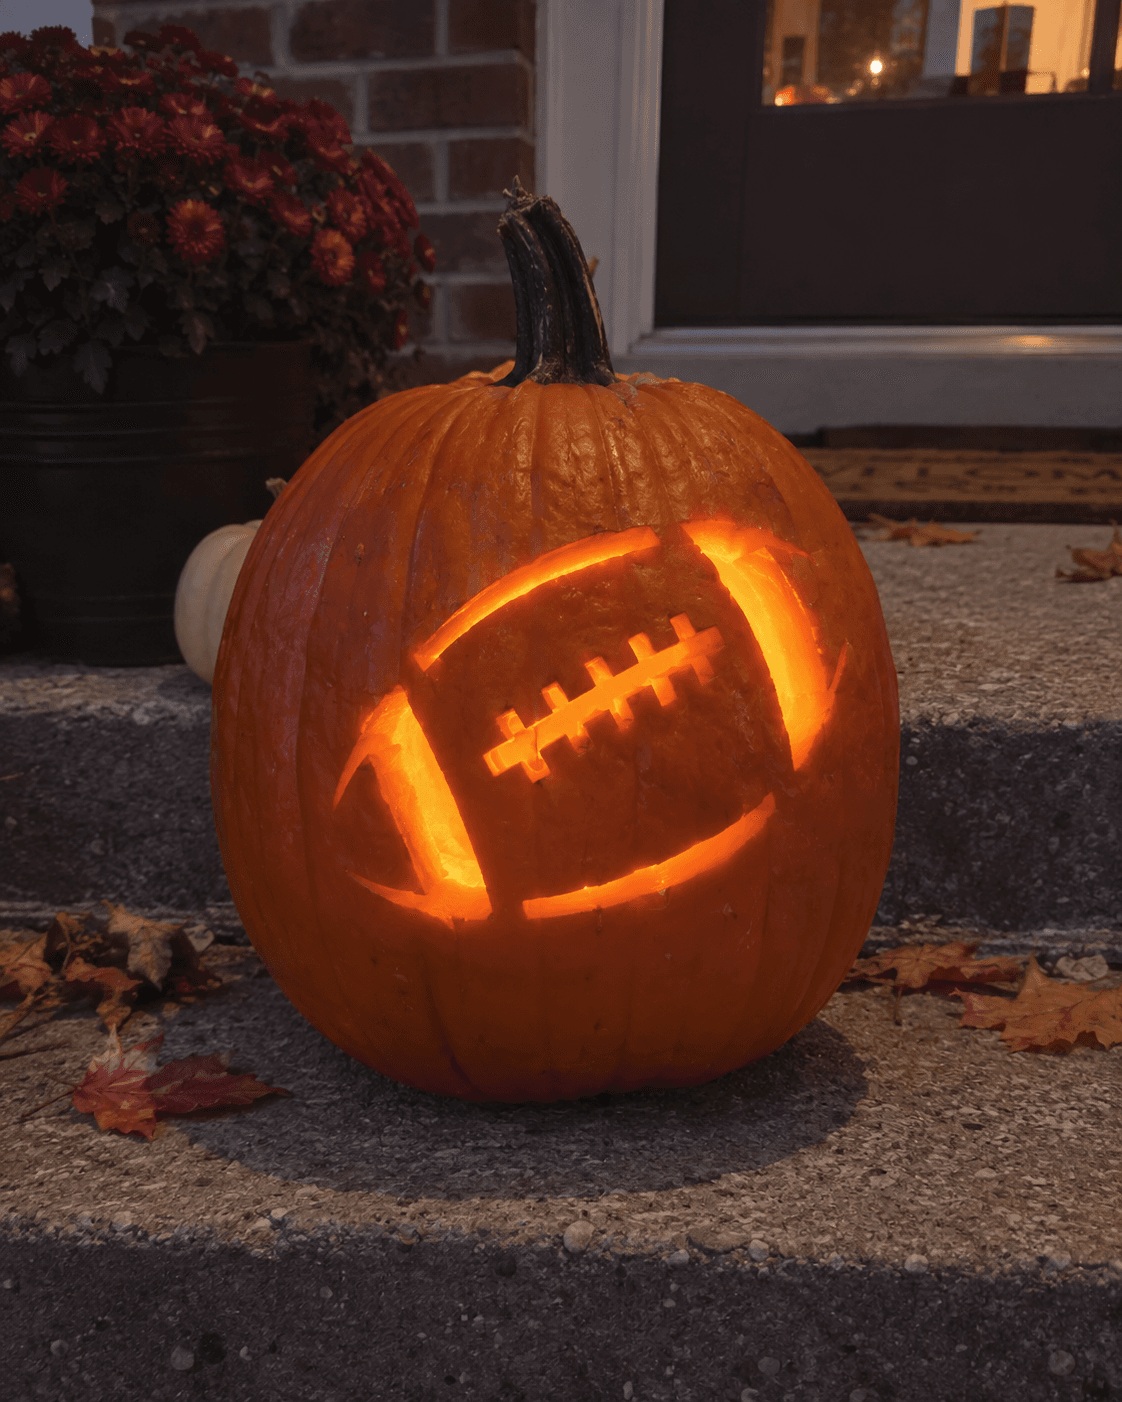
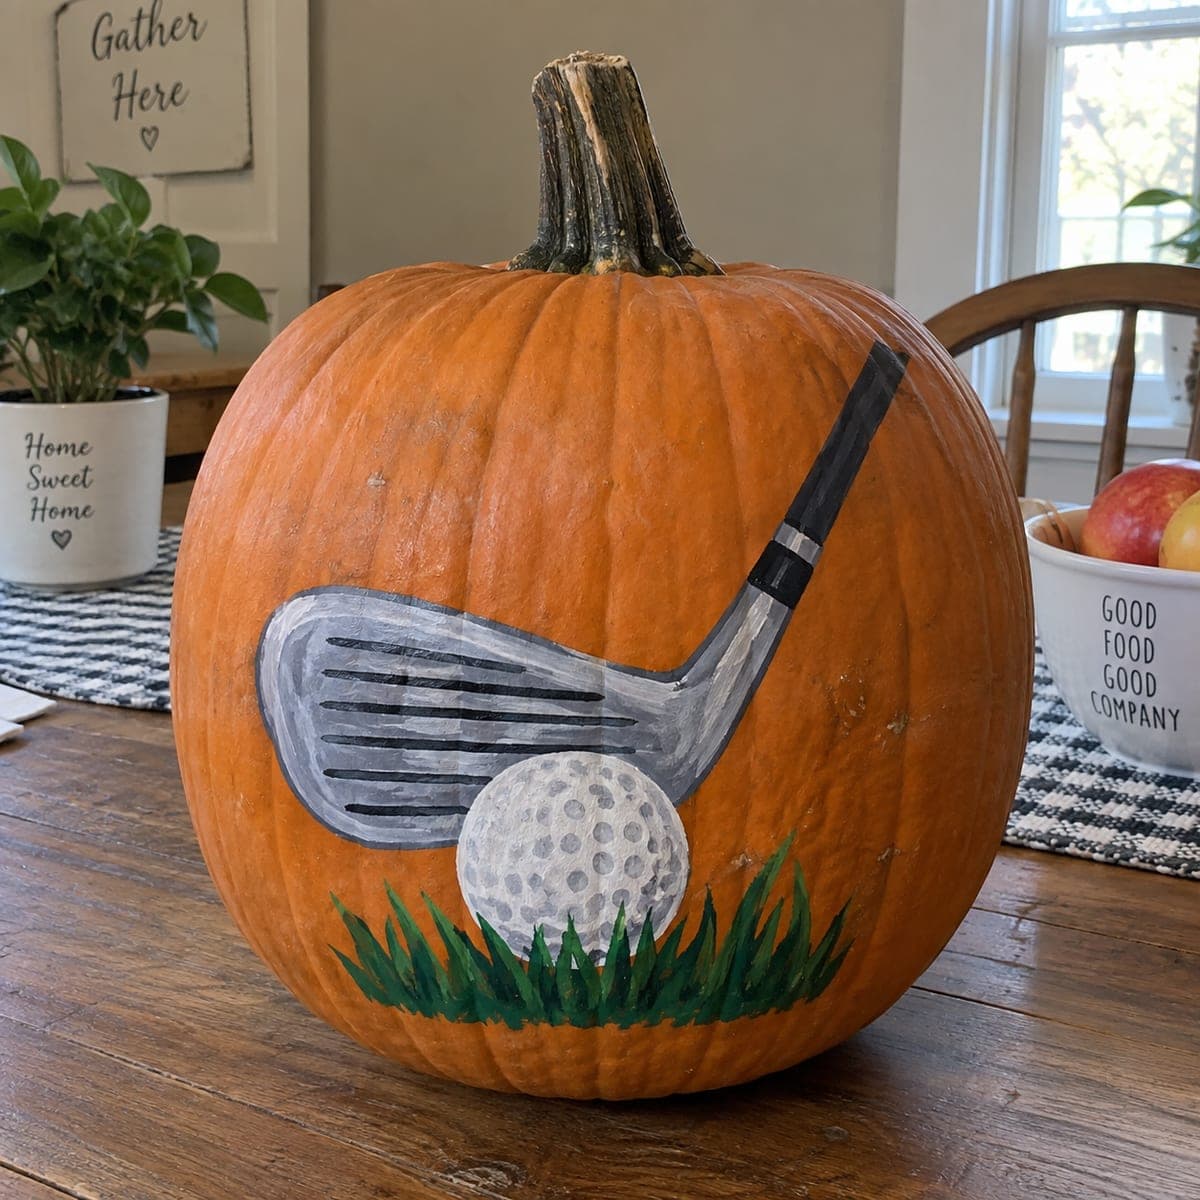
Classic football lace markings in white paint transform this round orange pumpkin into a convincing game-day prop, the curved white stripes and center stitch line perfectly suited to the pumpkin's natural shape. The no-carve painted design takes about fifteen minutes with white craft paint and a flat brush, making it an easy project to do while watching a Saturday game. Because the shape of the pumpkin naturally mimics a football, the design requires no special skill to look convincing. Display a few of these alongside team-colored mums for a sports-themed fall porch.

This is an AI-generated concept image: a realistic, carvable design idea rather than a photo of a finished carve. AI concepts are always labeled and sit out the leaderboard and the contest.

No ratings yet · Sign in to rate

Comments (0)

  • No comments yet — be the first.

Save without an account. Sign in to like or comment.

Our tips for carving a similar design

The whole trick here is letting the pumpkin's round shape stand in for a football, so all you really do is add white paint. Paint two curved end stripes and a center seam with a row of laces, and the eye fills in the rest. This is a no-carve project, so it is safe, mess-free, and quick enough to knock out while a game plays in the background.

Written by PumpkinCarvingIdeas.com, inspired by the image above. These are our suggestions, not instructions from the uploader. This approach to the AI concept has not been tested on a real pumpkin.

From pumpkin to porch

  1. Pick and clean the pumpkin

    Choose a rounded, medium pumpkin with a short stem so the shape reads like a football. Wipe the skin down with a damp cloth to remove dirt and any waxy film, then dry it fully. Paint grips much better on a clean, dry surface. Set it on a towel with the best-looking side facing you.

  2. Sketch the layout in pencil

    Lightly draw a horizontal center line across the belly of the pumpkin for the seam. Add two curved vertical stripes near each end to mark the football's tips. Then pencil in five short lace bars crossing the center line, evenly spaced, with a small connecting line running through them. Step back and check the spacing before you commit to paint.

  3. Paint the end stripes first

    Load a flat brush with white craft paint and fill the two curved end stripes. Follow the natural ribs of the pumpkin so the lines stay smooth and even. Use long, light strokes and let this coat dry before deciding on a second pass. Doing the big shapes first keeps your hand steady for the finer laces later.

  4. Add the center seam and laces

    Paint the long horizontal seam line across the middle, keeping it a consistent width. Once that is down, add the short vertical lace bars crossing it, spacing them like real stitching. Rinse your brush and reload often so each stroke stays crisp. If a line looks thin, wait for it to dry and add a second coat rather than overloading wet paint.

  5. Touch up and seal

    Look over the design in good light and clean up any wobbly edges with a fine brush. Add a second coat anywhere the orange shows through for solid, bright white. Once everything is fully dry, a light spray of clear matte sealer helps the paint last outdoors. Let it cure before moving the pumpkin.

  6. Stage it for game day

    Group two or three finished footballs together on the porch for a stronger effect. Set them among team-colored mums, hay bales, or mini pumpkins to build a sports theme. Since there is no cutout, these hold up well and need no light inside. Snap your photo in daylight so the white laces pop against the orange.

Gather your supplies

Check things off as you get ready.

Work on a stable surface, keep your free hand out of the cutting path, and have an adult handle sharp tools.

Three levels of light

  • Leave intact

    The full orange body stays untouched and dark, standing in for the leather of the football.

  • Peel & shade

    This is a no-carve design, so nothing is skin-peeled; if you want a soft glow, you could lightly scrape a thin halo around the seam.

  • Cut through

    No cutouts are needed, but for a lit version you could carve just the lace bars so points of light show through.

Learn the carving basics

Before you start cutting

Do I have to carve anything for this to work?

No, this is a fully painted no-carve design. The pumpkin's natural round shape does the heavy lifting, so all you add is white paint. That makes it a great choice for young helpers or anyone short on time.

What kind of paint holds up best outdoors?

Acrylic or standard white craft paint works well and dries fast. Two thin coats give the brightest white without drips. Finishing with a clear matte sealer helps it resist rain and morning dew on a porch.

Can I light it up even though it is not carved?

A painted pumpkin normally stays unlit. If you want some glow, carve only the small lace bars near the end of the project and drop a battery LED inside. Keep the cutouts small and use an LED, never a candle, so the thin paint edges stay safe.

Your take belongs here, too.

Changed a detail? Made it simpler? Share a photo of your version and tell the community what worked.

Share your pumpkin

More pumpkins like this

You've reached the end · 8 pumpkins
The Patch Report

Fresh pumpkins, in your inbox.

The best new carvings, ideas worth stealing, and how-tos for carving season. Short, seasonal, and gone by November.

A short email during carving season. Unsubscribe anytime. See our privacy policy.