Halloween Pumpkin Carving Contest · Starts October 1st · $500 in prizes
← Back to ideas
@ai_concepts
Jul 9, 2026
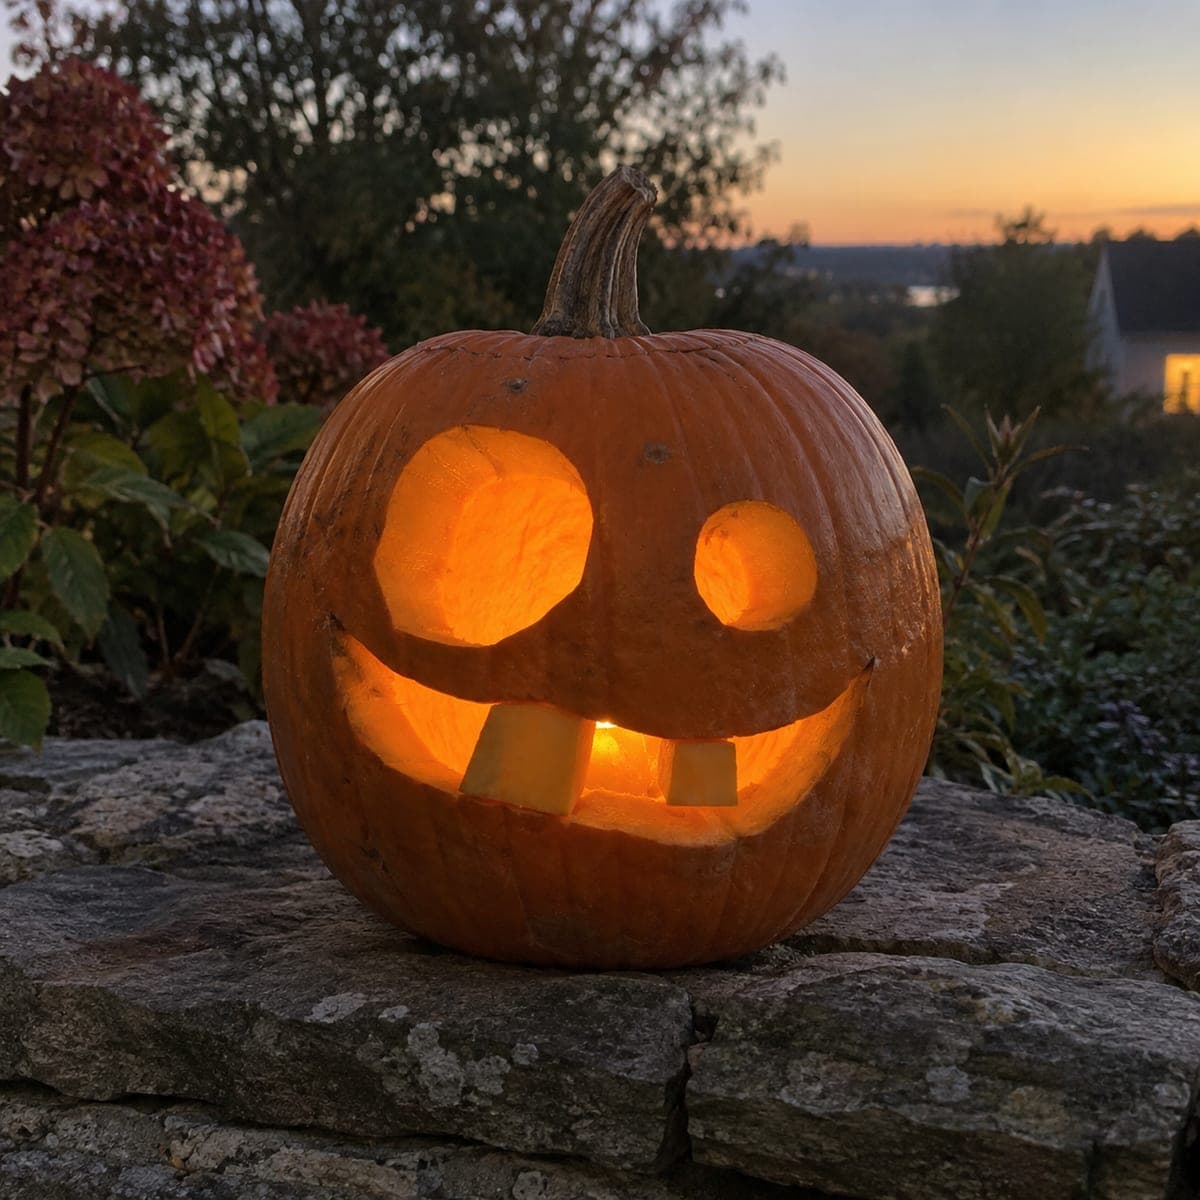
Friendly Glowing Classic Jack-O-Lantern Front PorchAI
0

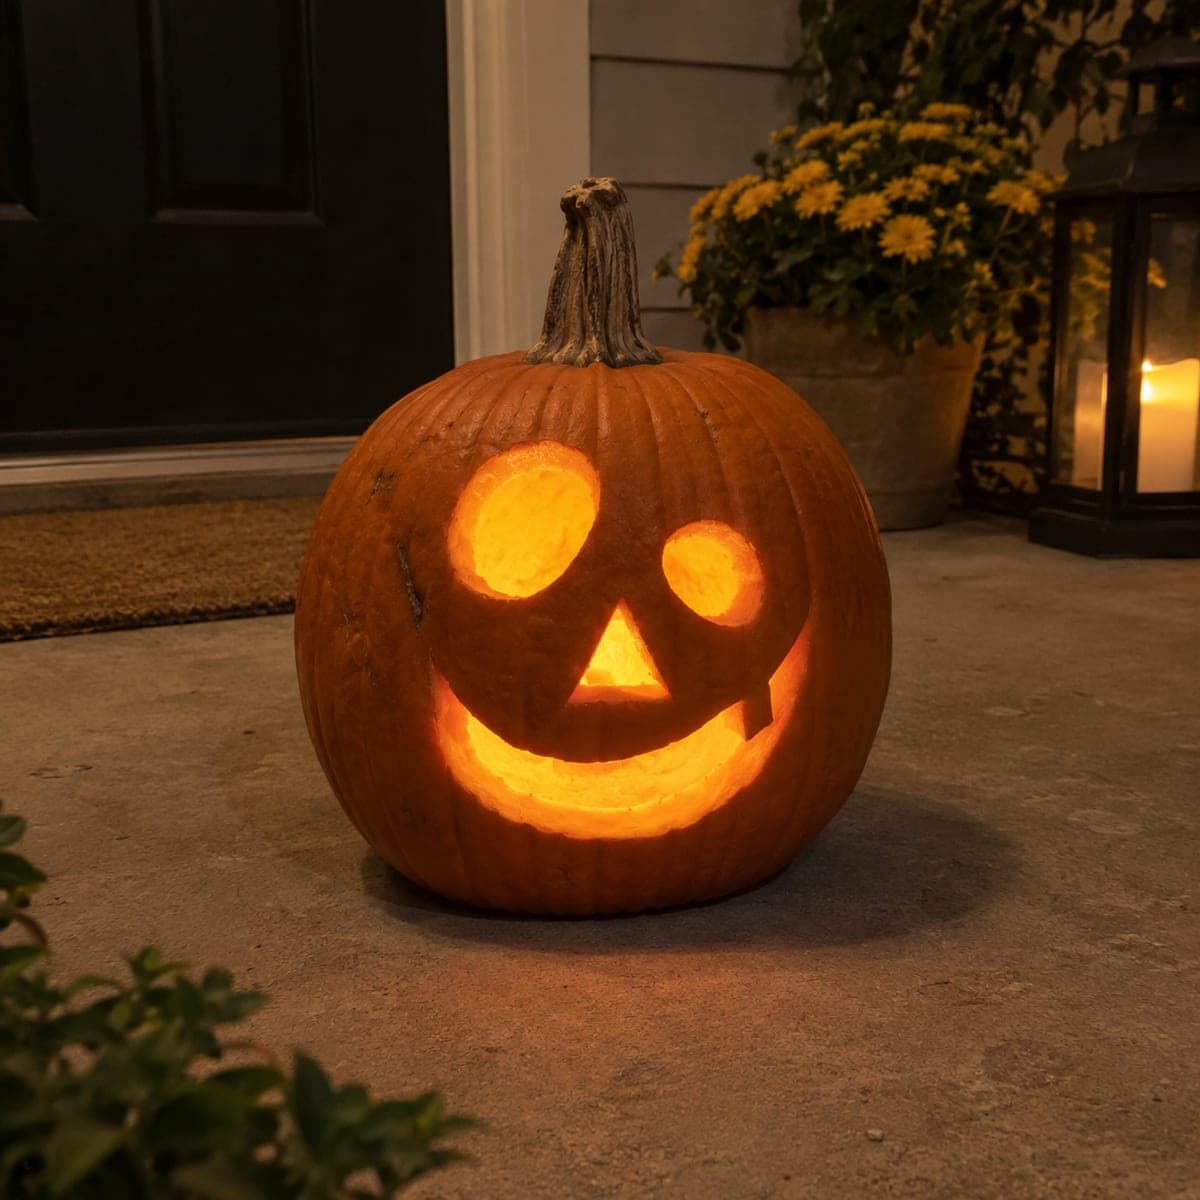
Friendly Glowing Classic Jack-O-Lantern Front Porch

Round cutout eyes and a wide curved smile with a small triangular nose give this classic Jack-O-Lantern a timeless friendly look, lit from within so every carved edge glows a warm amber. It is the quintessential beginner pumpkin carving idea, achievable in under 30 minutes with a basic carving kit. Trace the face shapes with a dry-erase marker before cutting, and keep the wall at least an inch thick at the mouth corners to prevent cracking. This design is equally at home on a front stoop, a fence post, or a wooden porch railing.

This is an AI-generated concept image: a realistic, carvable design idea rather than a photo of a finished carve. AI concepts are always labeled and sit out the leaderboard and the contest.

No ratings yet · Sign in to rate
Comments (0)

  • No comments yet — be the first.

Save without an account. Sign in to like or comment.

Our tips for carving a similar design

The whole charm here comes from three easy shapes, two round eyes and a small triangle nose above a wide curved smile, so the light reads as friendly rather than spooky. The plan is to trace the face first, cut the smaller features before the big grin, and keep the mouth corners thick so nothing cracks. Because this is a concept image, you can size the shapes to fit whatever real pumpkin you carve.

Written by PumpkinCarvingIdeas.com, inspired by the image above. These are our suggestions, not instructions from the uploader. This approach to the AI concept has not been tested on a real pumpkin.

From pumpkin to porch

  1. Pick a round pumpkin and cut the lid

    Choose a smooth, round pumpkin with a flat side to face the walkway. Have an adult cut a lid around the stem at a slight inward angle so it rests without falling in. Scoop out the seeds and pulp with a scoop or big spoon. Thin the front wall to about one inch so the light glows evenly and your tools cut easily.

  2. Draw the face with a dry-erase marker

    Sketch two round eyes, one slightly smaller if you like the playful look in the photo, and a small triangle nose centered below them. Add a wide curved smile that stops well short of the pumpkin sides. Step back to check the spacing before you cut, since a marker wipes off and mistakes do not. Keep at least an inch of skin between the mouth corners and the pumpkin edge.

  3. Cut the eyes and nose first

    Start with the smallest shapes while the pumpkin wall is still strong. Use a small serrated carving saw and gentle back-and-forth strokes, letting the blade do the work rather than forcing it. Push each cut piece inward and out. Cutting these before the big mouth keeps the front from flexing.

  4. Cut the smile last

    Save the widest opening for last so the pumpkin stays sturdy while you work. Cut the smile in short sections, following your curved line, and support the pieces with your free hand as they come free. Leave the corners a little thick so the grin does not crack under its own weight. Trim slowly if any tooth or edge needs cleaning up.

  5. Peel a soft glow around the smile

    For the warm amber halo you see near the mouth, use a lino or ribbon tool to skin off just the orange outer layer around the smile, leaving the flesh underneath intact. This thinner skin lets a dim glow bleed through without a full cut. Work shallow and even so the peeled ring looks smooth. Wipe away your marker lines as you go.

  6. Light it and set it out

    Drop in a battery LED tea light or a small puck light, never a real flame. Set the lid back on, or leave it off with the light tucked low for a brighter face. Place the pumpkin on your stoop, a fence post, or a porch railing where it sits flat and secure. Snap a photo in the dark once the amber glow settles in.

Gather your supplies

Check things off as you get ready.

Work on a stable surface, keep your free hand out of the cutting path, and have an adult handle sharp tools.

Three levels of light

  • Leave intact

    The whole outer surface of the pumpkin stays dark orange skin, keeping the face crisp against it.

  • Peel & shade

    A shallow ring of skinned flesh around the smile gives that soft amber halo without a full cut.

  • Cut through

    The two round eyes, the triangle nose, and the wide smile cut fully through for the brightest glow.

Learn the carving basics

Before you start cutting

How thick should I leave the wall at the mouth corners?

Keep at least an inch of pumpkin between the ends of the smile and the sides of the pumpkin. The wide grin removes a lot of material, so thick corners stop the front from sagging or cracking. Thinning the inside wall to about an inch everywhere else still lets plenty of light through.

Should I cut the eyes or the smile first?

Cut the small features first: the two eyes and the little triangle nose. The pumpkin wall is strongest before the big mouth opening is removed, so doing the smile last keeps everything sturdy. This order also gives you a feel for the tool on smaller, forgiving cuts.

How do I get the warm glow around the mouth like the picture?

That comes from peeling, not cutting. Skin off just the thin orange layer around the smile with a lino or ribbon tool, leaving the pale flesh behind so a dim light bleeds through. Pair it with a battery LED light and the ring glows a soft amber.

Your take belongs here, too.

Changed a detail? Made it simpler? Share a photo of your version and tell the community what worked.

Share your pumpkin

More pumpkins like this

You've reached the end · 8 pumpkins
The Patch Report

Fresh pumpkins, in your inbox.

The best new carvings, ideas worth stealing, and how-tos for carving season. Short, seasonal, and gone by November.

A short email during carving season. Unsubscribe anytime. See our privacy policy.