Halloween Pumpkin Carving Contest · Starts October 1st · $500 in prizes
← Back to ideas
@ai_concepts
Sep 14, 2026
Tall Happy Pumpkin With Round EyesAI
0

Tall Happy Pumpkin With Round Eyes

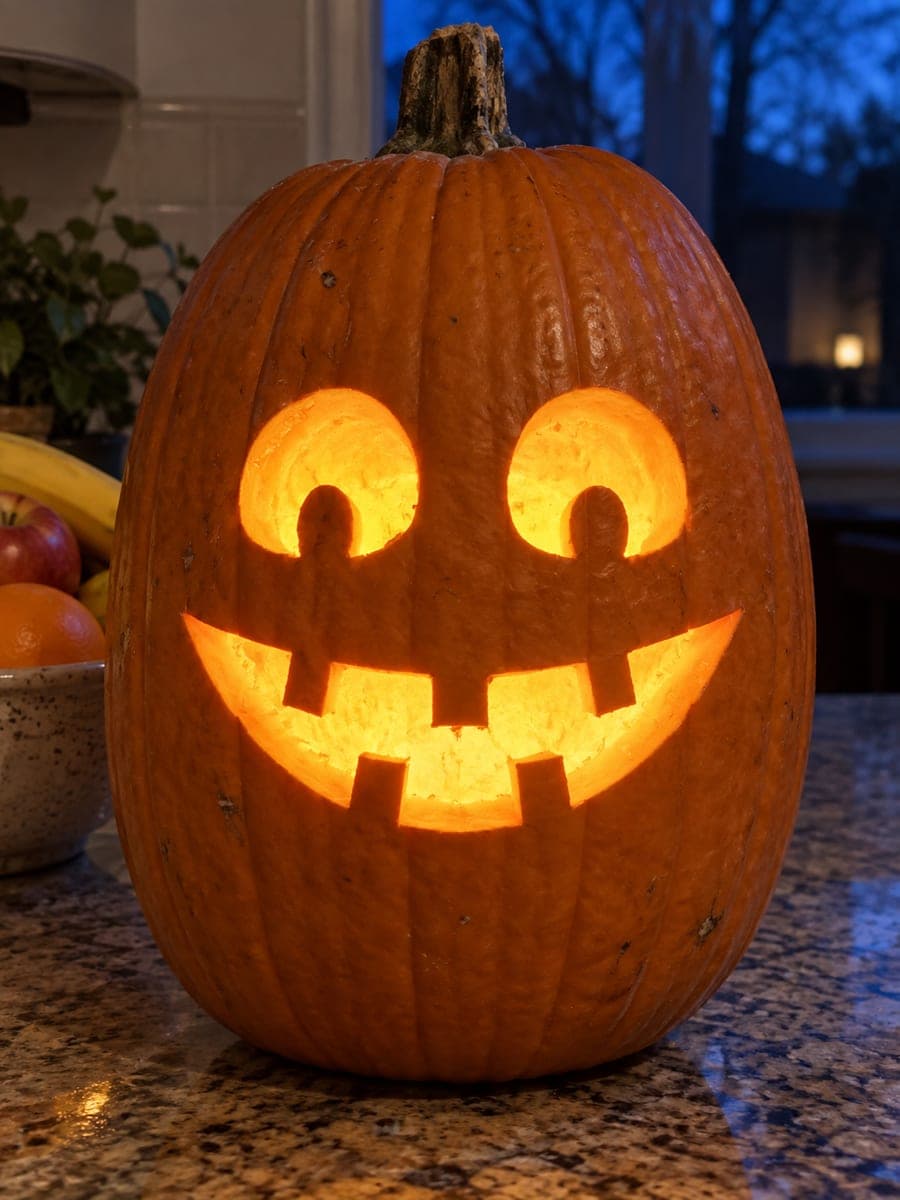
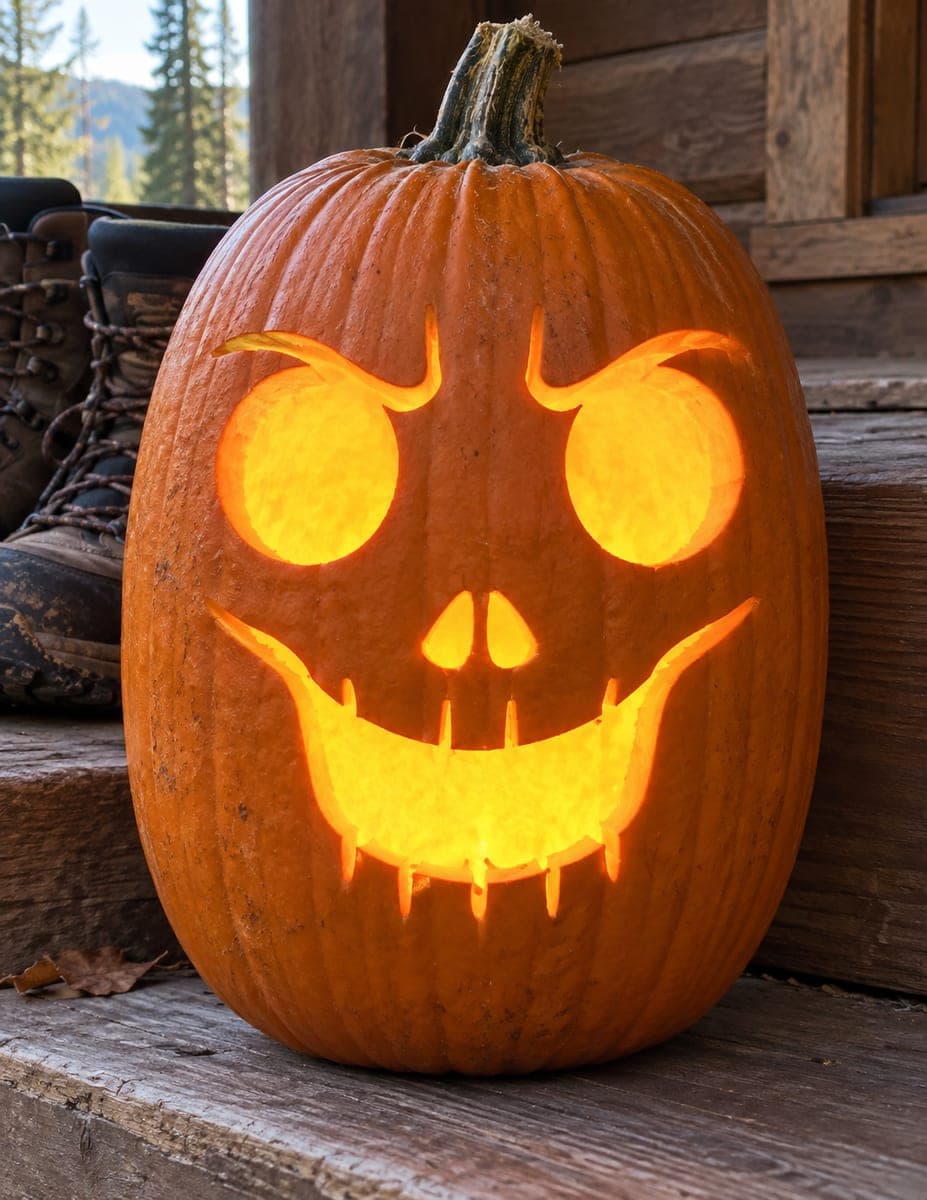
Two tall oval eyes each hold a small preserved-skin island at their base that acts as a pupil, and below a small triangular nose a wide curved smile shows two rectangular front teeth. The overall expression on this jack-o-lantern is friendly and slightly excited, making it a great easy pumpkin carving idea for families. Because the oval eyes are tall, choose a pumpkin with enough vertical face area between the top rib and the mouth line; at least four inches of clear skin ensures the eyes look proportional. Lighting from inside with a warm candle makes the skin-island pupils cast faint shadows that add life to the gaze.

This is an AI-generated concept image: a realistic, carvable design idea rather than a photo of a finished carve. AI concepts are always labeled and sit out the leaderboard and the contest.


No ratings yet · Sign in to rate

Comments (0)

  • No comments yet — be the first.

Save without an account. Sign in to like or comment.

Our tips for carving a similar design

The core trick here is leaving a small island of skin at the base of each tall oval eye so it reads as a pupil while everything around it glows. Everything else is straightforward cutout work: two teardrop eyes, a little triangle nose, and a wide smile broken by two square teeth. Plan your cuts so the eye islands and the mouth teeth stay connected to the surrounding shell.

Written by PumpkinCarvingIdeas.com, inspired by the image above. These are our suggestions, not instructions from the uploader. This approach to the AI concept has not been tested on a real pumpkin.

From pumpkin to porch

  1. Pick the pumpkin and plan the face

    Choose a tall, fairly smooth pumpkin with at least four inches of clear skin between the top ribs and where the smile will sit, so the long oval eyes look proportional. Wipe the face flat area clean and dry it. Sketch the layout in pencil first: two tall ovals up top, a small triangle nose in the center, and a wide curving smile below. Step back and check that the spacing looks balanced before you commit.

  2. Open a lid and clean out

    An adult should cut a lid at the back of the pumpkin rather than the top so the handsome stem stays intact and the front is unbroken. Angle the cut inward so the lid rests without falling in. Scoop out the seeds and scrape the front interior wall down to about one inch thick with a sturdy spoon or a loop tool. A thinner wall makes carving the fine details much easier.

  3. Mark the eye pupil islands

    Draw each eye as a tall oval, then draw a small vertical sliver near the bottom of each oval that you will NOT cut. That untouched sliver becomes the pupil island that keeps its skin. Outline it clearly in pen so you remember to carve around it. Do the same mental note for the two teeth in the smile.

  4. Cut the small details first

    Start with the smallest, safest shapes: the triangle nose, then the eyes. Carve the eye ovals in short controlled strokes, keeping the pupil sliver attached at both top and bottom so it does not pop out. Use a poke tool or fine saw for the tight curve at the base of each teardrop eye. Cutting these before the big mouth keeps the shell rigid while you work.

  5. Carve the smile last

    Save the wide curved mouth for last since it is the largest opening. Cut the two rectangular front teeth by leaving two square bridges of skin standing in the smile gap, connected top and bottom. Work slowly along the long curve and support the shell with your free hand. Removing this much material last keeps the face from flexing while you carve everything else.

  6. Light it and photograph

    Drop in a battery LED tealight or a small LED puck rather than a candle, which is safer and will not scorch the pupil islands. Turn it on in a dark room and check that the eyes and mouth glow evenly. If the pupils or teeth look too dark, gently shave the inside of those skin areas thinner from behind for a faint glow. Set it out at dusk and shoot from slightly below for the friendliest expression.

Gather your supplies

Check things off as you get ready.

Work on a stable surface, keep your free hand out of the cutting path, and have an adult handle sharp tools.

Three levels of light

  • Leave intact

    The pupil slivers inside each eye and the two front teeth in the smile stay as untouched skin so they read dark against the glow.

  • Peel & shade

    Shave the back of the pupil islands and teeth thin if you want them to give off a faint orange shadow instead of full black.

  • Cut through

    The two tall oval eyes, the triangle nose, and the wide smile are cut all the way through for the brightest light.

Learn the carving basics

Before you start cutting

How do I keep the pupil islands from falling out?

Leave each pupil as a narrow strip of skin that stays connected at both the top and bottom of the eye oval, not floating free. As long as it is anchored at both ends it will hold firmly. Carve the oval around it in small strokes rather than one big pull.

What size pumpkin works best for tall oval eyes?

Pick a taller pumpkin with a generous flat face and at least four inches of clear skin between the top ribs and the mouth line. That vertical room is what lets the long teardrop eyes look proportional instead of cramped. A rounder, squat pumpkin will make the eyes feel squished.

Can beginners handle the two front teeth?

Yes, the teeth are just two skin bridges you leave standing in the middle of the smile. Cut the mouth opening on either side of them and they appear on their own. Keep each tooth connected at the top and bottom of the smile curve so they stay strong.

Your take belongs here, too.

Changed a detail? Made it simpler? Share a photo of your version and tell the community what worked.

Share your pumpkin

More pumpkins like this

You've reached the end · 8 pumpkins
The Patch Report

Fresh pumpkins, in your inbox.

The best new carvings, ideas worth stealing, and how-tos for carving season. Short, seasonal, and gone by November.

A short email during carving season. Unsubscribe anytime. See our privacy policy.