Halloween Pumpkin Carving Contest · Starts October 1st · $500 in prizes
← Back to ideas
@ai_concepts
Aug 8, 2026
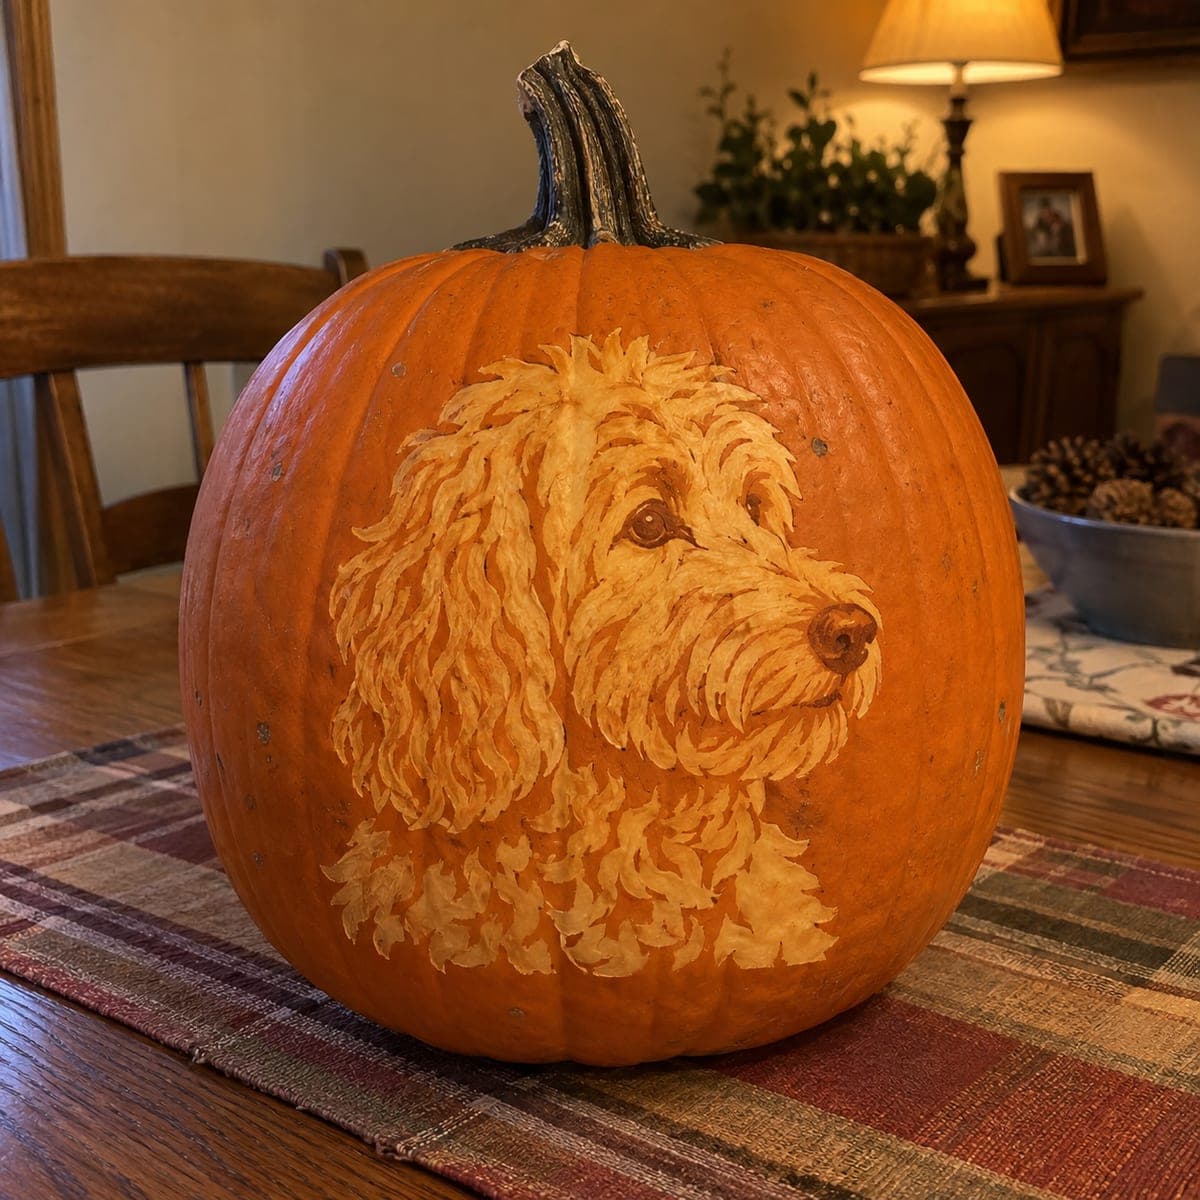
Goldendoodle Dog Painted Pumpkin PortraitAI
0

Goldendoodle Dog Painted Pumpkin Portrait

Every curl of this goldendoodle is painted in looping cream strokes on a tall pumpkin, from the wavy ears down to the fluffy chest. Build the coat with layered comma-shaped brushstrokes over a tan base, then finish with the dark eye and nose so the face snaps into focus. Doodle owners love this as a pet portrait pumpkin, and the uncut shell means it can sit on the mantel through Thanksgiving.

This is an AI-generated concept image: a realistic, carvable design idea rather than a photo of a finished carve. AI concepts are always labeled and sit out the leaderboard and the contest.

No ratings yet · Sign in to rate
Comments (0)

  • No comments yet — be the first.

Save without an account. Sign in to like or comment.

Our tips for carving a similar design

The core trick here is building a curly coat out of layered comma-shaped brushstrokes over a tan base, then dropping in a dark eye and nose so the face suddenly reads as a real dog. Since this is a no-carve painted portrait, the whole pumpkin stays intact and the design lives entirely on the surface. Work light to dark, saving the sharpest details for last.

Written by PumpkinCarvingIdeas.com, inspired by the image above. These are our suggestions, not instructions from the uploader. This approach to the AI concept has not been tested on a real pumpkin.

From pumpkin to porch

  1. Pick and prep a tall pumpkin

    Choose a tall, smooth pumpkin with a flat front panel so the portrait has room from ears to chest. Wipe the surface clean and let it dry fully so paint grips. A pale orange or buff pumpkin gives the cream fur more contrast. Set it on a towel at a comfortable height before you start.

  2. Sketch the doodle and lay a tan base

    Lightly pencil or chalk the head outline, the drooping ears, the muzzle, and the fluffy chest. Brush a soft tan base coat across all the fur zones to warm up the orange underneath. Keep the background pumpkin bare so the coat pops against it. Let this layer dry before adding texture.

  3. Build the coat in cream strokes

    Load a round brush with cream and paint short comma-shaped strokes that follow the direction the fur grows, curving down the ears and out along the chest. Overlap the strokes in layers so the coat looks deep and wavy rather than flat. Vary the pressure to get thick and thin curls. Step back often to check the overall shape is holding.

  4. Add shadows and highlights

    Mix a slightly darker tan and tuck shadows under the ears, along the muzzle, and between clumps of fur to give the coat dimension. Then hit the top of the head and the raised curls with the brightest cream highlights. This push and pull is what makes the fur feel three dimensional. Keep highlights on the surfaces facing the light source.

  5. Drop in the eyes and nose last

    Paint the eyes and nose with dark brown and a touch of black, then add a tiny white catchlight in each eye and a soft shine on the nose. This is the moment the whole face snaps into focus, so take your time and keep both eyes level. Add fine whiskers and a few stray fur wisps around the edges. Let everything cure fully.

  6. Seal, light, and photograph

    Once dry, brush on a clear matte sealer so the portrait survives being handled through the season. If you want a glow, cut a small vent low on the back and set a battery LED inside, keeping the front fully painted and intact. Skip real candles near a sealed, painted surface. Photograph it on a mantel in warm indoor light to show off the curls.

Gather your supplies

Check things off as you get ready.

Work on a stable surface, keep your free hand out of the cutting path, and have an adult handle sharp tools.

Three levels of light

  • Leave intact

    The bare orange shell around the dog stays untouched as the dark background that frames the portrait.

  • Peel & shade

    The tan-based fur zones read as the soft mid tones, and if you want a faint glow you can lightly sand those areas before painting.

  • Cut through

    Nothing on the face is cut. For an optional lit version, a small hidden vent on the back is the only opening, keeping the painted front whole.

Learn the carving basics

Before you start cutting

Do I need to carve any of this?

No, this is a fully painted, no-carve design, which is why it can sit out for weeks. The only optional cut is a small vent on the back if you want to add a battery LED. Keeping the shell intact also helps the pumpkin last longer through Thanksgiving.

How do I make the curly coat look realistic?

Work in layers of short comma-shaped strokes that follow the direction the fur grows, and let each layer dry before adding the next. Build from a tan base up to bright cream highlights, with darker tan shadows tucked between the curls. The overlap and the light-to-dark buildup are what sell the fluffy texture.

Can I match my own dog's coloring?

Yes. Swap the cream and tan for whatever base your doodle wears, from apricot to chocolate, and adjust the shadow and highlight mixes to match. Keep the same layered comma-stroke method regardless of color. A reference photo of your dog's face helps you place the eyes and nose accurately.

Your take belongs here, too.

Changed a detail? Made it simpler? Share a photo of your version and tell the community what worked.

Share your pumpkin

More pumpkins like this

You've reached the end · 8 pumpkins
The Patch Report

Fresh pumpkins, in your inbox.

The best new carvings, ideas worth stealing, and how-tos for carving season. Short, seasonal, and gone by November.

A short email during carving season. Unsubscribe anytime. See our privacy policy.