Halloween Pumpkin Carving Contest · Starts October 1st · $500 in prizes
← Back to ideas
@ai_concepts
Jul 31, 2026
Happy Corgi Shading Carving on Garden Bench PumpkinAI
0

Happy Corgi Shading Carving on Garden Bench Pumpkin

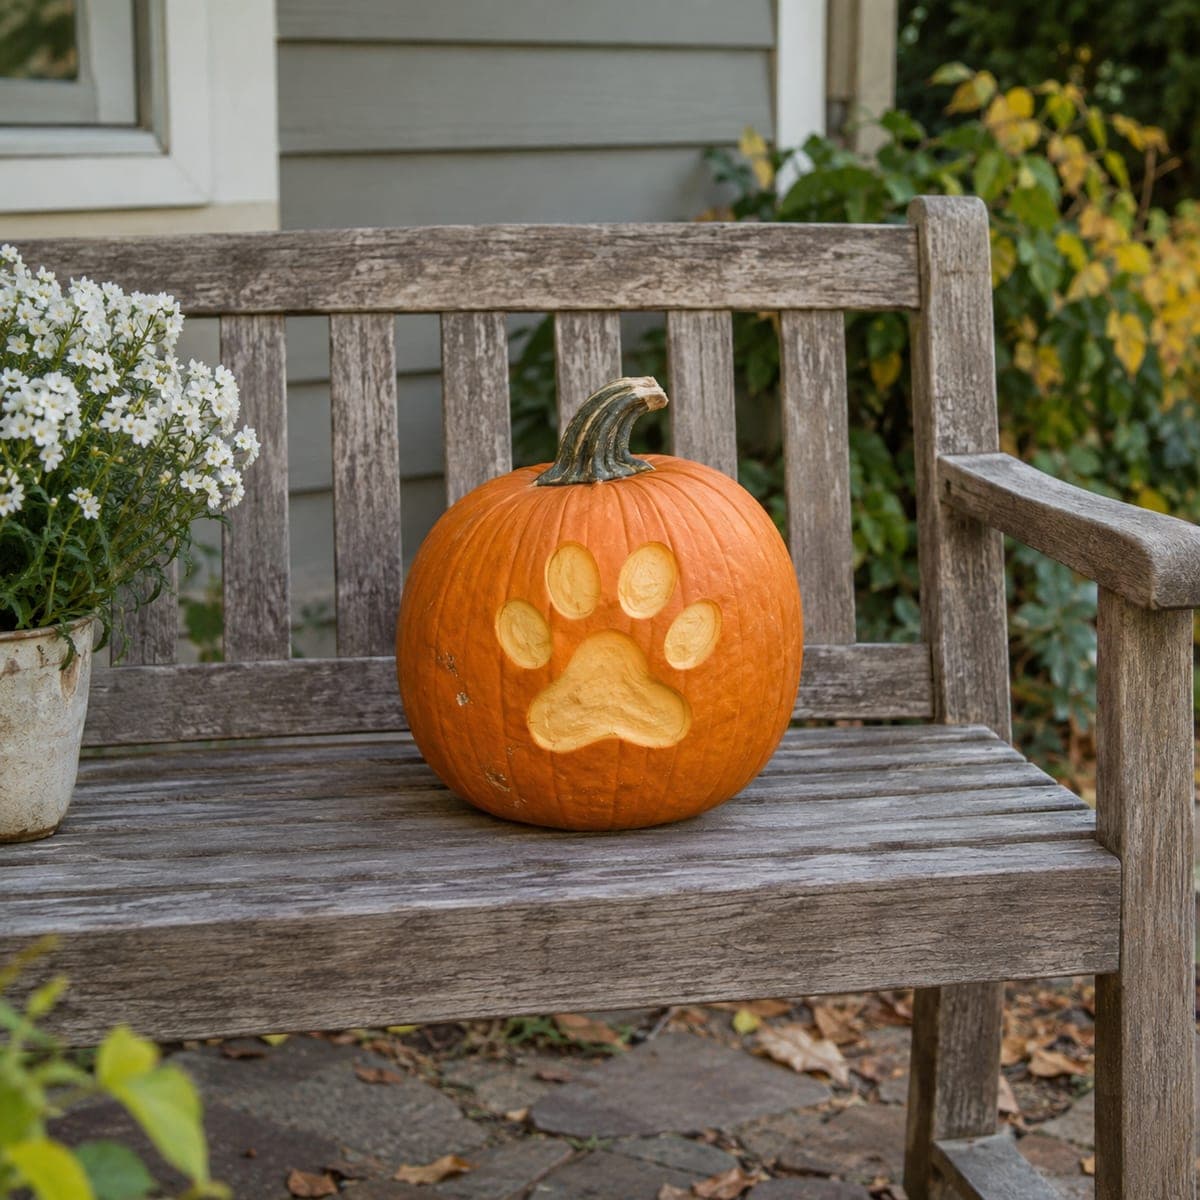
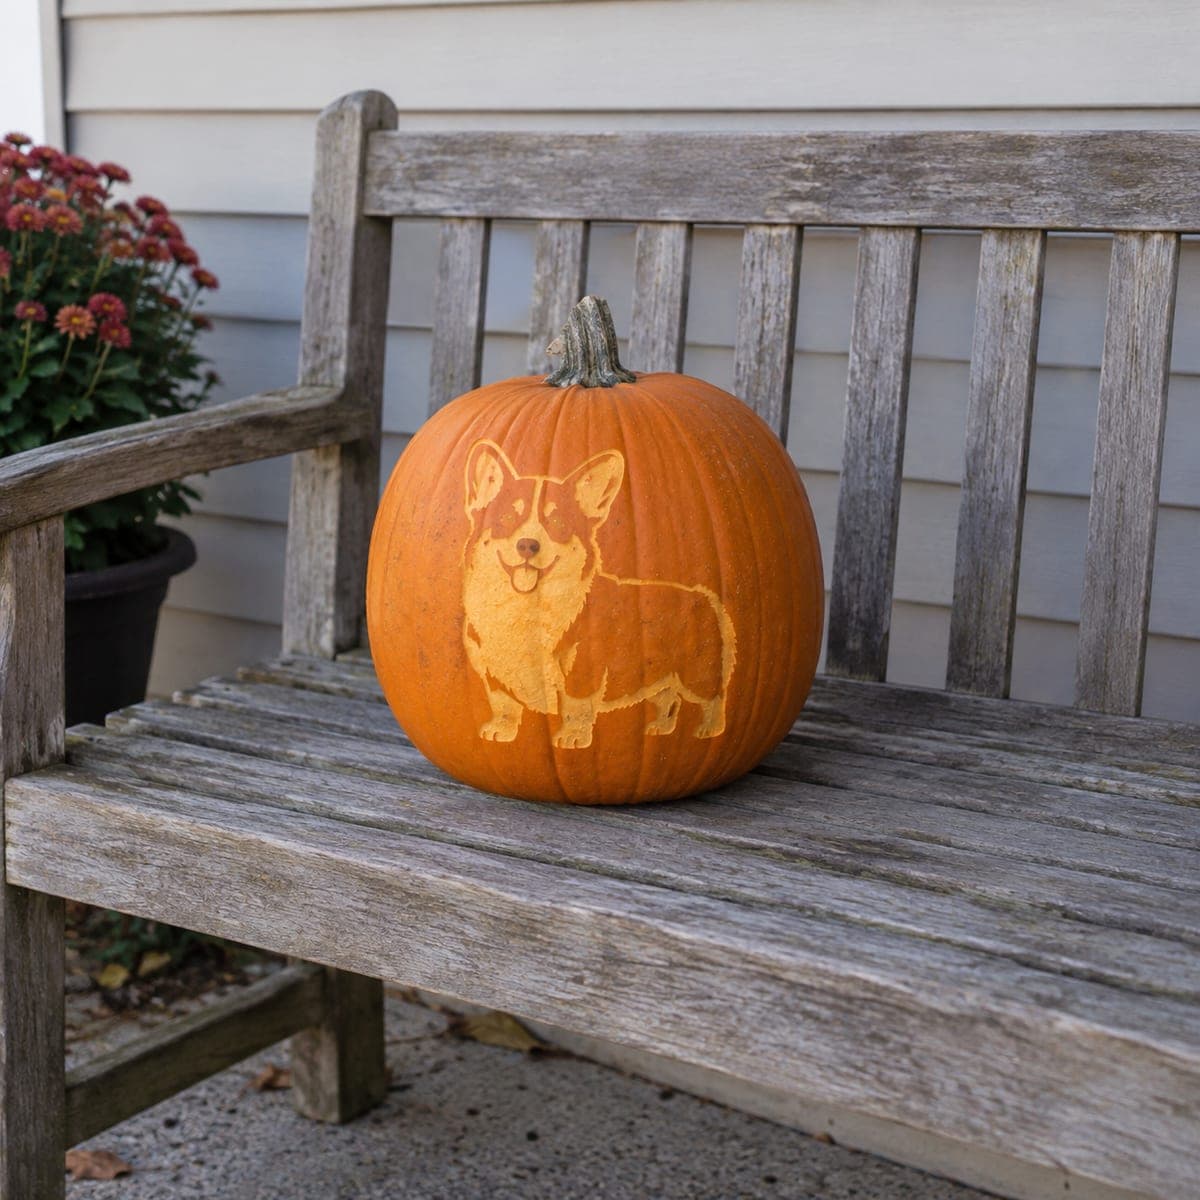
A smiling full-body Corgi with perky ears and a fluffy backside is etched in surface shading across this pumpkin, the shallow carving capturing the breed's compact, cheerful shape without any cutouts. The design is daytime-friendly and pairs beautifully with a front-porch bench setting. Apply petroleum jelly to the carved surface after finishing to slow oxidation and keep the pale etched area bright for longer display.

This is an AI-generated concept image: a realistic, carvable design idea rather than a photo of a finished carve. AI concepts are always labeled and sit out the leaderboard and the contest.

No ratings yet · Sign in to rate
Comments (0)

  • No comments yet — be the first.

Save without an account. Sign in to like or comment.

Our tips for carving a similar design

The whole trick here is depth of shaving, not cutting. You remove only the outer skin at different depths to build a full-body Corgi, so a pale glow reads as the dog against the untouched orange background. Because there are no openings, the design shows off beautifully in daylight and needs a lens light only for a soft evening glow.

Written by PumpkinCarvingIdeas.com, inspired by the image above. These are our suggestions, not instructions from the uploader. This approach to the AI concept has not been tested on a real pumpkin.

From pumpkin to porch

  1. Pick a smooth, flat-faced pumpkin

    Look for a pumpkin with a broad, even panel on one side and few deep ribs, since shading needs a clean canvas. A firm, unblemished wall holds fine detail better than a soft or bruised one. Wipe the surface dry and set the stem side up. This design keeps the top intact, so there is no lid to cut.

  2. Transfer the Corgi outline

    Tape your Corgi stencil onto the flat area and trace the main outline, the ears, face, legs, and fluffy rear with a poking tool or transfer paper. Mark separate shaded zones lightly so you know where the dog will be lightest and where it stays medium. Take a photo of the stencil first so you can check details after you remove the paper. Keep the lines shallow, they are just a map.

  3. Scrape the body to a mid tone

    Using a ribbon or loop tool, shave off just the top skin across the whole Corgi shape to expose the pale layer underneath. Keep the pressure light and even so the body reads as one soft glow. Work in small strokes and stop often to check the shape against your photo. This mid layer is your base for the whole dog.

  4. Deepen the bright accents

    Go back over the belly, chest, muzzle, and the fluffy backside and scrape a little deeper so those areas turn lighter and thinner. The deeper you go, the more light passes through, which is what makes the fur look soft. Leave the ear tips, the eye patches, and the outline slightly higher so they stay darker for contrast. Do not carve all the way through anywhere.

  5. Refine the face and edges

    With a small detail tool, tidy the smiling mouth, the tongue, the nose, and the crisp line where the dog meets the background. Clean, confident edges are what make a shaded carving pop. Brush away pulp dust with a dry paintbrush so you can judge the tones honestly. Adults should handle the sharp detail tools throughout.

  6. Preserve and photograph

    Rub a thin coat of petroleum jelly over the entire carved area to slow drying and keep the pale etch bright. Set the pumpkin on a porch bench in daylight for its best look, or tuck a battery LED behind or beside it for a gentle evening glow. Never use a candle, since a shaded pumpkin has no vent hole. Reapply jelly daily to stretch the display life.

Gather your supplies

Check things off as you get ready.

Work on a stable surface, keep your free hand out of the cutting path, and have an adult handle sharp tools.

Three levels of light

  • Leave intact

    The surrounding pumpkin skin and the dark ear tips and eye patches stay untouched and orange.

  • Peel & shade

    The main Corgi body, head, and legs are skin-peeled to a soft mid glow.

  • Cut through

    Nothing is cut through; the brightest areas are the deeply scraped belly, chest, muzzle, and fluffy rear.

Learn the carving basics

Before you start cutting

Do I need to cut any holes for this design?

No, this is a pure shading carving with no openings. All the contrast comes from scraping the skin at different depths. That also means it is sturdy and looks great in daylight.

How do I get the fluffy fur to look soft?

Vary your scraping depth instead of aiming for hard lines. Shave the fluffy backside and chest a touch deeper so they glow paler, and leave slight ridges where fur tufts overlap. Short, light strokes read more like fur than long flat sweeps.

How long will a shaded Corgi stay bright?

Shaded areas dry and darken faster than the skin, so plan to display it within a few days. Coating the carved surface with petroleum jelly and reapplying daily slows the browning. Keeping it cool and out of direct sun overnight helps too.

Your take belongs here, too.

Changed a detail? Made it simpler? Share a photo of your version and tell the community what worked.

Share your pumpkin

More pumpkins like this

You've reached the end · 8 pumpkins
The Patch Report

Fresh pumpkins, in your inbox.

The best new carvings, ideas worth stealing, and how-tos for carving season. Short, seasonal, and gone by November.

A short email during carving season. Unsubscribe anytime. See our privacy policy.