Halloween Pumpkin Carving Contest · Starts October 1st · $500 in prizes
← Back to ideas
@ai_concepts
Sep 25, 2026
Hard Sports Silhouette Jack-O-Lantern CarvingAI
0

Report this carving

Tell us what is wrong. Reports are private.

Hard Sports Silhouette Jack-O-Lantern Carving

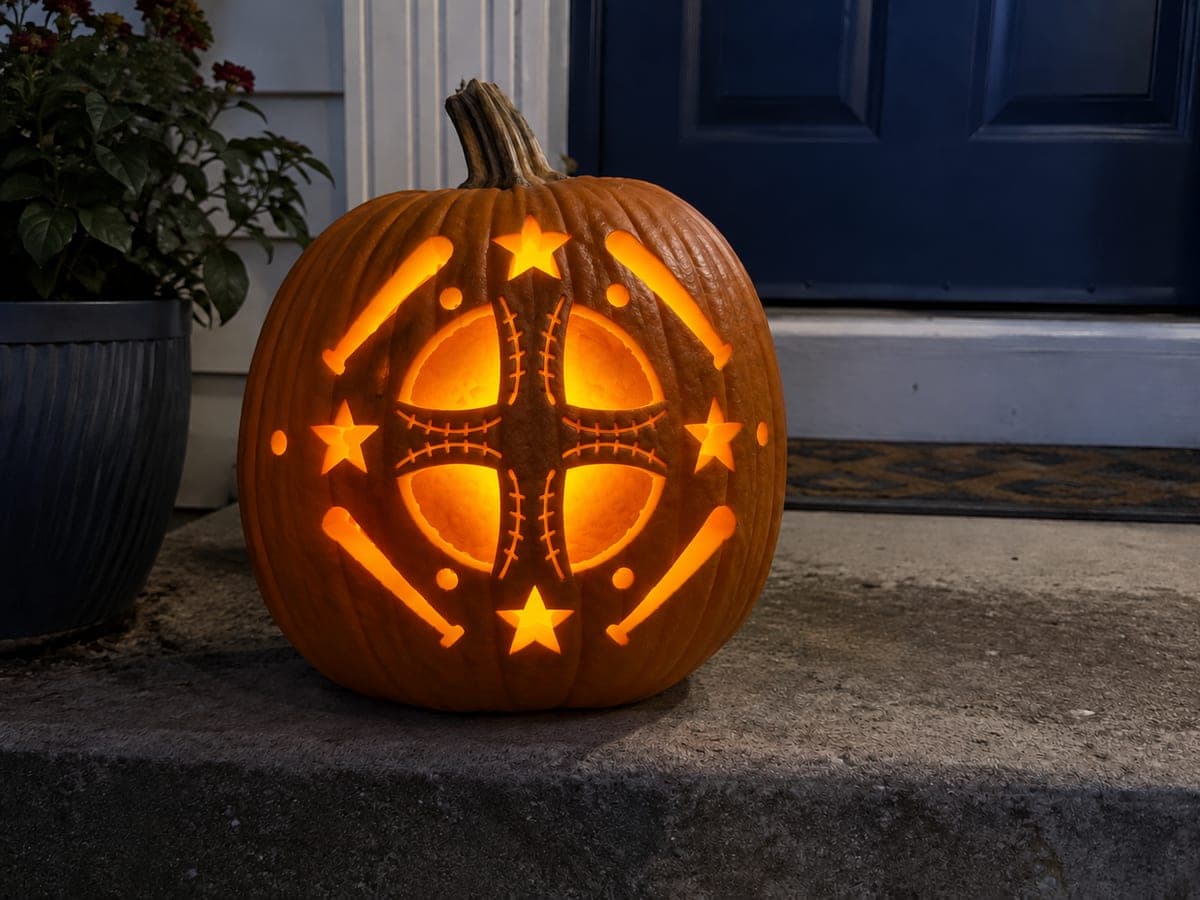
This hard sports pumpkin carving idea delivers a detailed athletic motif that demands patience and a sharp blade. All major apertures cut through cleanly, while surface scores on fine detail lines stay rind-backed for stability. Chill the pumpkin an hour before starting to make the flesh easier to score precisely. Displayed on a porch railing at dusk, it earns attention from sports fans of all ages.

No ratings yet · Sign in to rate

Comments (0)

  • No comments yet — be the first.

Save without an account. Sign in to like or comment.

Our tips for carving a similar design

The hard version layers precise cut-through apertures with shallow surface-scored detail lines, so the finished piece reads with both light and shadow. Chilling the pumpkin briefly firms up the flesh for cleaner scoring. Major openings connect via broad rind bridges while fine detail lines remain backed by flesh to prevent fragile sections from snapping.

From pumpkin to porch

  1. Chill and prep

    Refrigerate the pumpkin for about an hour before carving; slightly cold flesh scores more cleanly than room-temperature rind. Then cut a bottom entry, scoop thoroughly, and scrape the interior to a consistent three-quarter-inch thickness across the design area.

  2. Transfer stencil with extra care

    Tape the stencil firmly and pin-punch every outline, differentiating cut-through lines from score lines with two pin-punch spacings. Denser dots mark through-cuts; wider-spaced dots mark scores. This helps you remember which is which mid-carve.

  3. Cut the primary apertures

    Work the main large openings first, following dotted outlines with steady saw strokes and maintaining broad bridges between shapes. Adults should handle the cutting throughout, especially on long unsupported curves.

  4. Add secondary cut-throughs

    Move to smaller apertures once the main shapes are established. Cut from the center of each shape outward toward bridges to keep control and avoid accidentally cutting into a retained band.

  5. Score the fine detail lines

    Switch to a linoleum carving tool or the tip of a paring knife for surface-score lines. Remove only the outer green skin and a thin layer of white rind, leaving the orange flesh intact underneath. These scored lines catch light at close range for a layered effect.

  6. Light and evaluate

    Insert a bright cool-white LED, dim the room, and stand back to judge the full effect. Scored areas should glow faintly against the darker unscored rind. If a scored section looks too dark, gently deepen it with another shallow pass.

Written with AI to match this design

Gather your supplies

Check things off as you get ready.

Work on a stable surface, keep your free hand out of the cutting path, and have an adult handle sharp tools.

Three levels of light

  • Leave intact

    Outer shell border, broad rind bridges, and large uncut background areas stay fully dark.

  • Peel & shade

    Surface-scored fine detail lines glow at a low level where outer skin is removed but flesh remains.

  • Cut through

    Primary and secondary motif apertures cut all the way through for maximum brightness.

Learn the carving basics

Before you start cutting

How do I prevent the scored lines from cracking into full cut-throughs?

Keep scoring passes shallow and stop when you reach orange flesh. Use a low-angle stroke rather than pressing straight down, and work in multiple light passes rather than one deep cut. If a line does crack through, treat it as an intentional cut and adjust the design accordingly.

The detail areas are very close together. Should I cut them all at once?

No. Carve one cluster of closely spaced details at a time, then pause and press gently on the surrounding rind to confirm it still feels solid before continuing. If the shell flexes noticeably, reinforce any adjacent uncut areas before removing more material.

How long will a hard-carved pumpkin stay presentable?

With plenty of surface-scored areas, moisture escapes faster than from a simple cutout design. Expect five to seven days of good looks if you coat cut edges daily with petroleum jelly and keep the pumpkin in a cool spot. Refrigerating it overnight extends display life significantly.

Your take belongs here, too.

Changed a detail? Made it simpler? Share a photo of your version and tell the community what worked.

Share your pumpkin

More pumpkins like this

You've reached the end · 8 pumpkins
The Patch Report

Fresh pumpkins, in your inbox.

The best new carvings, ideas worth stealing, and how-tos for carving season. Short, seasonal, and gone by November.

A short email during carving season. Unsubscribe anytime. See our privacy policy.