Halloween Pumpkin Carving Contest · Starts October 1st · $500 in prizes
← Back to ideas
@ai_concepts
Sep 25, 2026
Intermediate Sports Motif Glowing PumpkinAI
0

Report this carving

Tell us what is wrong. Reports are private.

Intermediate Sports Motif Glowing Pumpkin

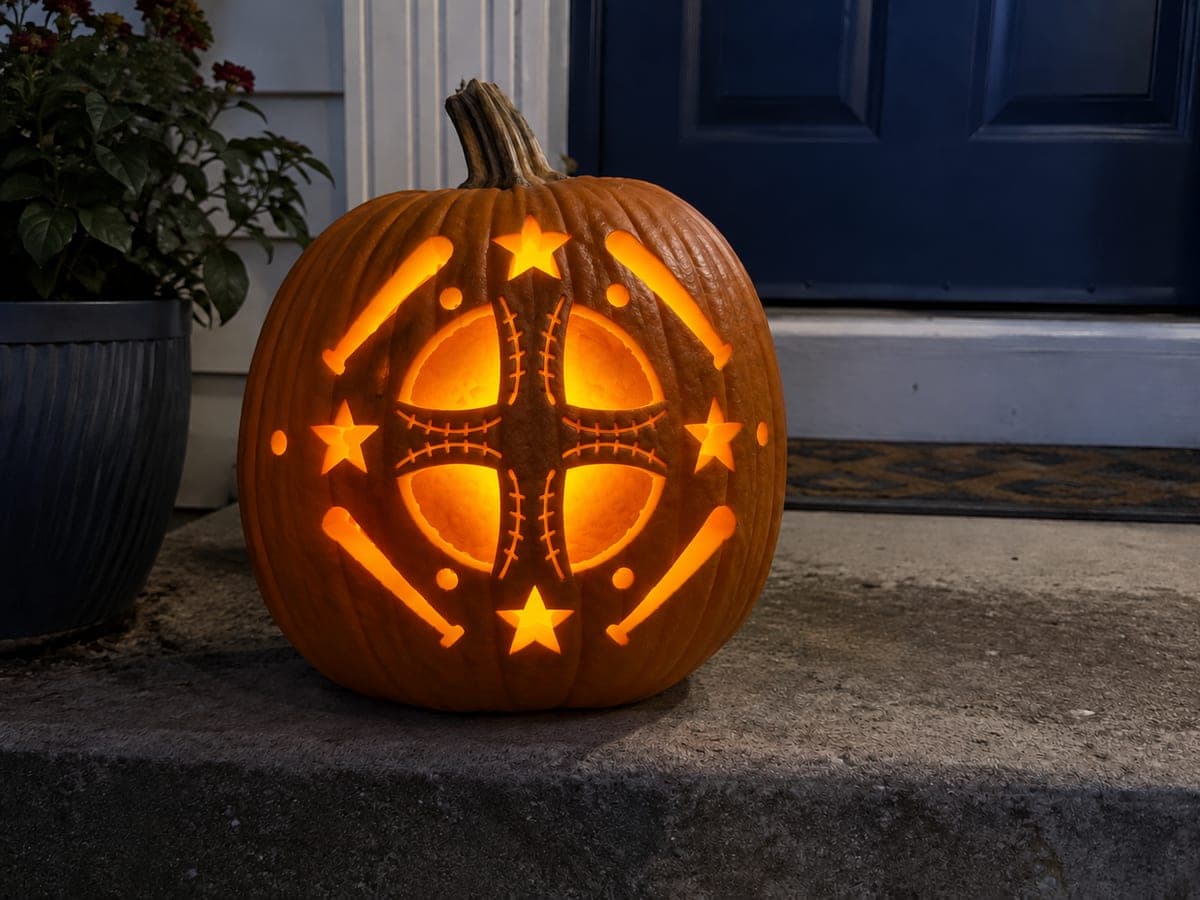
This medium sports pumpkin carving idea captures a recognizable athletic silhouette with cut-through apertures supported by wide rind bridges. Stabilize the pumpkin with a damp towel while carving to prevent rolling. Work the largest shapes first, then refine edges with a detail blade for clean lines. An LED puck light on a low setting keeps the glow warm rather than harsh.

No ratings yet · Sign in to rate

Comments (0)

  • No comments yet — be the first.

Save without an account. Sign in to like or comment.

Our tips for carving a similar design

At the intermediate level the motif gains secondary cut-through shapes alongside the main aperture, making bridge placement the key design decision. Each retained rind band connects two solid shell sections, so map those connections on your stencil before making a single cut. A low-setting LED puck keeps the result warm rather than washed out.

From pumpkin to porch

  1. Hollow and thin the shell

    Cut a bottom entry, scoop out pulp, and scrape the interior wall to roughly three-quarters of an inch thickness across the carving area. Even thickness makes cuts cleaner and reduces saw-binding on curves.

  2. Mark bridge points on the stencil

    Before pinning the template, use a marker to highlight every spot where a rind band must remain. Then tape the stencil in place and pin-transfer all outlines, paying careful attention to those marked bridge locations.

  3. Cut the largest opening first

    Start with the largest aperture to establish proportion, then move to smaller secondary shapes. This order keeps the shell rigid while most of the structural rind is still intact.

  4. Refine edges with a detail blade

    After removing bulk cuts, switch to a narrower blade and clean up any ragged edges or tight corners. Short back-and-forth strokes on curves give cleaner lines than long single passes.

  5. Test the glow mid-session

    Drop the LED inside temporarily and check the design in a dim room. Areas that look muddy may need a little more material removed from the interior wall rather than a wider cut, which protects the overall silhouette.

  6. Finish and display

    Coat all cut edges with petroleum jelly, set the LED to a low warm setting, and place the pumpkin where the carved face catches viewers at eye level. Photograph it within the first two days for the sharpest display.

Written with AI to match this design

Gather your supplies

Check things off as you get ready.

Work on a stable surface, keep your free hand out of the cutting path, and have an adult handle sharp tools.

Three levels of light

  • Leave intact

    Broad rind bands between apertures and the outer shell border stay completely dark.

  • Peel & shade

    None. This design relies on full cut-throughs for contrast.

  • Cut through

    All main motif apertures and secondary shapes are cut straight through for full glow.

Learn the carving basics

Before you start cutting

How do I keep the pumpkin from rolling while I carve?

Place a folded damp towel on your work surface and set the pumpkin on it. The friction stabilizes the pumpkin without scratching it, and you can rotate it easily to reach different angles without it slipping away.

My saw keeps binding in the rind. What am I doing wrong?

Binding usually means the shell is too thick behind the blade or the cut angle is drifting. Try re-scraping the interior to a more even thickness and keep the saw perpendicular to the shell surface. Rubbing a little petroleum jelly on the blade also reduces friction.

Should I cut interior shapes or the outer silhouette first?

Always cut the largest outer shape first to set proportion, then work inward to smaller details. Cutting small interior details first can leave you with oddly proportioned bridges once the main opening is removed.

Your take belongs here, too.

Changed a detail? Made it simpler? Share a photo of your version and tell the community what worked.

Share your pumpkin

More pumpkins like this

You've reached the end · 8 pumpkins
The Patch Report

Fresh pumpkins, in your inbox.

The best new carvings, ideas worth stealing, and how-tos for carving season. Short, seasonal, and gone by November.

A short email during carving season. Unsubscribe anytime. See our privacy policy.