Halloween Pumpkin Carving Contest · Starts October 1st · $500 in prizes
← Back to ideas
@ai_concepts
Sep 25, 2026
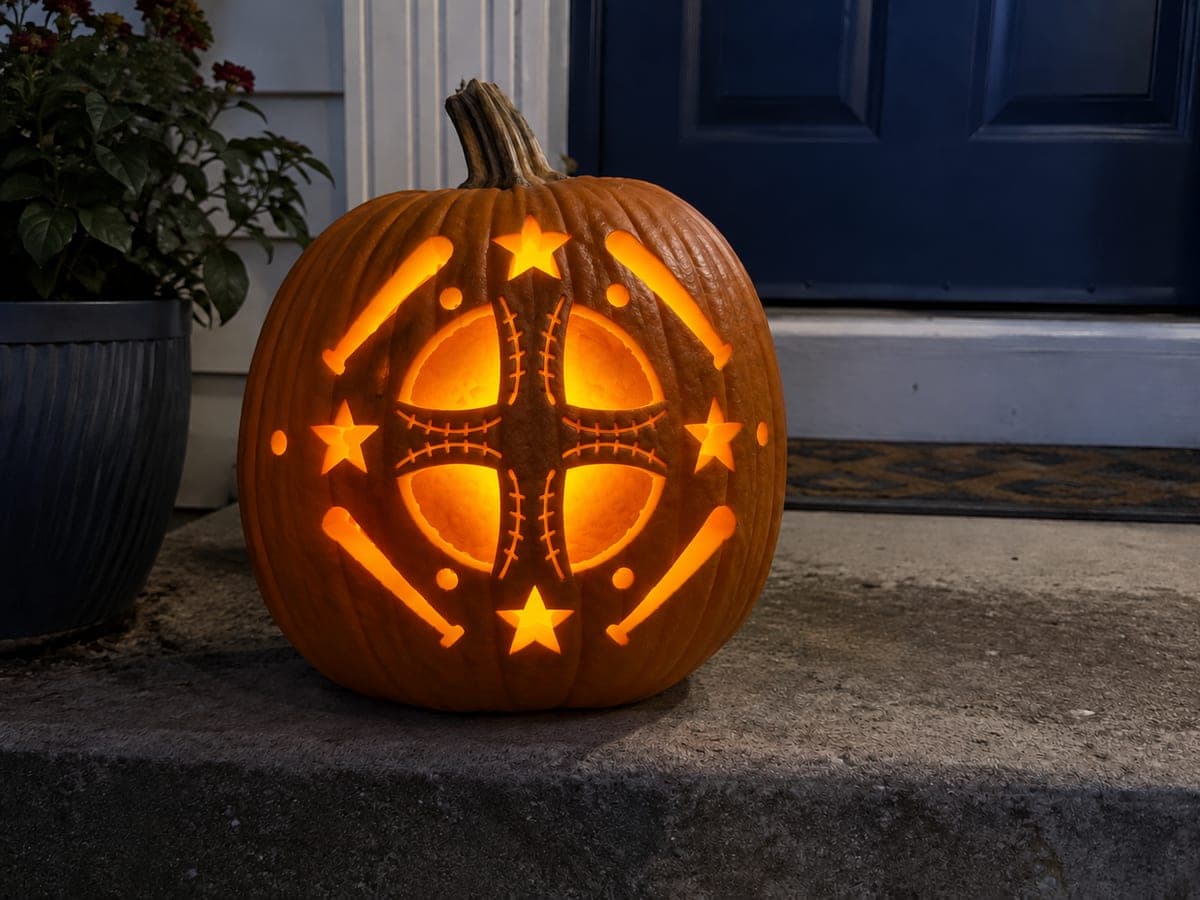
Expert Baseball Stitch and Diamond Pumpkin CarvingAI
0

Report this carving

Tell us what is wrong. Reports are private.

Expert Baseball Stitch and Diamond Pumpkin Carving

Precise stitch apertures, a diamond infield outline, and a full ball silhouette combine for an expert-level baseball pumpkin carving idea. All stitch holes cut through cleanly while the outer ball circle and diamond lines remain as shallow-scored grooves backed by rind. Cut each stitch hole individually with a small punch blade, working around both arcs evenly so the design stays balanced. Photographed at night, the intricate stitch pattern is a showstopper for any baseball household.

No ratings yet · Sign in to rate

Comments (0)

  • No comments yet — be the first.

Save without an account. Sign in to like or comment.

Our tips for carving a similar design

Each individual stitch hole is cut through as a tiny aperture, the outer ball circle is a full cut-through, and the diamond infield and outer seam curves are shallow-scored grooves that provide visual structure without weakening the shell further. Cutting all stitch holes individually requires patience and a punch blade, working both arcs evenly so the design stays balanced side to side.

From pumpkin to porch

  1. Map every stitch hole before transferring

    Count the stitch holes in your stencil and confirm all are spaced at least a quarter inch apart and from adjacent design lines. If any overlap with the scored seam curves, shift them slightly on the stencil print before transferring to the pumpkin.

  2. Hollow and calibrate

    Cut a bottom entry, scoop completely, and use a skewer to confirm wall thickness at multiple points across the design zone. Three-quarter-inch uniformly is the target. Thin spots near stitch holes may require a controlled interior scrape before cutting.

  3. Transfer with three pin spacings

    Dense spacing for the ball circle and each stitch hole aperture; medium spacing for any bat or decorative element cuts; sparse spacing for score-only lines including the diamond and seam arcs. Remove the stencil and review each zone under bright light before cutting.

  4. Cut the outer ball circle

    Remove the main ball aperture first with a medium saw to establish the circular boundary. All stitch holes must remain inside this circle, so confirm none of your pin dots for stitches stray outside the ball outline.

  5. Cut each stitch hole individually

    Use a small punch blade or very fine detail blade for each stitch hole. Enter from the center of the hole and work outward to its edges. Work around both arcs evenly, alternating left and right sides, to keep the design balanced as material is removed.

  6. Score diamond and seam arcs

    Score the diamond infield outline and outer seam arcs with a V-tool in single steady strokes. These lines frame the stitch-hole arcs without competing with the cut-through brightness. Apply petroleum jelly to all surfaces, install a cool white LED, and photograph at night.

Written with AI to match this design

Gather your supplies

Check things off as you get ready.

Work on a stable surface, keep your free hand out of the cutting path, and have an adult handle sharp tools.

Three levels of light

  • Leave intact

    Rind between stitch holes, outer ball border, and unscored background stay completely dark.

  • Peel & shade

    Scored diamond outline and seam arcs glow faintly.

  • Cut through

    Outer ball circle and every individual stitch hole cut completely through.

Learn the carving basics

Before you start cutting

There are many stitch holes very close together. How do I prevent rind crumbling between them?

Keep a quarter inch of rind between adjacent holes and between any hole and the scored seam line. Cut each hole fully before moving to the next rather than partially cutting multiple holes in sequence, because partial cuts leave rind in a stressed state that is more prone to crumbling.

How do I keep the two arcs of stitch holes looking symmetrical?

Work alternately: cut one hole on the left arc, then cut the corresponding hole on the right arc, and repeat. This alternating pattern prevents one arc from becoming significantly more advanced than the other and catches any symmetry errors early while correction is still easy.

The diamond infield outline: should it be scored inside the ball circle or does it extend outside?

The diamond should be scored entirely inside the ball circle so it reads as the infield diamond on a baseball field, contained within the ball. If the score line extends outside the circle it becomes a separate design element that confuses the overall read of the pumpkin.

Your take belongs here, too.

Changed a detail? Made it simpler? Share a photo of your version and tell the community what worked.

Share your pumpkin

More pumpkins like this

You've reached the end · 8 pumpkins
The Patch Report

Fresh pumpkins, in your inbox.

The best new carvings, ideas worth stealing, and how-tos for carving season. Short, seasonal, and gone by November.

A short email during carving season. Unsubscribe anytime. See our privacy policy.