Halloween Pumpkin Carving Contest · Starts October 1st · $500 in prizes
← Back to ideas
@ai_concepts
Sep 25, 2026
Painted Baseball No-Carve Pumpkin IdeaAI
0

Report this carving

Tell us what is wrong. Reports are private.

Painted Baseball No-Carve Pumpkin Idea

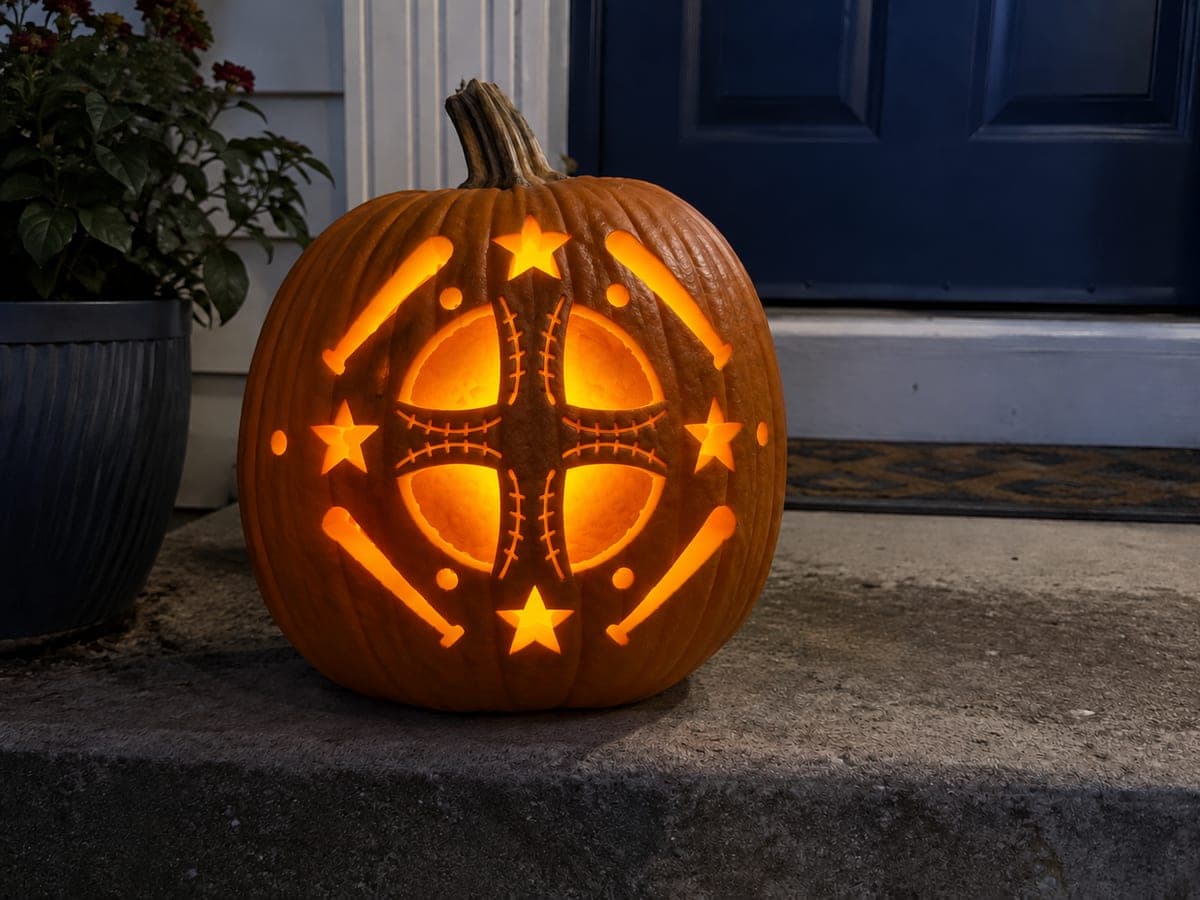
A classic white baseball with bright red curved stitching is painted directly onto an orange pumpkin in this no-carve baseball pumpkin idea. Paint the white ball circle first and let it dry fully before adding the red seam arcs with a thin round brush. Short diagonal red tick marks along each seam complete the authentic stitching look. A layer of matte varnish locks the design in for the full October stretch.

No ratings yet · Sign in to rate

Comments (0)

  • No comments yet — be the first.

Save without an account. Sign in to like or comment.

Our tips for carving a similar design

The orange pumpkin background works in your favor here: paint only the white ball circle and the red stitching, and the pumpkin does the rest. Painting the white base first and letting it cure fully before adding red seam arcs prevents the colors from blending. Short diagonal tick marks along each seam arc complete the authentic baseball stitching look.

From pumpkin to porch

  1. Clean and dry the pumpkin

    Wipe the entire surface with a damp cloth to remove wax or field dust that would repel paint. Let it dry for at least fifteen minutes before the first brush stroke. A clean, grease-free surface is essential for acrylic adhesion.

  2. Sketch the ball circle

    Lightly pencil a circle that covers most of the pumpkin face, leaving at least an inch of natural orange rind as a border. You can trace a circular object as a guide. The pencil line will be covered by white paint.

  3. Paint the white base

    Fill the circle with two thin coats of white acrylic paint using a flat brush, letting each coat dry fully. The second coat covers any transparent spots and gives a solid white canvas for the red seam arcs. Wait at least thirty minutes after the second coat before painting red.

  4. Paint the seam arcs

    Load a thin round brush with bright red acrylic and paint two mirrored curved arcs across the white circle, each starting and ending near the circle's equator. Keep arcs symmetrical by sketching their positions lightly in pencil on the white base first.

  5. Add stitch tick marks

    While the arcs are still slightly wet or after they dry, add short diagonal tick marks along each arc with the same red paint and a fine liner brush. Space them evenly and alternate the angle slightly for a natural stitching look. Roughly eight to twelve ticks per arc is realistic.

  6. Seal and display

    Apply two coats of matte acrylic varnish over the entire painted area once all layers are dry. The varnish is especially important for the red seam arcs, which are prone to scuffing when handled. Display on a covered porch or beside a lit entry for the full October stretch.

Written with AI to match this design

Gather your supplies

Check things off as you get ready.

Work on a stable surface, keep your free hand out of the cutting path, and have an adult handle sharp tools.

Three levels of light

  • Leave intact

    Natural orange rind shows outside the painted white ball circle as the background.

  • Peel & shade

    None. The shell stays fully intact.

  • Cut through

    None. Use an external porch light or spotlight to show the painted baseball after dark.

Learn the carving basics

Before you start cutting

My red seam arcs bled slightly into the white base. How do I fix it?

Let everything dry completely, then apply a thin touch-up coat of white along any bleeding edge using a fine liner brush. The white covers red far more effectively when both layers are fully dry. Rushing this step by painting over wet layers usually makes the bleed worse.

How do I make the seam arcs look mirrored and natural?

Sketch both arcs in pencil before painting and hold the pumpkin at arm's length to check symmetry before committing with red paint. Real baseball seam arcs sweep in the same rotational direction on both halves, which creates the characteristic S-curve shape when viewed straight on.

Can I paint the seam arcs in a team's official red rather than a standard red?

Yes. Mix standard red with a touch of orange or brown to match a specific team's red. Test the custom color on a piece of card before painting the pumpkin; team reds vary from bright scarlet to deep crimson and a small test swatch saves time on the actual design.

Your take belongs here, too.

Changed a detail? Made it simpler? Share a photo of your version and tell the community what worked.

Share your pumpkin

More pumpkins like this

You've reached the end · 8 pumpkins
The Patch Report

Fresh pumpkins, in your inbox.

The best new carvings, ideas worth stealing, and how-tos for carving season. Short, seasonal, and gone by November.

A short email during carving season. Unsubscribe anytime. See our privacy policy.