The 2026 contest winners are inGrand Prize, People's Choice and Most Creative, all crowned.
@ai_concepts
Sep 25, 2026
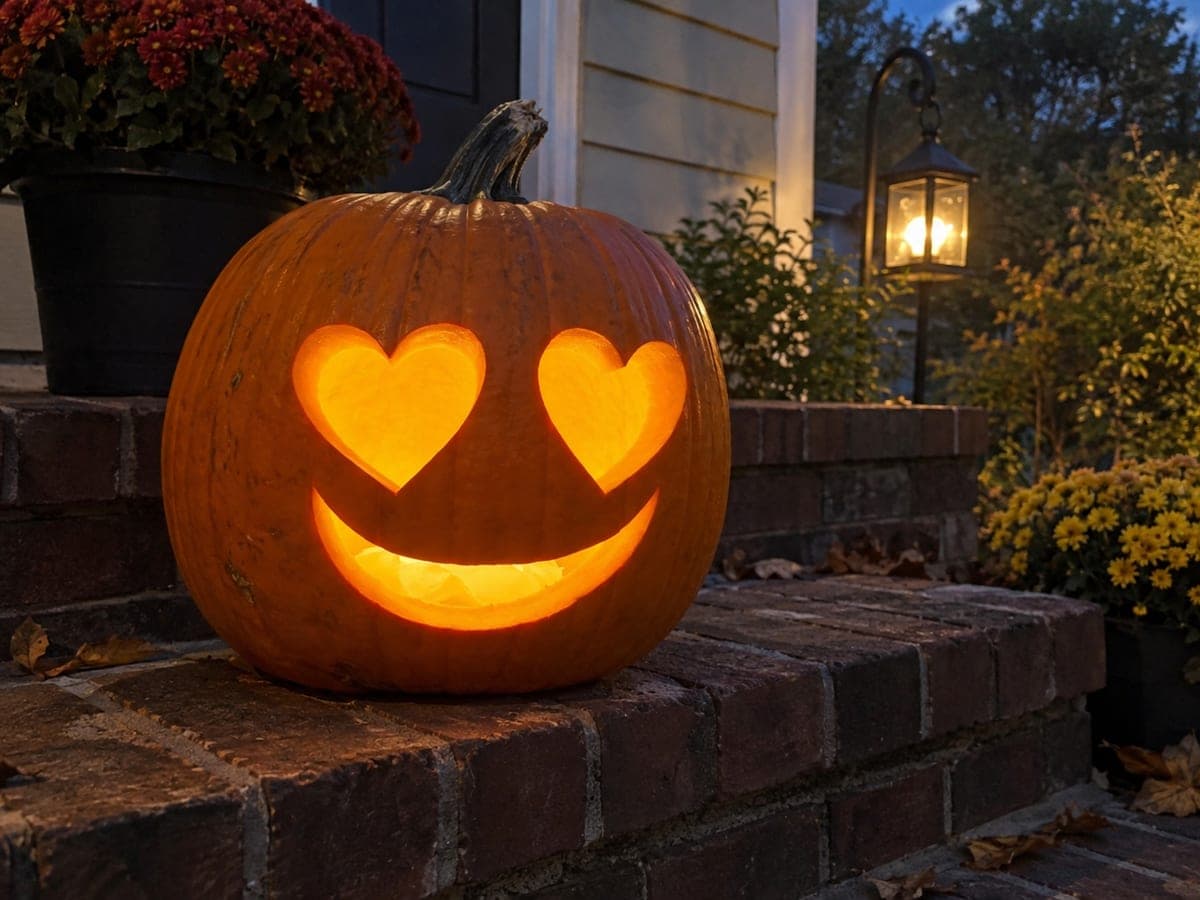
Sweetheart the Heart-Eyed PumpkinAI
0

Report this carving

Tell us what is wrong. Reports are private.

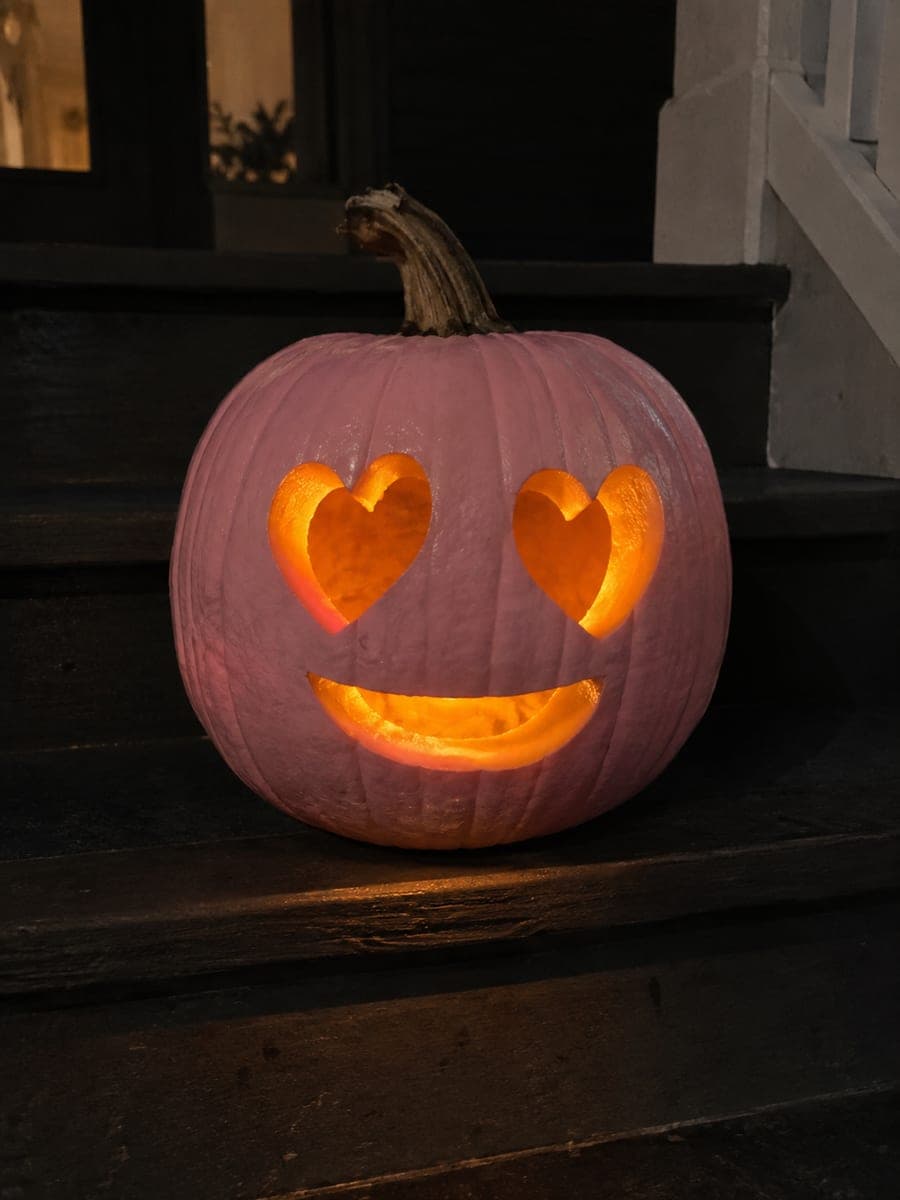
Sweetheart the Heart-Eyed Pumpkin

Two large heart-shaped eye cutouts and an oval smile opening glow warmly against a pale pink painted exterior in this easy pink pumpkin carving idea. Paint the outside before carving and let it cure fully so the blade does not chip the color at cut edges. Use a printed template to trace symmetrical hearts, then cut from the center outward toward each pointed tip. A tea-light inside makes the orange flesh of the cut rims pop against the pink shell.

No ratings yet · Sign in to rate
EasyFacesCuteClassic Cutout
pinkfacecuteeasyheartcandle-glowpainted-exteriororange-rim

Save this design for carving night, then share a photo of your own jack-o'-lantern once it's glowing.

Comments (0)

  • No comments yet. Be the first.

Our tips for carving a similar design

The design pairs a pale pink painted shell with cut-through heart eyes and an oval smile, so the raw orange cut rims glow against the painted exterior. Curing the paint before carving is the key prep step that keeps edges crisp. A tea-light or LED puck inside warms the orange flesh visible at every rim.

From pumpkin to porch

  1. Prep and paint

    Wash and dry the pumpkin thoroughly. Apply two thin coats of pale pink acrylic or chalk paint, letting each coat dry completely before the next. Allow the final coat to cure for at least four hours so the blade does not chip the surface at cut edges.

  2. Hollow the pumpkin

    Cut a lid at an angle so it rests back in place without falling in, then scoop out seeds and stringy pulp. Scrape the inside walls to about 2 cm thickness so light travels evenly to the cut rims. An adult should handle all cutting steps.

  3. Transfer your heart template

    Print or draw two symmetrical heart shapes sized to fit the face, then tape your template to the pink shell and trace the outline with a toothpick poke. Remove the paper and connect the dots with a marker before cutting.

  4. Cut the hearts

    Begin each heart cut at the center top dip and work outward toward each pointed tip, using a small serrated carving saw. Cut slowly around the curves so the blade stays on the line. Push each plug inward and pull it out through the lid opening.

  5. Cut the oval smile

    Mark an oval centered below the hearts with a marker, then cut it out in smooth continuous strokes. Keep the smile at least 2 cm below the lower heart to preserve rind strength.

  6. Light and display

    Drop in an LED tea-light rather than a real candle to avoid scorching the painted exterior. Replace the lid and step back to check that the orange cut rims glow evenly. Display on a shelf or table where the pink shell faces forward.

Written with AI to match this design

Gather your supplies

Check things off as you get ready.

Work on a stable surface, keep your free hand out of the cutting path, and have an adult handle sharp tools.

Three levels of light

  • Leave intact

    The full pink-painted outer shell and all rind between openings stay solid and dark.

  • Peel & shade

    None on this design; no skin peeling is used.

  • Cut through

    Both heart-shaped eye holes and the oval smile are cut fully through, glowing orange at the cut rims.

Learn the carving basics

Before you start cutting

Will carving through the painted shell chip the pink color at the edges?

It can if the paint is still soft. Let the final coat cure fully for at least four hours before cutting. Using a sharp, fine-toothed saw rather than a chunky blade also helps keep cut edges tidy.

How do I keep both hearts symmetrical?

Print a single heart shape, fold the paper in half to verify it is mirror-image, then use that template twice with equal spacing from the center vertical rib. Toothpick-poke the outline before committing any cuts so you can adjust.

Can I use a real candle inside a painted pumpkin?

Avoid open flames near the painted shell because heat and smoke can blister or yellow the paint over time. An LED tea-light or a small battery puck gives the same warm glow with no risk to the finish.

Your take belongs here, too.

Changed a detail? Made it simpler? Share a photo of your version and tell the community what worked.

Share your pumpkin

Want more designs like this? Browse our full library of pumpkin carving ideas, or pick a free printable stencil. Every pattern and template in our own collection is free to print at home.

More pumpkins like this

You've reached the end · 8 pumpkins
The Patch Report

Fresh pumpkins, in your inbox.

The best new carvings, ideas worth stealing, and how-tos for carving season. Short, seasonal, and gone by November.

A short email during carving season. Unsubscribe anytime. See our privacy policy.