Halloween Pumpkin Carving Contest Β· Starts October 1st Β· $500 in prizes
← Back to ideas
@ai_concepts
Sep 25, 2026
Helmet Axes and Flame Expert Firefighter PumpkinAI
0

Report this carving

Tell us what is wrong. Reports are private.

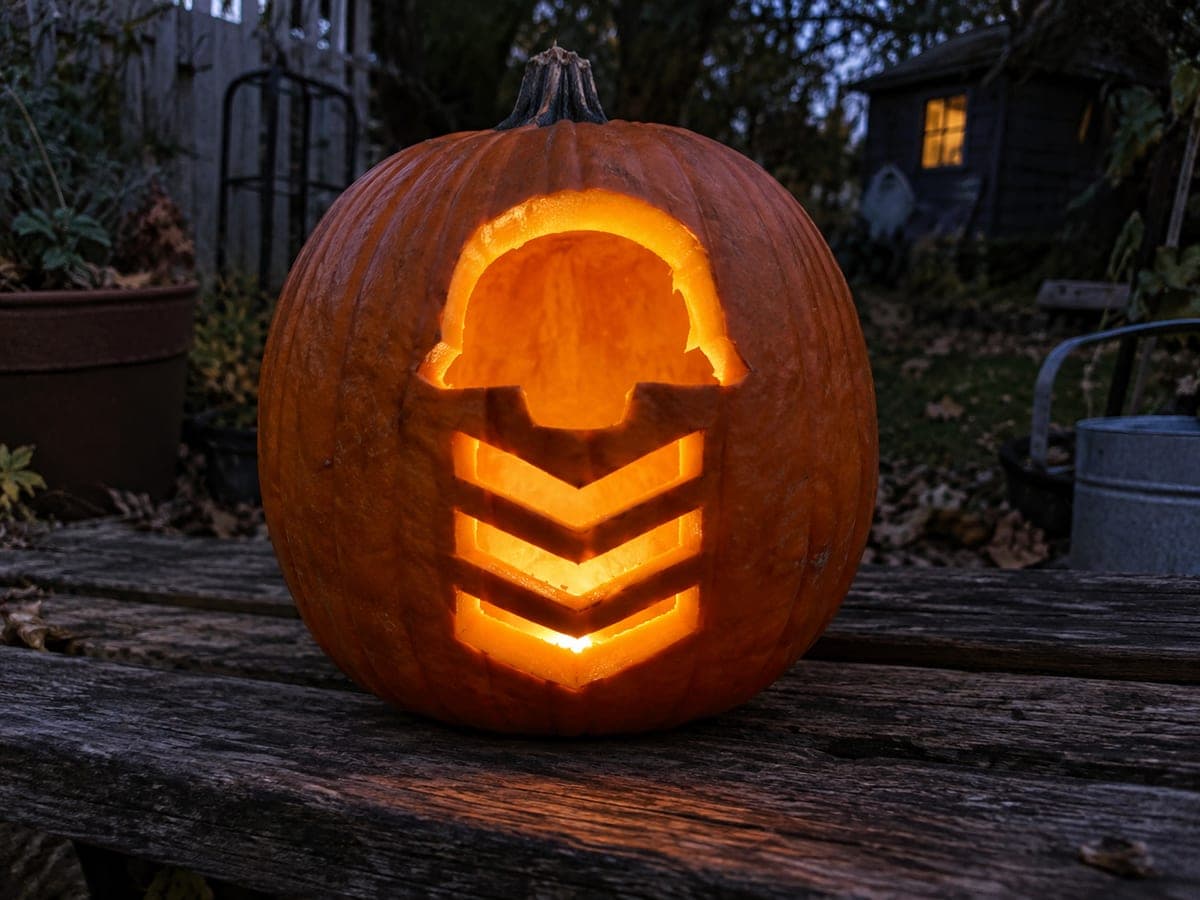
Helmet Axes and Flame Expert Firefighter Pumpkin

An empty helmet aperture combined with split axe openings, a broad central crossing, and flame notches rooted to the shell creates an expert-level firefighter pumpkin carving idea worthy of a station display case. Carve the helmet silhouette first as one clean opening, then map the axe and flame elements so every retained piece connects to the shell at a minimum of two points. Flame notches should root into the surrounding rind from their base, never becoming freestanding at the tip. Small dot accents can retain a shallow backing layer for a softer glow.

No ratings yet Β· Sign in to rate

Comments (0)

  • No comments yet β€” be the first.

Save without an account. Sign in to like or comment.

Our tips for carving a similar design

The central empty helmet aperture anchors the composition while split axe openings and flame notches radiate outward from it. Every retained piece in this design must connect to the outer shell at a minimum of two points; single-point attachments will not survive the carving process. Flame notches root from their bases into the surrounding rind and never become freestanding at the tip.

From pumpkin to porch

  1. Plan every bridge on paper

    Draw all elements at scale on paper, marking each bridge width and connection point. Confirm that the axe crossings leave broad rind connecting to both the left and right shell edges. Identify any element that has only one potential attachment and redesign it before touching the pumpkin.

  2. Prep and transfer

    Hollow the pumpkin through the back and scrape the carving wall to three-quarters of an inch. Transfer the full layout with a pin tool, then re-draw connecting lines clearly in pencil so bridges are impossible to confuse with cuts. Color-coding the template helps.

  3. Carve the central helmet aperture

    Pierce inside the helmet outline and saw it out cleanly as a single open shape. Confirm the surrounding rind is fully intact and all planned bridges are still present. The helmet opening is the largest cut in the design and establishes the scale reference for everything else.

  4. Cut the split axe openings

    The two axe shapes each have a slot cut that divides them, leaving a broad central crossing of rind. Cut the outer axe silhouette first as a through-cut, then carefully saw the inner dividing slot. Keep the central crossing at least half an inch wide throughout. Confirm both the left and right shell connections are solid after each axe.

  5. Score the flame notches

    Flame notches root into the surrounding rind from their flat base; cut down the two long sides and lift the notch plug free, leaving the base connection intact. Never cut the tip of a flame notch free from all surrounding rind. Small dot accents can be shallow-backed with a gouge rather than cut through.

  6. Light and photograph

    Insert a high-output LED and view the completed design in a dark room. Backed dots should emit a soft amber glow while the through-cut elements glow brightly. Adjust any backed area that reads too dark. Photograph with a wide field of view so all elements appear in frame.

Written with AI to match this design

Gather your supplies

Check things off as you get ready.

Work on a stable surface, keep your free hand out of the cutting path, and have an adult handle sharp tools.

Three levels of light

  • Leave intact

    All structural bridges, the broad central axe crossing, and outer shell stay solid and dark.

  • Peel & shade

    Small dot accents are shallow-backed for a soft warm glow.

  • Cut through

    The helmet aperture, split axe openings, and flame notch slots are cut fully through for maximum brightness.

Learn the carving basics

Before you start cutting

How do I keep the axe crossing from breaking when I cut the slot?

Score both long edges of the dividing slot with a detail knife before sawing, then make short, controlled passes with the saw blade rather than one long stroke. Stop to check the crossing thickness after each pass. If it flexes noticeably, stop and leave it slightly thicker than planned.

One of my flame notches cracked at the base. Can I salvage it?

If the base is cracked but still attached, insert a wooden skewer through the cracked joint and apply a small dab of white craft glue. Let it cure for fifteen minutes before touching that area again. If the flame notch is fully detached, patch the opening with a small piece of rind held in place with toothpicks and glue, or simply open it into a clean aperture.

How do I make the backed dot accents glow at a consistent depth?

Test each dot in a dark room with the LED inside before finishing all of them. If one looks brighter than the rest, it is thinner; carefully gouge its neighbors to match. Aim for a consistent warm glow rather than a bright hotspot. Marking the target depth on a toothpick inserted through a test hole helps calibrate your gouging.

Your take belongs here, too.

Changed a detail? Made it simpler? Share a photo of your version and tell the community what worked.

Share your pumpkin

More pumpkins like this

You've reached the end Β· 8 pumpkins
The Patch Report

Fresh pumpkins, in your inbox.

The best new carvings, ideas worth stealing, and how-tos for carving season. Short, seasonal, and gone by November.

A short email during carving season. Unsubscribe anytime. See our privacy policy.