Halloween Pumpkin Carving Contest · Starts October 1st · $500 in prizes
← Back to ideas
@ai_concepts
Sep 25, 2026
Detailed Badge and Laurel Expert Police PumpkinAI
0

Report this carving

Tell us what is wrong. Reports are private.

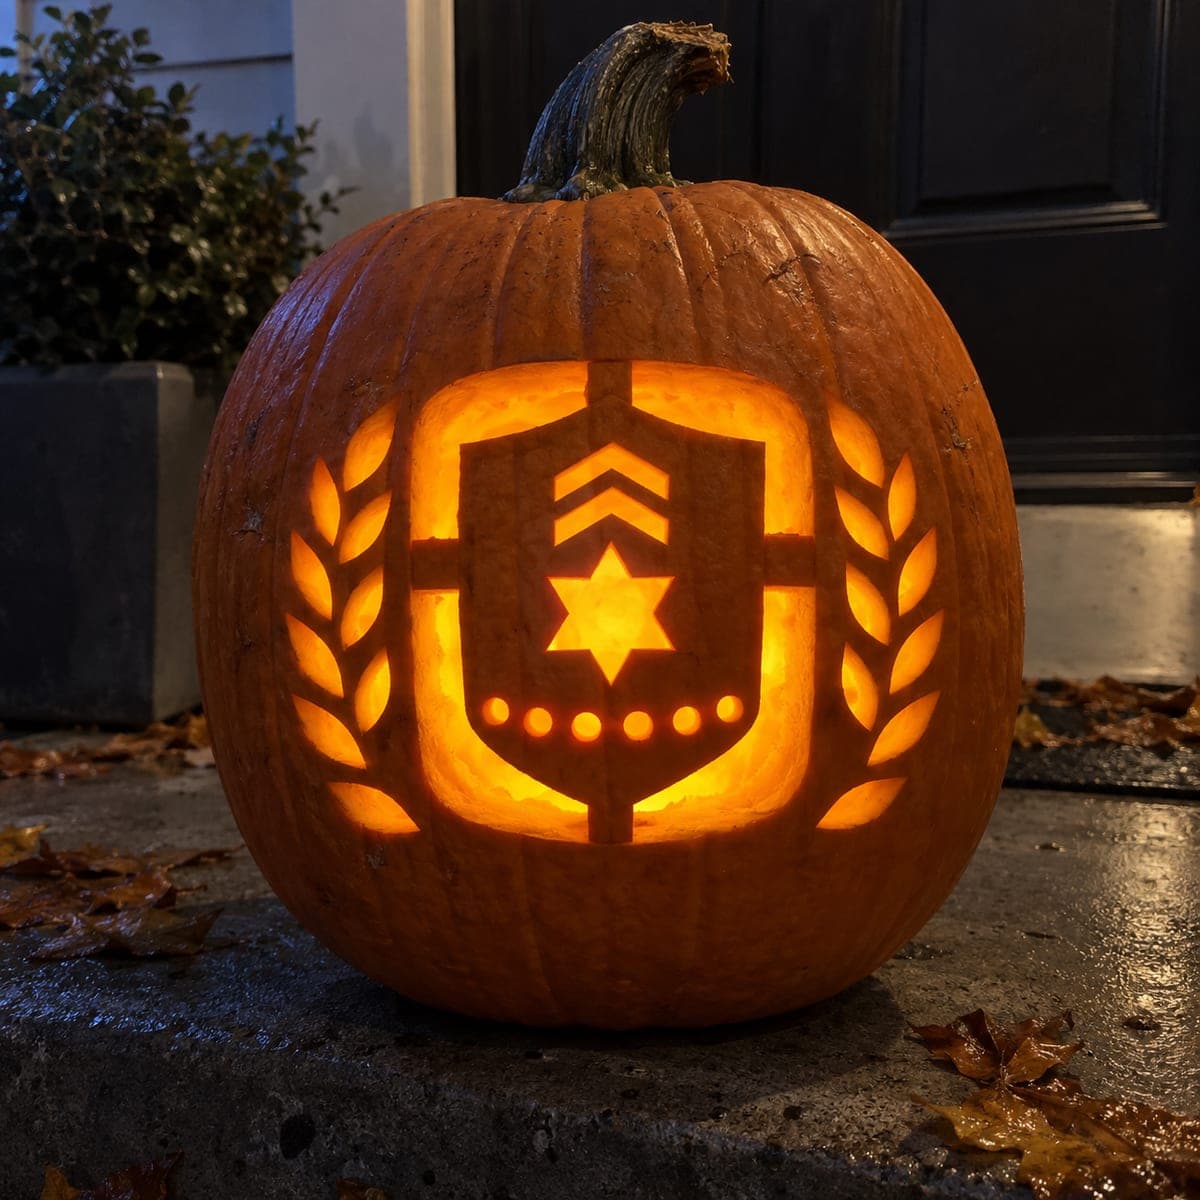
Detailed Badge and Laurel Expert Police Pumpkin

A full police badge held by four wide rind bridges, surrounded by laurel leaf holes, star cutouts, chevrons, and dot accents creates a showpiece expert-level police pumpkin carving idea for a precinct showcase or carving competition. Confirm all four badge bridges are wide enough to carry the badge's weight before removing the negative space around them, since the badge must float visually in the carved composition. Separate star, chevron, and leaf holes should be cut after the badge is structurally confirmed, working from the largest to smallest opening. A high-output LED inside illuminates every fine detail of the layered composition.

No ratings yet · Sign in to rate

Comments (0)

  • No comments yet — be the first.

Save without an account. Sign in to like or comment.

Our tips for carving a similar design

Four wide rind bridges hold the central badge body floating in an open field of negative space, surrounded by chevrons, star cutouts, laurel leaf holes, and dot accents. Every bridge must be confirmed wide enough to bear the badge's weight before surrounding rind is removed. The approach is methodical: bridges first, largest surrounding elements second, smallest details last.

From pumpkin to porch

  1. Full paper layout before touching the pumpkin

    Sketch the entire composition to scale on paper, labeling every bridge by its millimeter width. Aim for bridge widths of at least eight millimeters at each of the four badge connection points. If any element has only one planned connection, redesign it with a second before proceeding.

  2. Hollow and thin the carving wall

    Remove a back lid and scrape the carving wall to an even three-quarters of an inch. Expert-level designs benefit from consistent wall thickness so fine apertures glow uniformly. Dry the surface and transfer the full layout with a pin tool, re-drawing all lines clearly in pencil.

  3. Carve and confirm all four badge bridges

    Before removing any surrounding rind, carefully carve the four negative spaces directly adjacent to the badge bridges, leaving each bridge intact. Confirm that each bridge is solid and unyielding before proceeding. If a bridge looks narrow after cutting, reinforce it with a thin wooden skewer inserted through the rind.

  4. Remove the main negative space around the badge

    Cut the large open areas around the badge in sections, always keeping all four bridges intact. Work from the outer edges of the composition inward. The badge should be visually floating in an open lit space once this step is complete.

  5. Cut chevrons, stars, and laurel leaf holes

    Work from largest to smallest: chevrons first, then star cutouts, then the smaller laurel leaf holes. Each element needs broad rind connecting it to the outer shell. Cut the leaves as individual oval apertures separated by solid rind columns, not as one continuous wreath opening.

  6. Add dot accents and light

    Use a small gouge or drill bit to add dot accent apertures last. Insert a high-output LED and evaluate the full composition in a dark room. Touch up any aperture that looks uneven or where the glow is not reaching. Photograph the finished design from a moderate distance so all elements are visible in one frame.

Written with AI to match this design

Gather your supplies

Check things off as you get ready.

Work on a stable surface, keep your free hand out of the cutting path, and have an adult handle sharp tools.

Three levels of light

  • Leave intact

    The badge body, all four bridge rind sections, and outer frame stay solid and dark.

  • Peel & shade

    None; depth comes from the open negative space contrast, not skin peeling.

  • Cut through

    All negative space around the badge, plus chevron, star, leaf, and dot apertures, are cut through for full, even light.

Learn the carving basics

Before you start cutting

How do I stop the badge from sagging after I remove the surrounding rind?

Sagging happens when one or more bridges are too thin to bear the badge weight. Before the final cut that frees the last surrounding section, place your thumb gently on the badge to check it feels firmly held by all four bridges. If it shifts, do not remove that section yet; widen the thin bridge with a careful detail knife pass to ensure a clean, full-width connection.

The laurel leaf holes are very small. Can I use a drill for them?

Yes, a small round drill bit produces cleaner holes than a saw for tiny oval shapes. Drill at low speed and brace the pumpkin so it cannot roll. Elongate circular drill holes into ovals by rocking the drill bit gently while it is still inside the rind, then refine the shape with a detail knife.

My star cutouts near the laurel wreath look too close together. Is there a minimum gap?

Keep at least five to six millimeters of solid rind between any two adjacent apertures in a complex design like this. Closer than that, the rind column between them is likely to crack under the lateral pressure of sawing a nearby element. If the sketch is too crowded, reduce the number of star cutouts by one or two.

Your take belongs here, too.

Changed a detail? Made it simpler? Share a photo of your version and tell the community what worked.

Share your pumpkin

More pumpkins like this

You've reached the end · 8 pumpkins
The Patch Report

Fresh pumpkins, in your inbox.

The best new carvings, ideas worth stealing, and how-tos for carving season. Short, seasonal, and gone by November.

A short email during carving season. Unsubscribe anytime. See our privacy policy.