Halloween Pumpkin Carving Contest Β· Starts October 1st Β· $500 in prizes
← Back to ideas
@ai_concepts
Sep 25, 2026
Badge Star and Chevrons Police Pumpkin CarvingAI
0

Report this carving

Tell us what is wrong. Reports are private.

Badge Star and Chevrons Police Pumpkin Carving

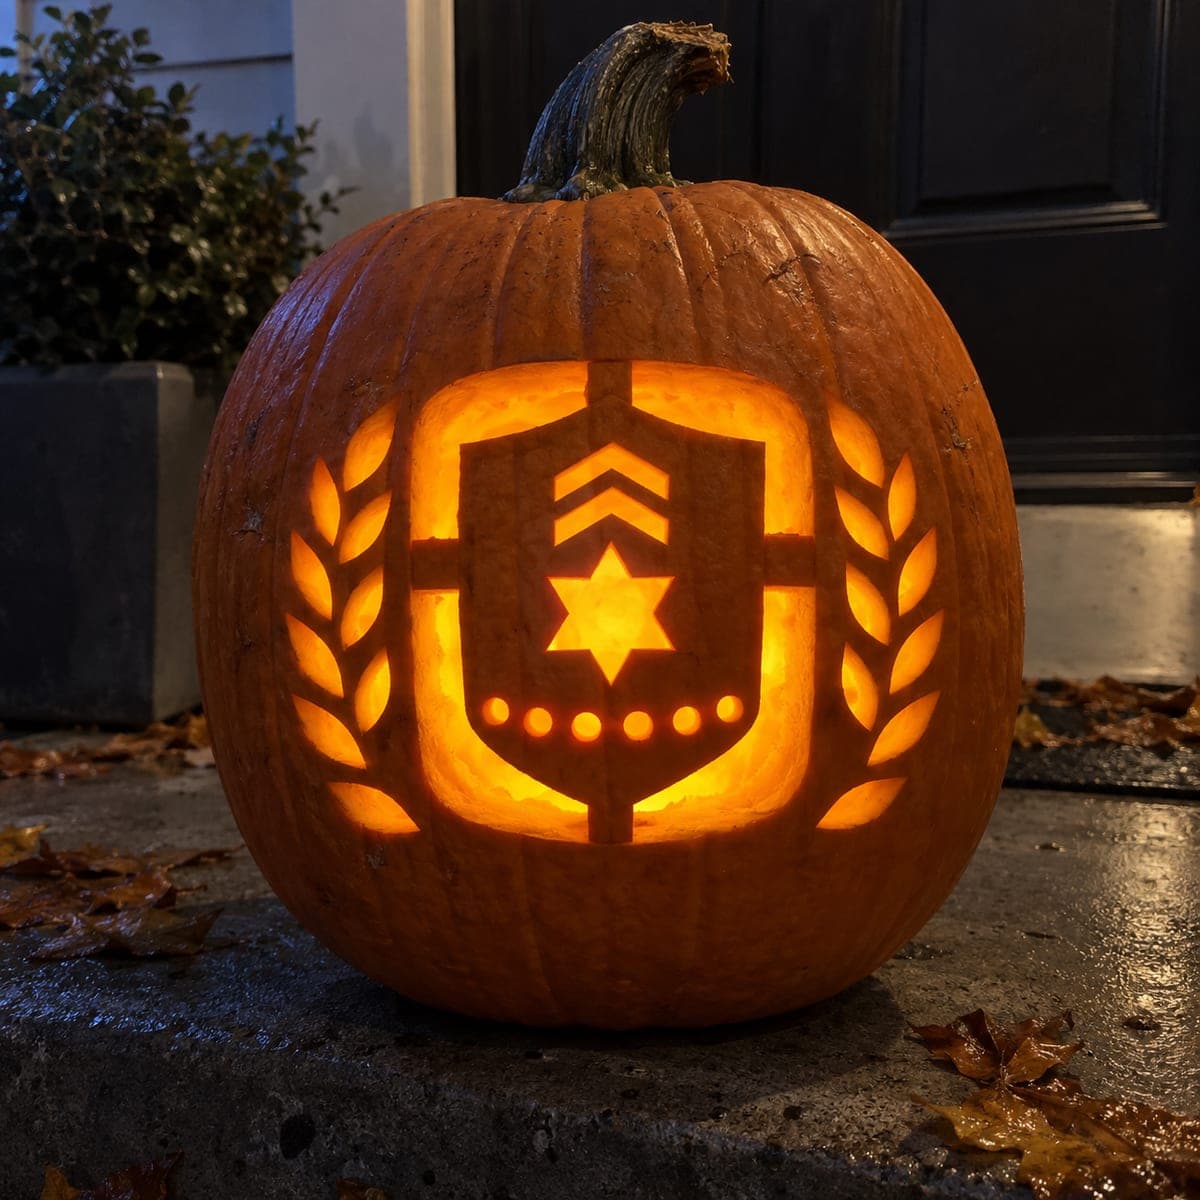
Separate star, chevron, and round apertures arranged to suggest a police badge create a recognizable mid-level police pumpkin carving idea for a precinct or community event display. Sketch all three element positions in chalk first and confirm the overall spacing before making any cuts. Cut the star opening first since it is the most complex shape, then remove the chevrons and round holes working outward. Broad rind between each element keeps the face of the pumpkin rigid and prevents any single piece from detaching.

No ratings yet Β· Sign in to rate

Comments (0)

  • No comments yet β€” be the first.

Save without an account. Sign in to like or comment.

Our tips for carving a similar design

Rather than carving one solid badge silhouette, this design uses individual apertures arranged to suggest the badge as a whole. Mapping all three element positions in chalk before cutting confirms the spacing looks proportional on the curved surface. Cutting the most complex star shape first and finishing with the simpler chevrons and round holes reduces the risk of misplacing any element.

From pumpkin to porch

  1. Hollow and prepare the carving wall

    Cut a back lid, scoop out all pulp, and scrape the carving face to about an inch thick. A flat-faced pumpkin works best for a multi-element badge layout. Dry the exterior before sketching.

  2. Sketch all elements in chalk

    Mark the star position centrally, then place the chevron shapes above or below it and the round holes at their intended positions. Check that broad rind gaps exist between every element. Erase and redraw in chalk as many times as needed before committing to the layout.

  3. Transfer with a pin tool

    Once the chalk layout looks right, trace every shape with a pin tool to leave dotted cutting guides. Remove the chalk with a dry cloth and lightly re-draw the dots with pencil for clarity. Color-code cut areas with a light marker so you do not accidentally saw through a bridge.

  4. Cut the star aperture first

    Pierce inside the star outline and saw around the full perimeter, approaching each inside corner from two directions as with any star shape. Remove the plug and confirm the surrounding rind is solid before moving on.

  5. Cut the chevrons and round holes

    Saw each chevron opening individually, then use a small round cutter or drill bit for the circular holes. Work from the chevron closest to the star outward so you always have solid rind to grip. Check rind gaps after each cut.

  6. Light and check from a distance

    Insert an LED and view the pumpkin from at least six feet away to confirm all elements read as a coherent badge composition. Apply petroleum jelly to cut edges and allow it to absorb before displaying the pumpkin at your venue.

Written with AI to match this design

Gather your supplies

Check things off as you get ready.

Work on a stable surface, keep your free hand out of the cutting path, and have an adult handle sharp tools.

Three levels of light

  • Leave intact

    All rind between the star, chevrons, and round holes stays solid to hold the composition together.

  • Peel & shade

    None; every element is a clean through-cut.

  • Cut through

    The star, each chevron opening, and every round hole aperture are cut completely through for even glow.

Learn the carving basics

Before you start cutting

How many chevrons and round holes should I use?

Two or three chevrons and two to four round holes give a believable badge impression without overcrowding the face. Odd numbers of chevrons tend to look more balanced than even numbers when arranged in a vertical column. Lay them out in chalk first and adjust until the grouping feels right.

My star and chevrons overlap slightly in the sketch. Is that fixable?

Yes, in chalk it is easy to erase and reposition any element. If you have already pin-transferred the outline, use a pencil to mark a revised cut line that keeps a clear gap between the two shapes. The minimum safe gap is about half an inch to prevent cracking.

Can I add a number or letter to make it look like a specific badge?

Bold block letters or numbers with wide stroke widths can be added as small apertures between the chevrons. Keep letter strokes at least a quarter inch wide so they cut cleanly. Thin serif fonts will break apart during carving and should be avoided at any size.

Your take belongs here, too.

Changed a detail? Made it simpler? Share a photo of your version and tell the community what worked.

Share your pumpkin

More pumpkins like this

You've reached the end Β· 8 pumpkins
The Patch Report

Fresh pumpkins, in your inbox.

The best new carvings, ideas worth stealing, and how-tos for carving season. Short, seasonal, and gone by November.

A short email during carving season. Unsubscribe anytime. See our privacy policy.