Halloween Pumpkin Carving Contest · Starts October 1st · $500 in prizes
← Back to ideas
@ai_concepts
Sep 14, 2026
I Love Georgia Heart Lettering PumpkinAI
0

I Love Georgia Heart Lettering Pumpkin

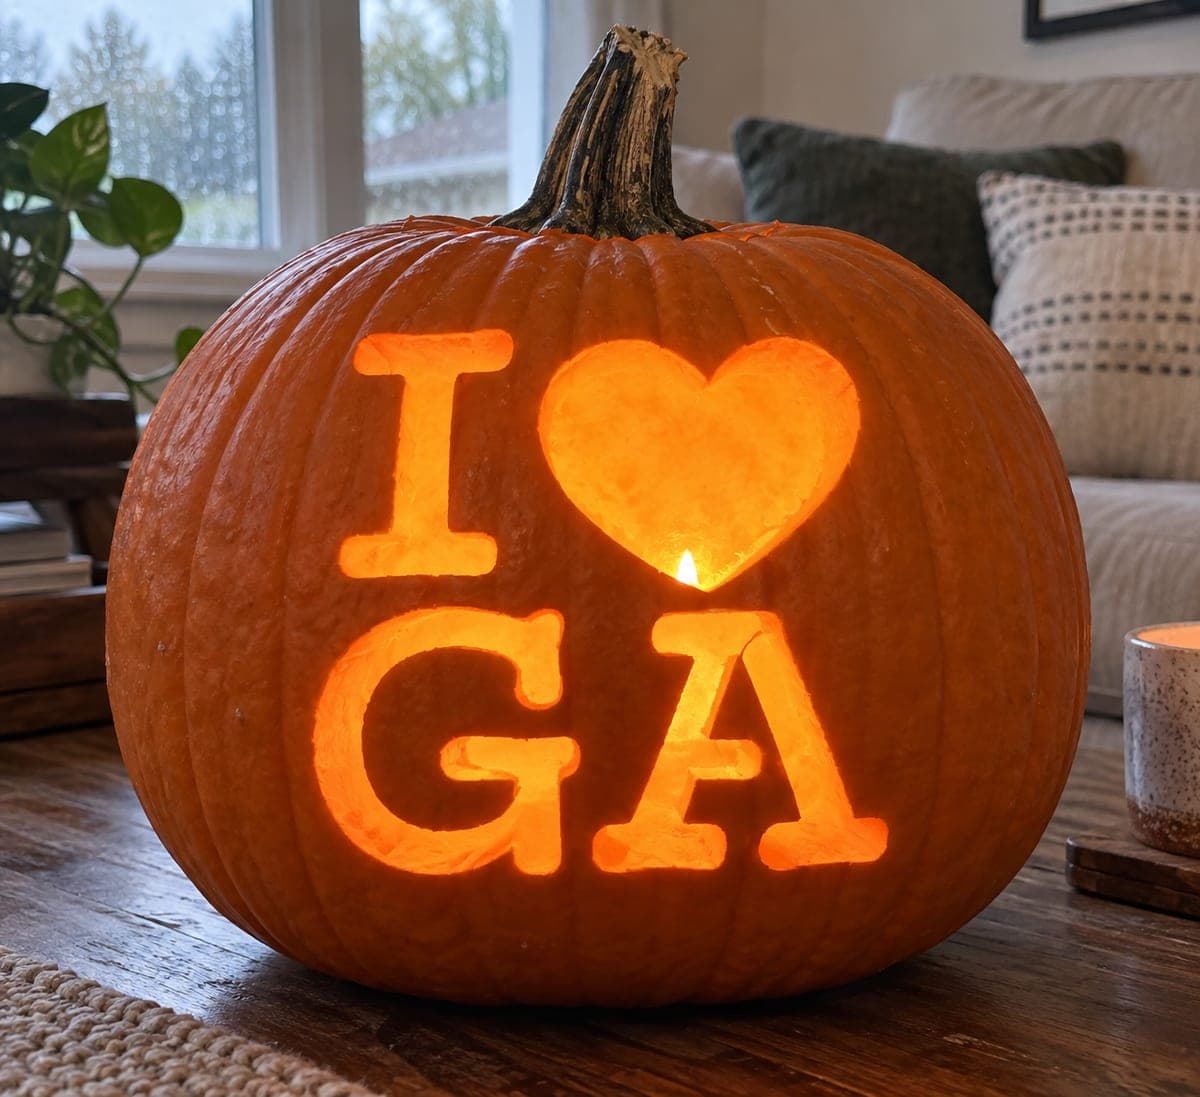
Rounded slab-serif letters spelling I, a heart, G, and A glow through this living-room pumpkin, the heart positioned at upper right beside the I and the large GA letters filling the lower half of the face. The G has a distinctive horizontal crossbar spur extending inward at mid-height, which is the element most likely to snap if the surrounding cuts weaken the wall -- carve the body of the G first, then score the spur and cut it last. Viewing the finished jack-o-lantern from directly in front shows the GA lettering at its clearest, so place it on a surface at seated eye level rather than on the floor.

This is an AI-generated concept image: a realistic, carvable design idea rather than a photo of a finished carve. AI concepts are always labeled and sit out the leaderboard and the contest.


No ratings yet · Sign in to rate

Comments (0)

  • No comments yet — be the first.

Save without an account. Sign in to like or comment.

Our tips for carving a similar design

This is a full cutout design where light passes straight through each letter and the heart, so the whole trick is keeping the letter shapes crisp and the walls strong between openings. The plan is to transfer a tidy slab-serif layout, carve the solid letter bodies first, and save the fragile G crossbar spur and any thin bridges for last. Since this is a concept image, treat it as a blueprint for how you could carve a similar pumpkin at home.

Written by PumpkinCarvingIdeas.com, inspired by the image above. These are our suggestions, not instructions from the uploader. This approach to the AI concept has not been tested on a real pumpkin.

From pumpkin to porch

  1. Pick a pumpkin and plan the layout

    Choose a tall, wide pumpkin with a smooth flat front so the letters sit evenly. Sketch the layout on paper first: a small I and heart across the top, then large G and A filling the lower half. Center everything on the flattest panel and keep a border of skin around each shape so the wall stays strong. Aim for chunky slab-serif letters, which hold up far better than thin script.

  2. Open the pumpkin and thin the wall

    Have an adult cut a lid from the bottom rather than the top so the design side stays intact and the pumpkin sits flat. Scoop out the insides and scrape the inner wall of the carving face down to about one inch thick. A thinner, even wall makes cutting cleaner and lets more light through. Work slowly so you do not gouge through the front by accident.

  3. Transfer the stencil

    Tape your I, heart, G, and A pattern flat against the front, snipping the paper at the curves so it lies smooth on the round surface. Poke closely spaced dots along every outline with a pin or awl, paying extra attention to the inner corners of the letters. Remove the paper and connect the dots lightly with a marker so you can see the full shape. Double check the spacing before any blade touches the pumpkin.

  4. Carve the letter bodies and the heart

    Start with the simplest solid shapes, the I and the outer body of the G and A, using a small serrated carving saw and gentle steady pressure. Cut the enclosed opening inside the heart before opening its outer edges so the shape stays supported. For the A, leave the little triangle counter attached if your design shows it as skin, or cut it out cleanly if it should glow. Push each cut piece inward and out to avoid chipping the front face.

  5. Score and cut the G spur last

    The G has a horizontal crossbar spur reaching inward at mid-height, and that thin tab is the most likely piece to snap. Finish all the surrounding cuts of the G first so you are not stressing the wall around it later. Then lightly score the spur outline, and make the final freeing cuts with the tip of your smallest blade using almost no force. Support the spur with a fingertip from behind as you finish so it releases cleanly instead of tearing.

  6. Light it and photograph from the front

    Drop in a battery LED tea light or a small LED puck rather than a flame, since open candles scorch the thin letter walls and are a fire risk. Set the pumpkin at seated eye level, on a side table or stool, because the GA reads clearest viewed straight on. Adjust the light until every letter glows evenly, adding a second LED low inside if the bottom letters look dim. Wipe the cut edges dry before your photo to reduce glare.

Gather your supplies

Check things off as you get ready.

Work on a stable surface, keep your free hand out of the cutting path, and have an adult handle sharp tools.

Three levels of light

  • Leave intact

    The full orange face around and between the letters stays untouched and dark, framing the message.

  • Peel & shade

    Optional: shave a thin halo just outside each letter to add a soft glowing outline without cutting through.

  • Cut through

    The I, the heart, and the G and A are cut fully through so they shine at their brightest.

Learn the carving basics

Before you start cutting

How do I keep the G crossbar spur from breaking off?

Carve the entire body of the G first so the wall around the spur is not already weakened when you reach it. Then score the spur outline lightly and make the freeing cuts last, using the tip of your smallest blade with almost no pressure. Support it from behind with a fingertip as it releases.

Should the counter inside the A glow or stay dark?

Both look good, so decide before you carve. If you want the triangle to read as a solid part of the letter, leave it as skin and it will stay dark. If you prefer a cleaner open A, cut the triangle out completely so it glows like the rest.

Why carve the lid from the bottom?

Cutting the opening from the bottom keeps the front face uninterrupted, which matters when a design fills most of the visible panel. It also lets the pumpkin sit flat and steady over the LED. You simply set the hollowed pumpkin down over the light rather than dropping the light in through a top lid.

Your take belongs here, too.

Changed a detail? Made it simpler? Share a photo of your version and tell the community what worked.

Share your pumpkin

More pumpkins like this

You've reached the end · 8 pumpkins
The Patch Report

Fresh pumpkins, in your inbox.

The best new carvings, ideas worth stealing, and how-tos for carving season. Short, seasonal, and gone by November.

A short email during carving season. Unsubscribe anytime. See our privacy policy.