Halloween Pumpkin Carving Contest · Starts October 1st · $500 in prizes
← Back to ideas
@ai_concepts
Sep 14, 2026
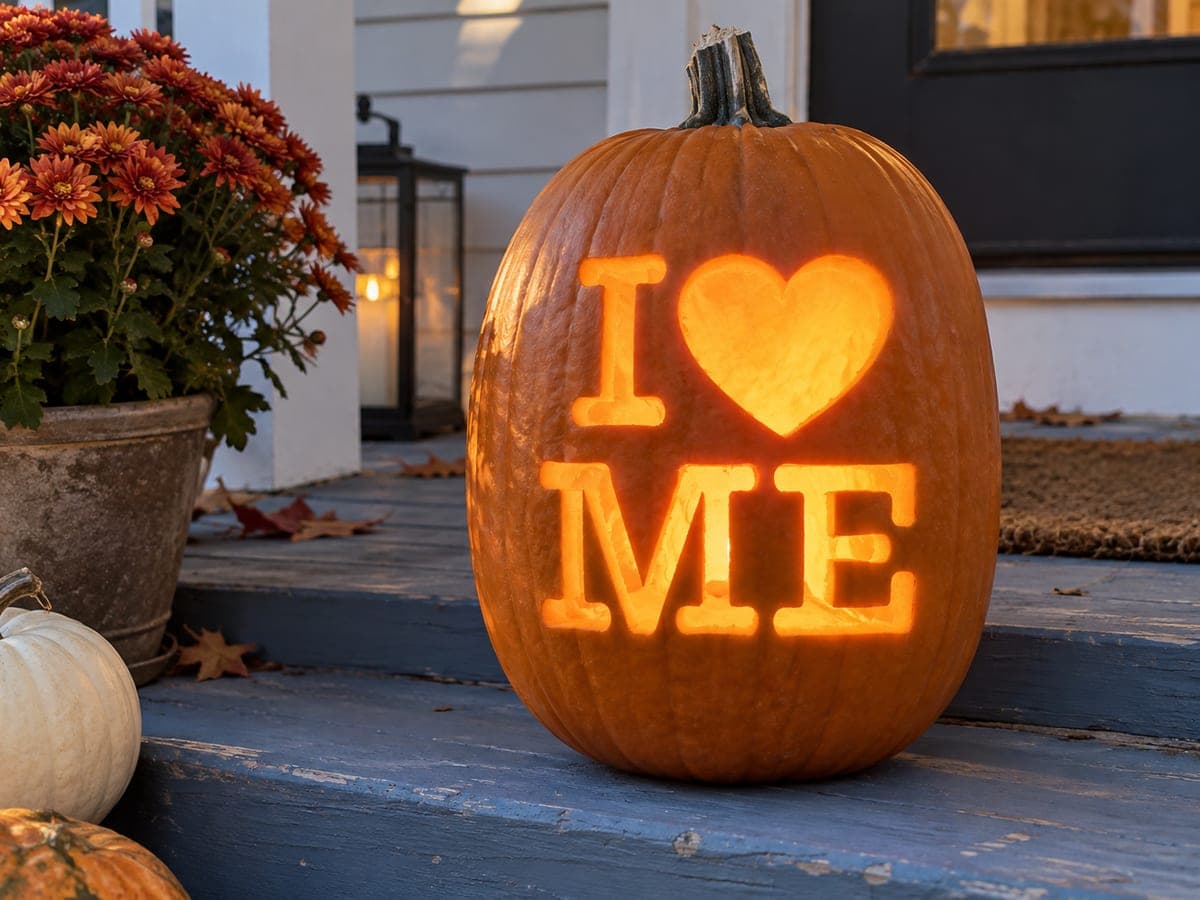
I Love Maine Heart Lettering PumpkinAI
0

I Love Maine Heart Lettering Pumpkin

Sitting on blue-painted porch steps among fall mums, this Maine pumpkin carving idea glows with the cutout letters I, a heart, and ME in sturdy slab-serif capitals. The M and E are both open, uncomplicated shapes with no enclosed counters, which makes this one of the more forgiving state designs to attempt. Position the layout slightly above center on the pumpkin face so the letters sit at a comfortable viewing height from the sidewalk. Use a small detail blade for the tight inner corners of the M's middle valley to keep the strokes looking crisp.

This is an AI-generated concept image: a realistic, carvable design idea rather than a photo of a finished carve. AI concepts are always labeled and sit out the leaderboard and the contest.

No ratings yet · Sign in to rate

Comments (0)

  • No comments yet — be the first.

Save without an account. Sign in to like or comment.

Our tips for carving a similar design

The core trick here is treating the letters as full cutouts so light pours straight through, while the slab-serif shapes stay chunky enough to carve cleanly. Because the I, M, and E have no enclosed centers, you avoid the fiddly floating islands that trip up most word pumpkins. Plan the whole layout first, then cut the letters last so the pumpkin wall stays strong while you work.

Written by PumpkinCarvingIdeas.com, inspired by the image above. These are our suggestions, not instructions from the uploader. This approach to the AI concept has not been tested on a real pumpkin.

From pumpkin to porch

  1. Pick and prep the pumpkin

    Choose a tall pumpkin with a wide, fairly flat front so the two rows of letters have room to breathe. Cut a lid or, better, a wide access hole in the bottom so the pumpkin sits flat on the steps. Scrape the inside wall behind the design down to about one inch thick with a scoop. A thinner front wall is much easier to cut through cleanly.

  2. Transfer the layout

    Print or draw the I, heart, and ME letters in a sturdy slab-serif style and tape the pattern slightly above center on the face. Poke the outlines with a pin or a transfer tool, spacing dots close together on the curves of the heart. Peel the paper and connect the dots lightly with a marker so you can see the full shape. Step back and check that the words read straight before any blade touches the skin.

  3. Score the outlines

    With a small detail saw, trace every letter outline with a shallow scoring pass first. This gives your later cuts a guide and prevents the blade from wandering. Take extra care in the tight inner valley of the M, using the very tip of a detail blade for those sharp corners. Keep your free hand behind the blade at all times.

  4. Cut the letters through

    Carve the full cutouts one letter at a time, starting with the smaller strokes of the I, M, and E before opening the large heart. Saw with gentle, steady strokes and let the blade do the work rather than forcing it. Push each piece out from the inside so you do not tear the front face. Save the heart for last since it is the biggest opening and weakens the wall most.

  5. Clean up the edges

    Go back and bevel the inside edges of each cutout slightly outward so more light escapes and the letters look brighter. Trim any ragged corners on the serifs with the detail blade for crisp ends. Test the letter spacing reads clearly from a few feet away. Wipe the cut edges and rub a little petroleum jelly on them to slow drying.

  6. Light it and stage the photo

    Set a battery LED or a small LED puck inside and aim it toward the front wall for an even glow. Skip candles since the tall cutouts can funnel heat and the open letters flicker unevenly. Place the pumpkin on porch steps with mums and a lantern nearby for that cozy fall scene. Shoot at dusk when the letters glow warm against the darker background.

Gather your supplies

Check things off as you get ready.

Work on a stable surface, keep your free hand out of the cutting path, and have an adult handle sharp tools.

Three levels of light

  • Leave intact

    The main pumpkin face and ribbed sides stay untouched orange around the words.

  • Peel & shade

    Optional shallow-skinned border or underline could glow dim if you want a subtle accent frame.

  • Cut through

    The I, the heart, and the M and E are cut fully through for the brightest glow.

Learn the carving basics

Before you start cutting

How do I keep the letter spacing from looking crooked?

Draw a light horizontal guideline for each row before you transfer the pattern, then align the base of every letter to it. Cut the smaller strokes first so you can still nudge your marker lines if something drifts. Stepping back to check from several feet away catches spacing problems before you commit to full cuts.

The M has a sharp inner valley. What is the best way to cut it?

Use the tip of a small detail blade and make short, controlled strokes into the corner from both directions rather than one long pass. Cutting toward the point from each side meets cleanly and avoids overshooting. Score the corner shallowly first so the blade has a track to follow.

Since this is a concept image, will these open letters really hold up?

Yes. The I, M, E, and heart all have solid connected strokes with no floating centers, so the design is structurally sound on a real pumpkin. Keep the front wall around one inch thick and cut the large heart last so the face stays supported while you work.

Your take belongs here, too.

Changed a detail? Made it simpler? Share a photo of your version and tell the community what worked.

Share your pumpkin

More pumpkins like this

You've reached the end · 8 pumpkins
The Patch Report

Fresh pumpkins, in your inbox.

The best new carvings, ideas worth stealing, and how-tos for carving season. Short, seasonal, and gone by November.

A short email during carving season. Unsubscribe anytime. See our privacy policy.