Halloween Pumpkin Carving Contest · Starts October 1st · $500 in prizes
← Back to ideas
@ai_concepts
Sep 14, 2026
I Love Nevada Heart Lettering PumpkinAI
0

I Love Nevada Heart Lettering Pumpkin

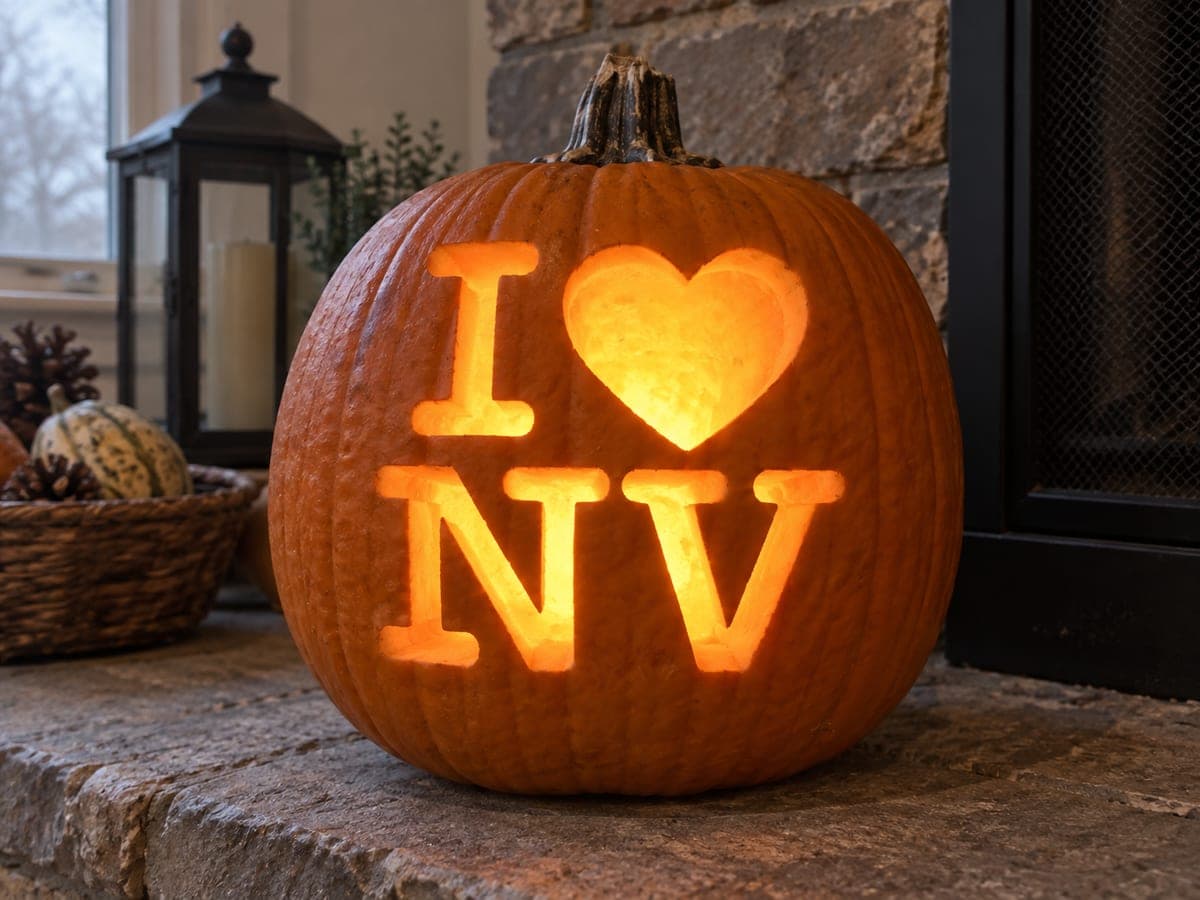
Displayed on a stone hearth beside a black lantern and a basket of pine cones, this Nevada pumpkin carving idea glows with I, a heart, and NV rendered in clean block letters pierced through the rind. The V's two diagonal strokes meet at a sharp bottom point; use a detail blade and keep the tip of that point slightly rounded rather than needle-thin so the rind does not break there over time. Warm fireplace light in the background layers with the pumpkin's inner candle glow to create a rich amber atmosphere. Choosing a pumpkin with walls at least one inch thick gives you more material to work with when shaping the V's crisp angles.

This is an AI-generated concept image: a realistic, carvable design idea rather than a photo of a finished carve. AI concepts are always labeled and sit out the leaderboard and the contest.


No ratings yet · Sign in to rate

Comments (0)

  • No comments yet — be the first.

Save without an account. Sign in to like or comment.

Our tips for carving a similar design

The core trick here is treating each shape, the letter I, the heart, and the block letters N and V, as its own clean cutout with crisp edges. Plan the layout on the front face first so the three elements sit balanced and evenly spaced. Cut the small serifs and the sharp point of the V carefully so the rind stays strong.

Written by PumpkinCarvingIdeas.com, inspired by the image above. These are our suggestions, not instructions from the uploader. This approach to the AI concept has not been tested on a real pumpkin.

From pumpkin to porch

  1. Pick and prep the pumpkin

    Choose a pumpkin with a smooth, flat front face and walls at least one inch thick, which gives you room to shape the V's angles cleanly. Cut a wide lid from the bottom or the back rather than the top so the shape stays intact and you can set it over an LED light easily. Scoop the inside until the front wall is an even thickness all around. Thinner walls carve faster and glow brighter, so scrape the carving area down a bit if it feels heavy.

  2. Transfer the layout

    Print or draw the I, heart, and NV so they fit the front face with even spacing, then tape the pattern flat and poke dots along every edge with a poker tool. Keep the block letters lined up on a shared baseline so the finished word reads straight. Space the two letters of NV so the V's diagonals have room without crowding the N. Remove the paper and connect the dots lightly with a marker before you cut.

  3. Cut the simple straight shapes first

    Start with the letter I and the straight strokes of the N, using a small detail saw and keeping the blade upright. Cut with slow, steady strokes and let the saw do the work instead of forcing it. Push the pieces inward or outward gently once each shape is fully outlined. Doing the easy shapes first builds your rhythm before the trickier heart and V.

  4. Shape the heart

    Carve the two top curves of the heart in short, controlled passes, turning the pumpkin as you go so your wrist stays comfortable. Meet the curves cleanly in the center dip and bring the sides down to a point at the bottom. A rounded detail blade helps you follow the curves without leaving flat spots. Take your time here since the heart is the visual center of the design.

  5. Carve the V and its point

    Cut the V's two diagonal strokes so they meet at the bottom, but keep that tip slightly rounded rather than needle-thin so the rind does not crack there later. Angle the blade to keep the strokes even in width from top to bottom. If a stroke feels fragile, leave a hair more material rather than shaving it razor-thin. Clean up all the inner edges with a paring knife for a sharp final look.

  6. Light it and photograph

    Drop in a battery LED puck or string, never a candle, and set the pumpkin over it so the light fills all the cutouts evenly. Place it on a stone ledge or shelf with a lantern and a few pine cones for a warm fall scene. Shoot in low room light so the amber glow through the letters reads clearly. Wipe the cut edges dry first so they photograph crisp.

Gather your supplies

Check things off as you get ready.

Work on a stable surface, keep your free hand out of the cutting path, and have an adult handle sharp tools.

Three levels of light

  • Leave intact

    The full orange rind around and between the letters stays untouched and dark, framing the message.

  • Peel & shade

    Optional: shave a thin border just inside each letter edge for a soft dim halo around the bright cutouts.

  • Cut through

    The I, the heart, and the N and V are cut fully through the rind for the brightest amber glow.

Learn the carving basics

Before you start cutting

How do I keep the V's point from breaking?

Round the very tip of the V slightly instead of carving it to a needle-fine point. A tiny rounded end holds far more rind together and resists cracking as the pumpkin dries. Leave a touch of extra thickness there and clean the edges gently with a paring knife.

How do I space the three elements so it reads well?

Lay out the whole I heart NV pattern on the front face before you cut anything, keeping the block letters on one shared baseline. Center the heart above the word so it acts as the focal point. Even gaps between shapes make the finished pumpkin read clearly from a distance.

Since this is a concept image, can a real pumpkin glow this evenly?

Yes, this shows a concept, but you can get close by scraping the front wall to an even thickness so light passes through consistently. Use a bright LED with a wide spread rather than a single narrow beam. A round, flat-faced pumpkin also helps every letter catch the same glow.

Your take belongs here, too.

Changed a detail? Made it simpler? Share a photo of your version and tell the community what worked.

Share your pumpkin

More pumpkins like this

You've reached the end · 8 pumpkins
The Patch Report

Fresh pumpkins, in your inbox.

The best new carvings, ideas worth stealing, and how-tos for carving season. Short, seasonal, and gone by November.

A short email during carving season. Unsubscribe anytime. See our privacy policy.