Halloween Pumpkin Carving Contest · Starts October 1st · $500 in prizes
← Back to ideas
@ai_concepts
Sep 14, 2026
I Love Pennsylvania Heart Lettering PumpkinAI
0

I Love Pennsylvania Heart Lettering Pumpkin

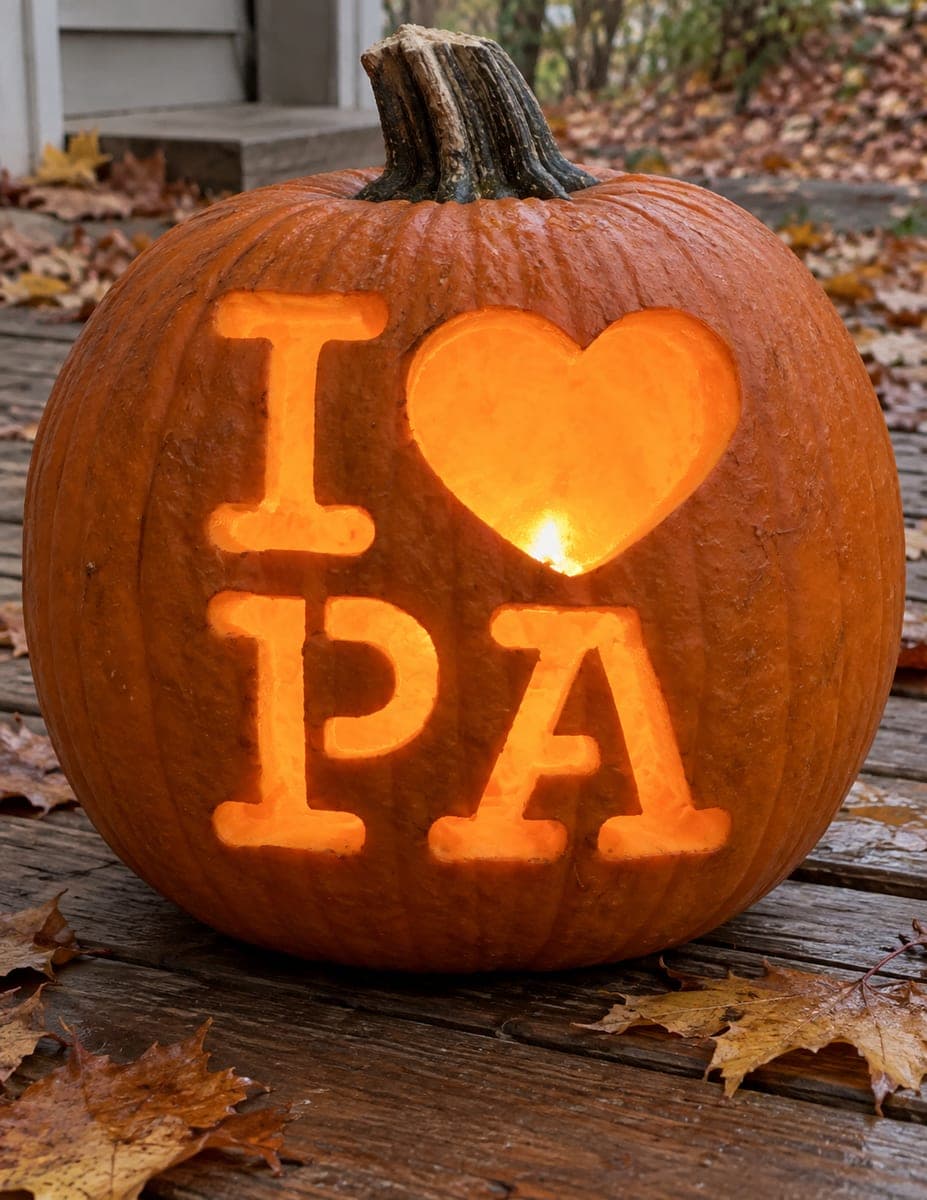
Chunky rounded letters reading "I" and "PA" flank a large open heart in this I Love Pennsylvania pumpkin carving idea, all elements cut through the rind and glowing orange from a candle within. The letter A contains an enclosed triangular counter at its peak that must stay attached, so plan a tiny connecting bridge before cutting the A's legs. Carve the heart and the P first, then finish with the A, approaching the inner triangle from both sides of the peak to keep the cuts aligned.

This is an AI-generated concept image: a realistic, carvable design idea rather than a photo of a finished carve. AI concepts are always labeled and sit out the leaderboard and the contest.

No ratings yet · Sign in to rate

Comments (0)

  • No comments yet — be the first.

Save without an account. Sign in to like or comment.

Our tips for carving a similar design

The core trick here is treating each letter and the heart as a clean cut-through shape so light pours out in bright orange blocks. The one thing that makes this a medium project is the letter A, which has an enclosed triangular gap at its peak that has to stay connected. Plan a small bridge at the top of the A before you cut, and carve the simple shapes first to build confidence.

Written by PumpkinCarvingIdeas.com, inspired by the image above. These are our suggestions, not instructions from the uploader. This approach to the AI concept has not been tested on a real pumpkin.

From pumpkin to porch

  1. Transfer the layout and check spacing

    Print or draw the design so the I sits left, the heart tops the center, and the P and A anchor the bottom row. Tape the pattern to a smooth area of the pumpkin and poke the outlines with a pin tool or push pin. Step back and confirm the letters are level and evenly spaced before you cut anything. Mark a tiny bridge across the top of the A's inner triangle now so you remember to leave it.

  2. Open a lid and clean out the pulp

    Since every element cuts through the rind, cut a removable lid from the bottom or back rather than the top so the front stays intact. Scoop out the seeds and thin the inside wall behind the design to about one inch. A thinner wall is much easier to cut cleanly and lets more light through. Scrape until the area behind the letters and heart feels smooth.

  3. Cut the heart and the I

    Start with the large heart because it is the simplest shape and gives you a feel for the rind thickness. Use a small saw tool and let it do the work with gentle strokes, keeping the blade straight for tidy edges. Then cut the I, working slowly around the serifs at top and bottom. Push the pieces out gently from the inside once each shape is fully cut.

  4. Cut the P, then tackle the A

    Carve the P next, cutting the outer curve and the enclosed loop so the counter drops free. For the A, cut the two outer legs and the crossbar first, then approach the inner triangle from both sides of the peak so the cuts meet evenly. Leave the small bridge you marked so the triangle piece stays anchored to the pumpkin. Take your time here since this is the trickiest part.

  5. Clean edges and add a dim glow

    Trim any ragged edges with a paring knife for crisp letters. If you want the counter of the A or areas around the letters to glow softly instead of going fully dark, peel just the outer skin there so a dim orange comes through. Rub a little petroleum jelly on the cut edges to slow drying and keep the shapes sharp.

  6. Light it and photograph

    Set a battery LED puck or string light inside rather than a candle, which is safer and gives steadier light for these open shapes. Warm white or orange LEDs read best against the pumpkin. Shoot in low evening light on a porch or wood surface so the glowing letters pop. Reposition the light if any letter looks uneven and enjoy your state pride display.

Gather your supplies

Check things off as you get ready.

Work on a stable surface, keep your free hand out of the cutting path, and have an adult handle sharp tools.

Three levels of light

  • Leave intact

    The pumpkin face around the letters and the small bridge at the peak of the A stay untouched and dark.

  • Peel & shade

    Skin peel the inside of the A's triangular counter, or a thin border around each letter, for a soft mid glow.

  • Cut through

    The I, the P, the A's main strokes, and the large heart are cut clear through for the brightest light.

Learn the carving basics

Before you start cutting

How do I keep the triangle inside the A from falling out?

Leave a small uncut bridge of rind at the top peak of the A that connects the triangle to the rest of the pumpkin. Cut the A's legs and crossbar first, then carve the inner triangle carefully from both sides so the cuts line up. The bridge can be as narrow as a quarter inch and will barely show once lit.

Should I use a candle since this is meant to glow orange?

We recommend a battery LED puck or string light instead of a candle. Open cutout designs like this can let a flame flicker or blow out, and the heat is a fire risk near dry rind. An LED gives you a steady, even orange glow and is safe to leave running all evening.

This is a concept image, so how do I plan spacing on a real pumpkin?

Choose a pumpkin with a wide, fairly flat front so all five elements fit without wrapping around the curve. Size your pattern to leave a finger's width of skin between each letter and the heart. Test the layout with the paper stencil taped in place and adjust before you poke your guide holes.

Your take belongs here, too.

Changed a detail? Made it simpler? Share a photo of your version and tell the community what worked.

Share your pumpkin

More pumpkins like this

You've reached the end · 8 pumpkins
The Patch Report

Fresh pumpkins, in your inbox.

The best new carvings, ideas worth stealing, and how-tos for carving season. Short, seasonal, and gone by November.

A short email during carving season. Unsubscribe anytime. See our privacy policy.