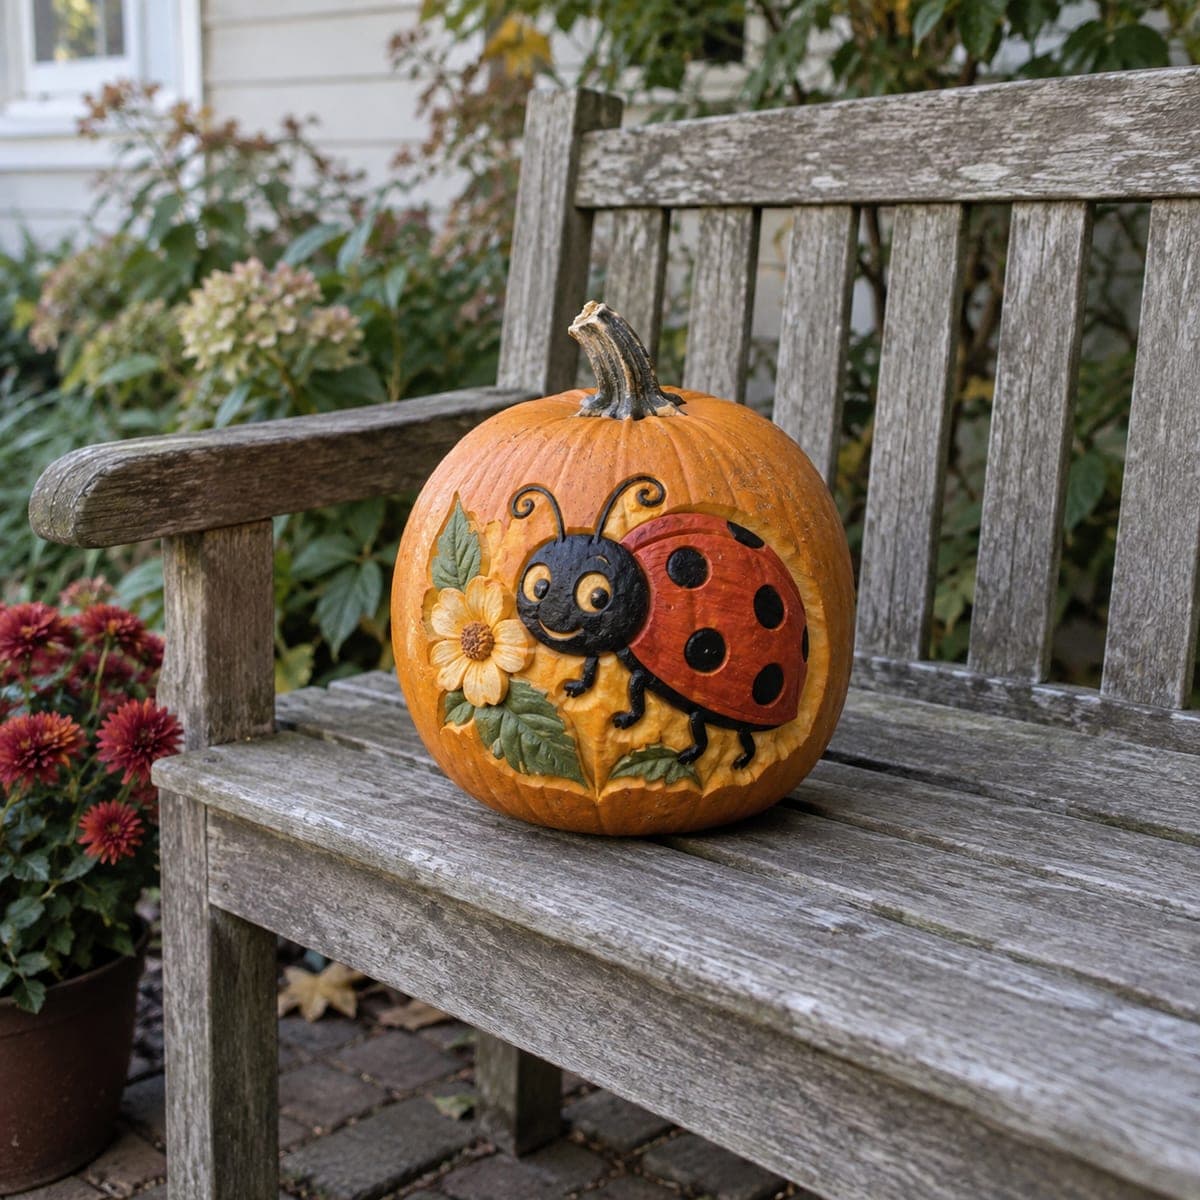
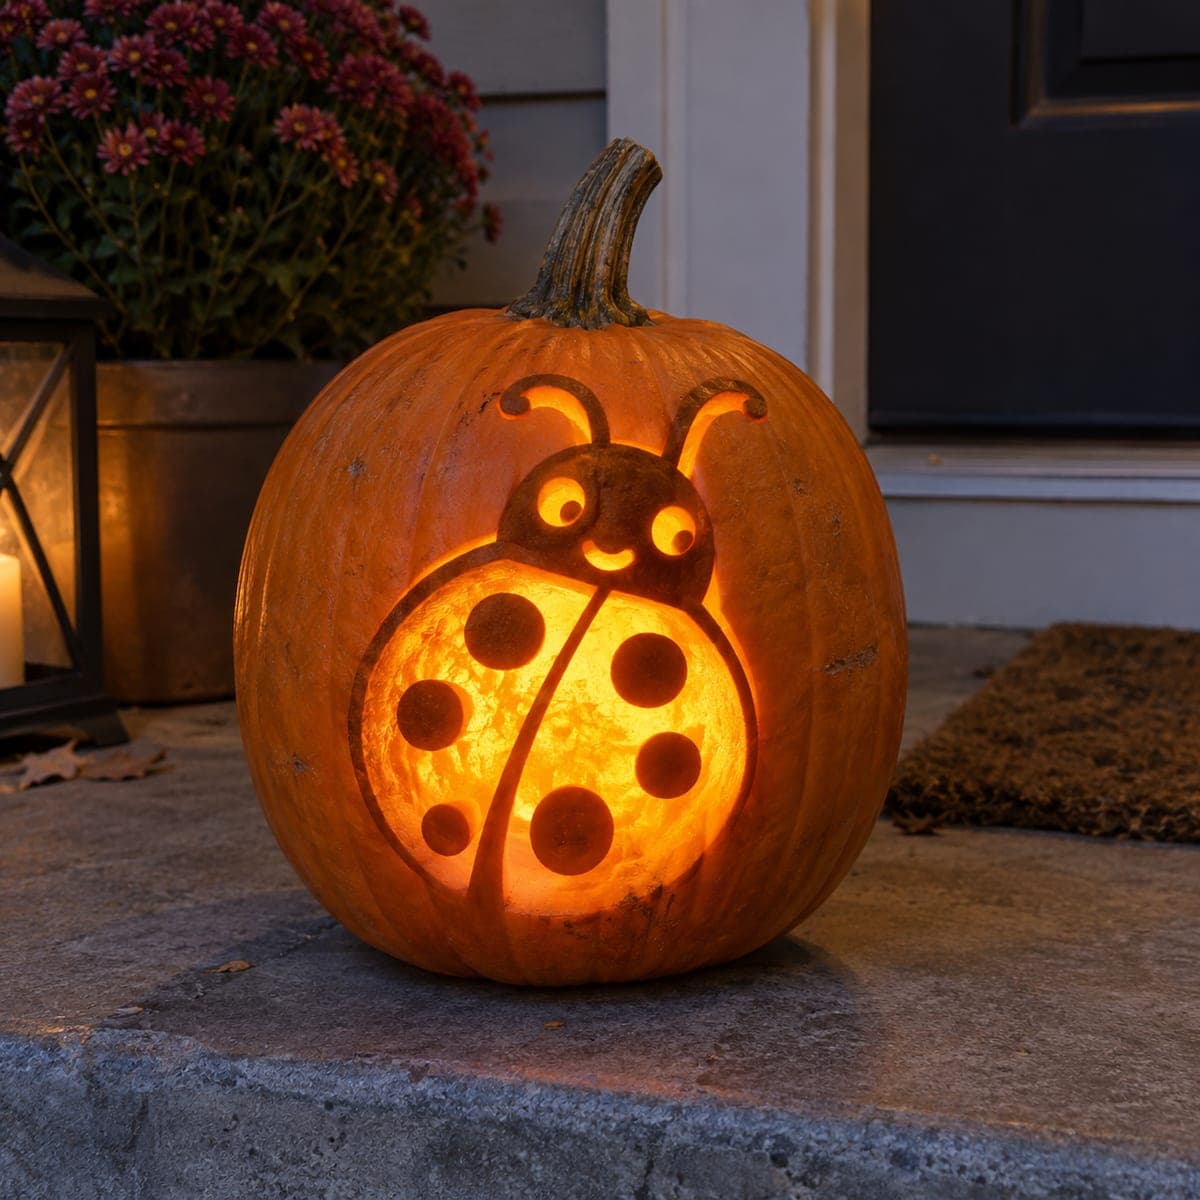
A cheerful ladybug with bold black spots crawls beside a carved daisy and leaves, the whole scene sculpted in painted relief that looks bright and finished in daylight. The design combines shallow relief carving with acrylic color, so the red shell and yellow petals pop without any interior light. Carve the raised shapes first, seal the cut surfaces with petroleum jelly, then paint once dry. A lovely garden-theme pumpkin for fall porches that skips spooky entirely.
This is an AI-generated concept image: a realistic, carvable design idea rather than a photo of a finished carve. AI concepts are always labeled and sit out the leaderboard and the contest.
The core trick here is relief carving, where you sculpt raised shapes into the pumpkin wall instead of cutting all the way through, then finish with acrylic paint so the ladybug and daisy read clearly in daylight. Because this is an AI concept image, no real pumpkin exists, but you can build a very close version by carving the raised ladybug body, flower, and leaves first, then scooping the background lower around them. The whole scene relies on color and shadow rather than interior light.
Written by PumpkinCarvingIdeas.com, inspired by the image above. These are our suggestions, not instructions from the uploader. This approach to the AI concept has not been tested on a real pumpkin.
From pumpkin to porch
1
Transfer and plan your layers
Choose a smooth, broad-shouldered pumpkin and wipe it clean. Tape your stencil to the front and poke or trace the outlines of the ladybug, daisy, and leaves. Think in layers before you cut: the ladybug shell sits highest, the flower and leaves slightly lower, and the background lowest. Mark which lines are edges to keep raised so you do not carve them away by accident.
2
Score every outline
With a small detail saw or a clean craft knife, score about a quarter inch deep along all the outlines you traced. Keep the blade straight down so each shape gets a crisp wall. Have an adult handle the sharp tools and cut on a stable surface. These score lines protect your raised shapes when you start removing the background.
3
Lower the background
Using a ribbon or loop tool, shave away the skin and a thin layer of flesh in the background areas around the ladybug and flowers. Work slowly and keep the depth even, roughly an eighth to a quarter inch, so the subjects stand up in relief. Leave narrow bridges of pumpkin intact where the ladybug legs and antennae are so those thin parts stay supported. Do not cut all the way through the wall at any point.
4
Shape and shade the subjects
Round the top of the ladybug shell slightly and carve a shallow groove to separate the two wings. Peel just the skin off the daisy petals and leaves so they sit a touch lower than the raised centers and veins. Use gentle scooping to hint at the flower center and the ladybug head. This shading is where the design gets its dimension, so take your time.
5
Seal and paint
Let the cut surfaces dry for an hour, then rub a thin coat of petroleum jelly over all exposed flesh to slow drying and keep edges crisp. Once it feels tacky, paint with acrylics: red shell with bold black spots, black head and legs, yellow petals with a gold center, and green leaves. Add tiny white highlights to the eyes and shell for that cheerful look. Let each color dry before adding the next so they stay clean.
6
Display and photograph
Because there is no interior cutout, this pumpkin is meant to be seen in daylight or under a warm porch light. Set it on a bench or step where the raised scene catches soft side light and shows off its shadows. If you want a nighttime glow, aim a small LED spotlight at the front rather than placing a light inside. Snap your photo in the morning sun when the colors look brightest.
Gather your supplies
Check things off as you get ready.
Work on a stable surface, keep your free hand out of the cutting path, and have an adult handle sharp tools.
Three levels of light
Leave intact
The raised ladybug shell, flower center, and leaf veins keep their full skin and painted color for the boldest, darkest tones.
Peel & shade
The daisy petals, leaves, and ladybug head get skin-peeled just slightly to sit lower and take paint smoothly.
Cut through
Only the shallow background is scooped down; nothing is cut through the wall, since this design relies on paint and shadow rather than interior light.
Do I need to hollow out the pumpkin or add a light?
No, this is a relief and paint design, so the inside stays intact and there is no interior light. You can leave the pumpkin whole, which actually keeps the wall sturdy for carving raised shapes. If you want a glow at night, point a small LED spotlight at the front instead of placing one inside.
How do I keep the thin ladybug legs and antennae from breaking?
Carve them in shallow relief rather than as free-standing pieces, leaving pumpkin behind them for support. Keep the grooves narrow and do not undercut them. Painting them black over the raised or scored lines reads just as clearly as deep cuts and stays much stronger.
Why seal the surface with petroleum jelly before painting?
Exposed pumpkin flesh dries out and shrinks, which can crack your paint and blur crisp edges. A thin coat of petroleum jelly slows that drying so the relief stays sharp for days. Wait until it feels tacky, then paint with acrylics for the brightest color.
Your take belongs here, too.
Changed a detail? Made it simpler? Share a photo of your version and tell the community what worked.
 AI
AI
Comments (0)