Halloween Pumpkin Carving Contest · Starts October 1st · $500 in prizes
← Back to ideas
@ai_concepts
Aug 17, 2026
Ornate Peacock Pumpkin Carving With Glowing Tail FeathersAI
0

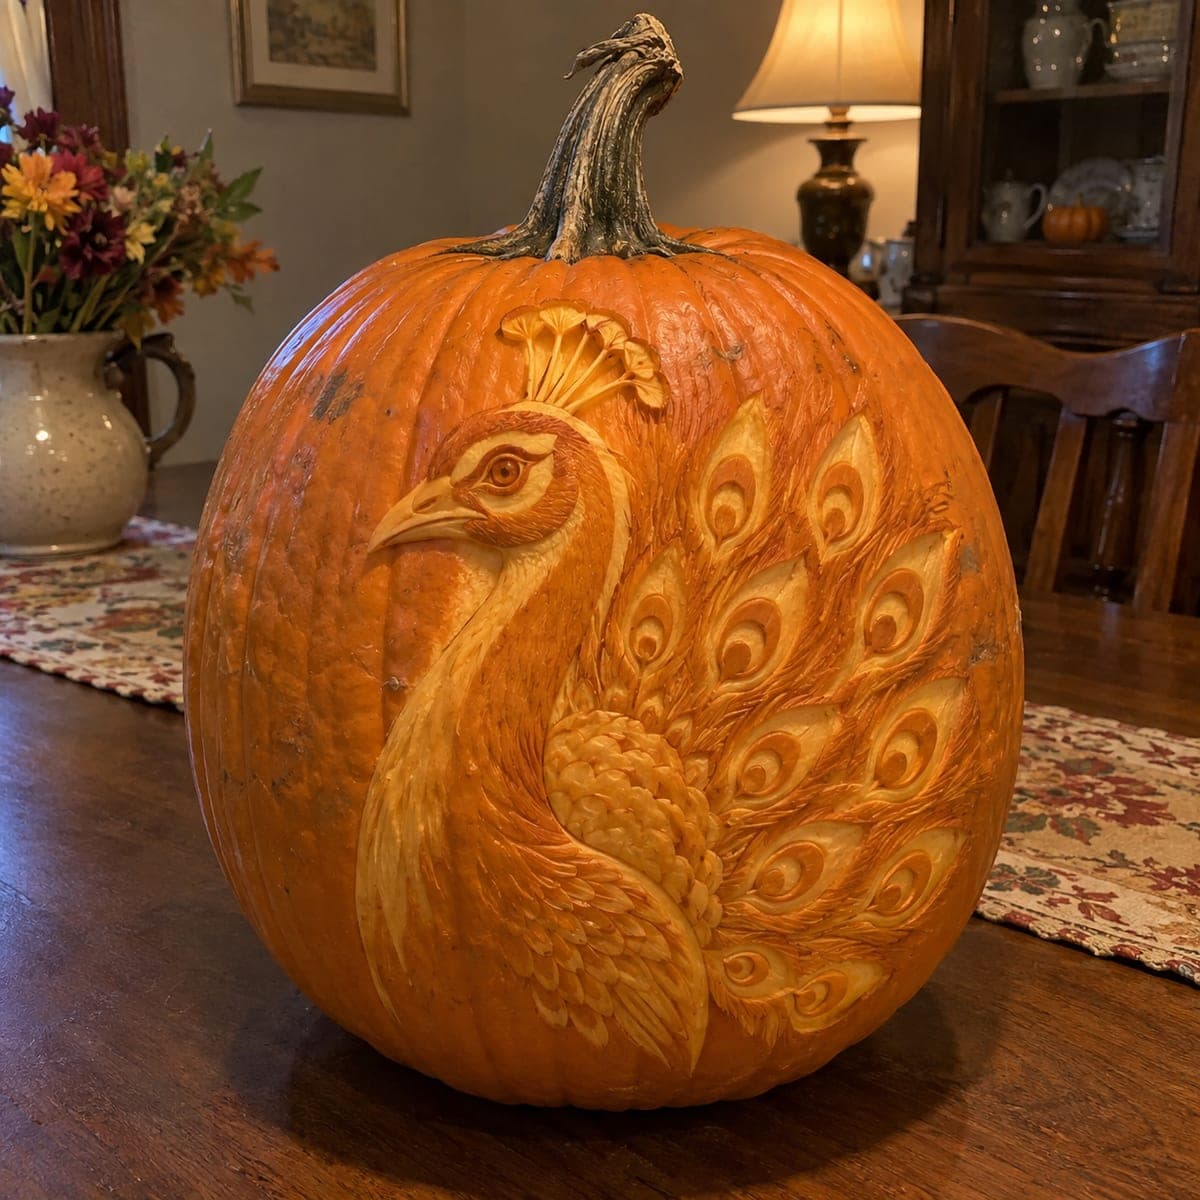
Ornate Peacock Pumpkin Carving With Glowing Tail Feathers

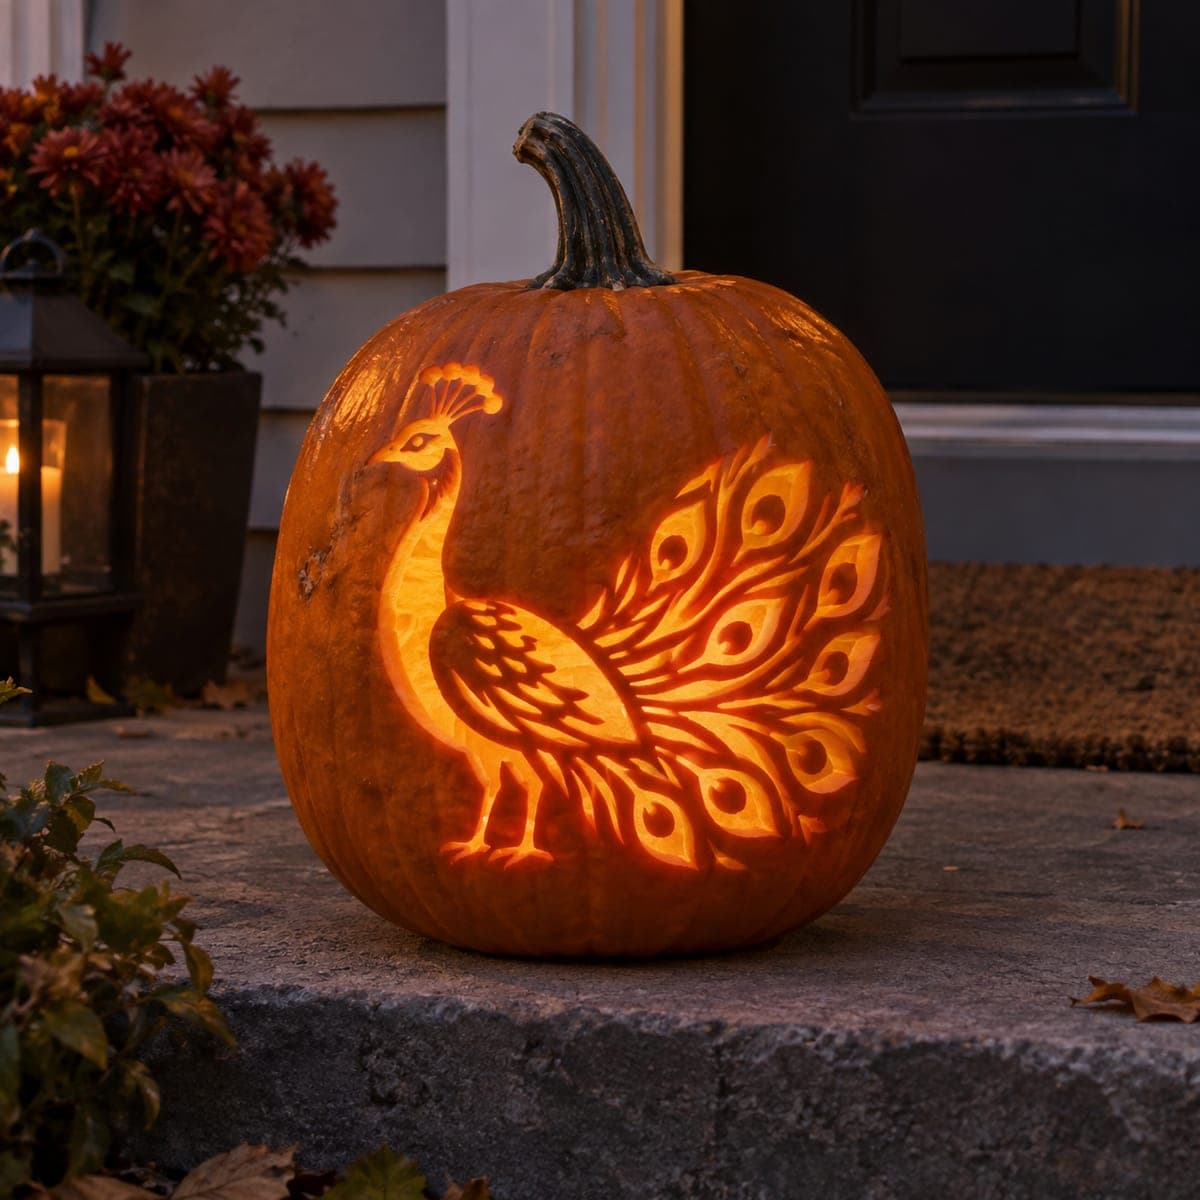
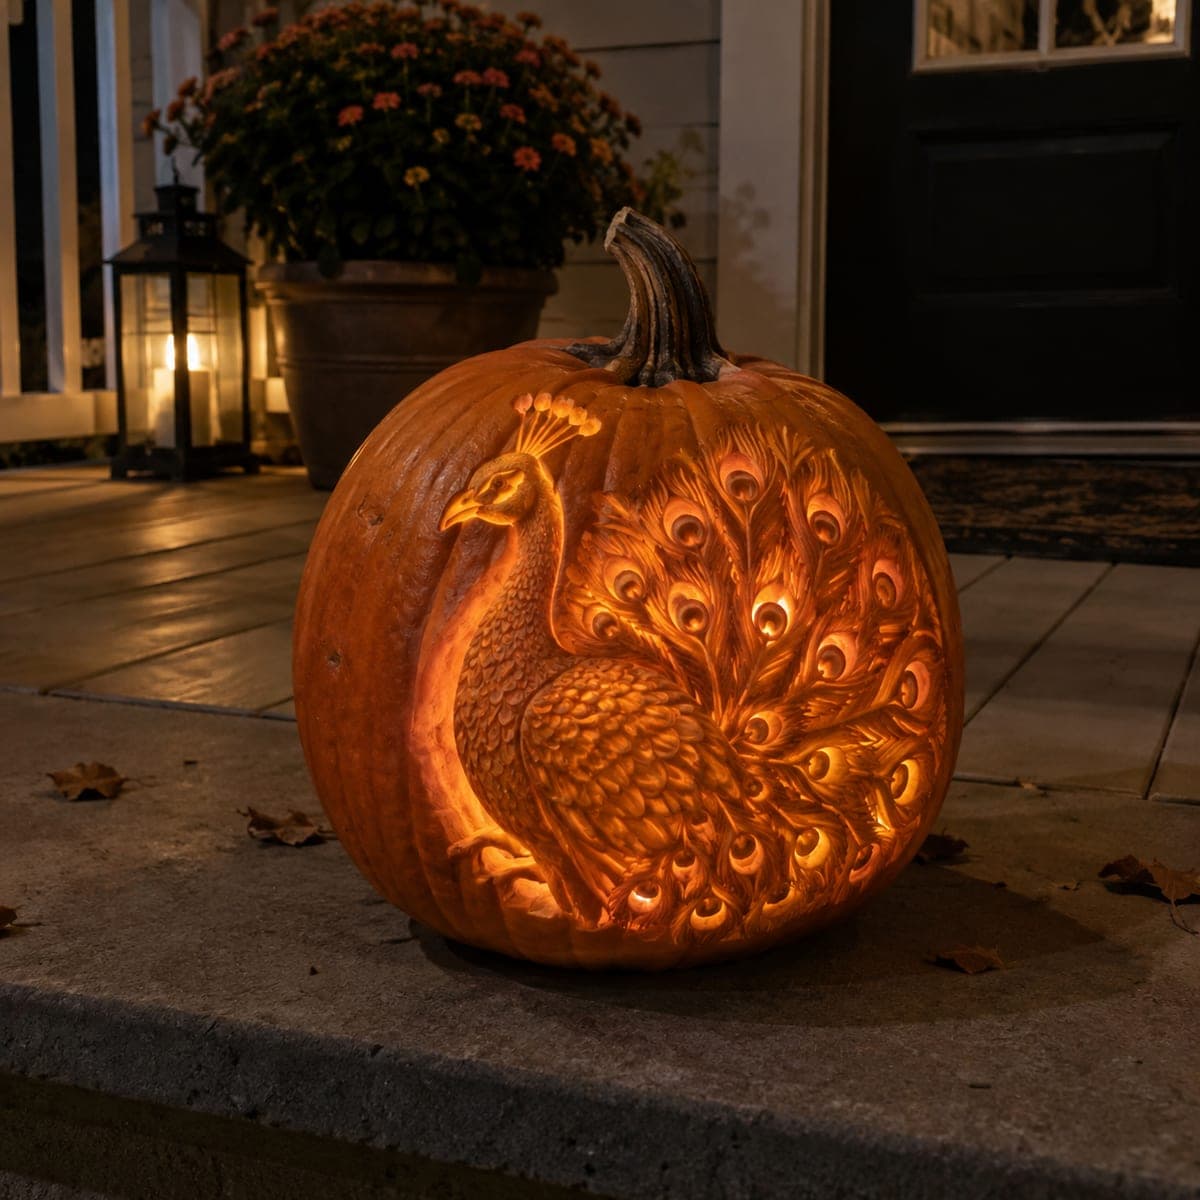
A regal peacock spreads a fan of eyespot feathers across this show-stopping carved pumpkin, each feather eye pierced to blaze like a tiny lantern. The body and crest are relief carved for gray tones while the tail spots are cut fully through, mixing shading and cutout in one design. Carve the delicate feather eyes last so the wall stays strong, and use a bright plug-in bulb to push light through the dense pattern.

This is an AI-generated concept image: a realistic, carvable design idea rather than a photo of a finished carve. AI concepts are always labeled and sit out the leaderboard and the contest.

No ratings yet · Sign in to rate
Comments (0)

  • No comments yet — be the first.

Save without an account. Sign in to like or comment.

Our tips for carving a similar design

The core trick here is combining two techniques on one face: relief carve the bird's body and crest so they glow soft gray, then pierce each tail eyespot all the way through so it blazes like a tiny lantern. Plan the layout first so the dense fan of feathers spreads evenly without weakening any single strip of shell. Save the pierced eyes for last so the wall stays strong while you do the slow shading work.

Written by PumpkinCarvingIdeas.com, inspired by the image above. These are our suggestions, not instructions from the uploader. This approach to the AI concept has not been tested on a real pumpkin.

From pumpkin to porch

  1. Pick a big, smooth pumpkin and open the back

    Choose a large pumpkin with one broad, even face for the peacock and its fanned tail. Cut a wide access hole in the back rather than the top so the front stays unbroken for the design. Scrape the inside wall behind the tail down to about one inch so light passes through the pierced eyes later. Keep the front wall a little thicker where you plan to relief carve.

  2. Transfer the peacock pattern

    Tape your stencil flat against the front, snipping darts around the curve so it lies smooth. Poke the outlines with a pin tool, spacing dots close together on the fine feather lines. Mark which spots are relief zones and which are full cutouts before you peel the paper. A light pencil note on the skin saves confusion once the pattern is off.

  3. Relief carve the body and crest

    Use a small loop or ribbon tool to shave the skin off the bird's head, neck, and body so it glows dim orange. Vary your depth to suggest rounded scales on the breast and layered feathers on the wing. Leave the darkest outlines as untouched skin so the shapes read clearly. Work patiently and keep both hands behind the blade edge.

  4. Shade the tail feather shafts

    Peel shallow channels to form the long, sweeping shafts that spread out from behind the bird. Keep narrow ribs of untouched skin between them so the fan does not collapse into one big soft area. These half-depth grooves catch light and give the tail its flowing sense of motion. Step back often to check the fan stays balanced left to right.

  5. Pierce the eyespots last

    Now cut each feather eye fully through with a fine saw or drill-style tool, starting with the ones farthest from each other. Keep every opening small and leave solid pumpkin between them so the wall never gets fragile. Cut the largest eyes near the outer edge only after the smaller inner ones are done. If the shell starts to flex, stop and leave more bridges between holes.

  6. Light it and photograph

    Set a bright plug-in LED bulb inside, since the dense pattern needs strong light to push through. Aim it toward the tail so every pierced eye glows. Rub a little petroleum jelly on the cut edges to slow drying, and shoot your photo at dusk on a porch step for the warmest look.

Gather your supplies

Check things off as you get ready.

Work on a stable surface, keep your free hand out of the cutting path, and have an adult handle sharp tools.

Three levels of light

  • Leave intact

    The dark outline of the bird, its facial markings, and the ribs between feather shafts stay as untouched skin.

  • Peel & shade

    The body, crest, wing scales, and long tail shafts are skin-peeled for a soft gray-orange glow.

  • Cut through

    Each round feather eyespot is cut fully through so it blazes brightest.

Learn the carving basics

Before you start cutting

How do I keep the tail from getting too fragile with so many holes?

Leave a solid rib of pumpkin between every pierced eye and cut the biggest openings last. Keep each hole small rather than merging neighbors into one large gap. If the shell starts to flex under your hand, stop piercing and preserve more bridges.

Do I really need a plug-in bulb instead of a battery light?

The pattern is dense, so a brighter, steady light helps every pierced eye read from a distance. A plug-in LED bulb pushes more light than most small battery units. Never use a candle, since the thin relief areas can scorch and the heat dries the pumpkin fast.

This is an AI concept, so can a real pumpkin look this detailed?

You can get close, but plan for a slightly simpler fan and thicker bridges than the image shows. Real pumpkin walls need support, so reduce the number of eyespots if the shell feels thin. Focus your best detail on the bird's body and a dozen well-placed feather eyes.

Your take belongs here, too.

Changed a detail? Made it simpler? Share a photo of your version and tell the community what worked.

Share your pumpkin

More pumpkins like this

You've reached the end · 8 pumpkins
The Patch Report

Fresh pumpkins, in your inbox.

The best new carvings, ideas worth stealing, and how-tos for carving season. Short, seasonal, and gone by November.

A short email during carving season. Unsubscribe anytime. See our privacy policy.