Halloween Pumpkin Carving Contest Β· Starts October 1st Β· $500 in prizes
← Back to ideas
@ai_concepts
Aug 7, 2026
Flamingo Shaded Carving Pumpkin at NightAI
0

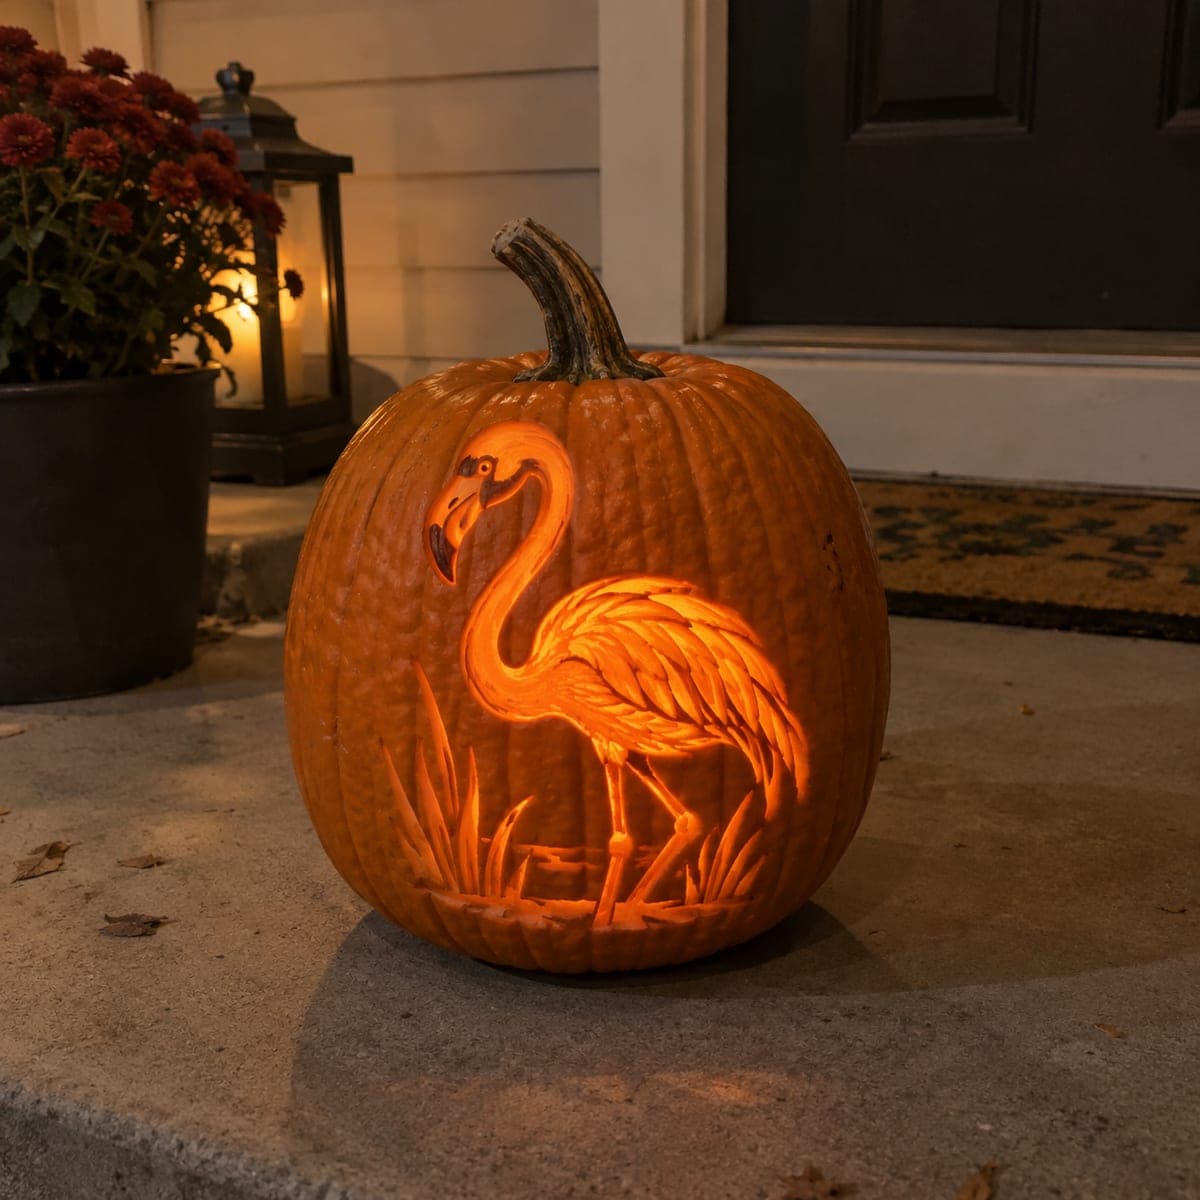
Flamingo Shaded Carving Pumpkin at Night

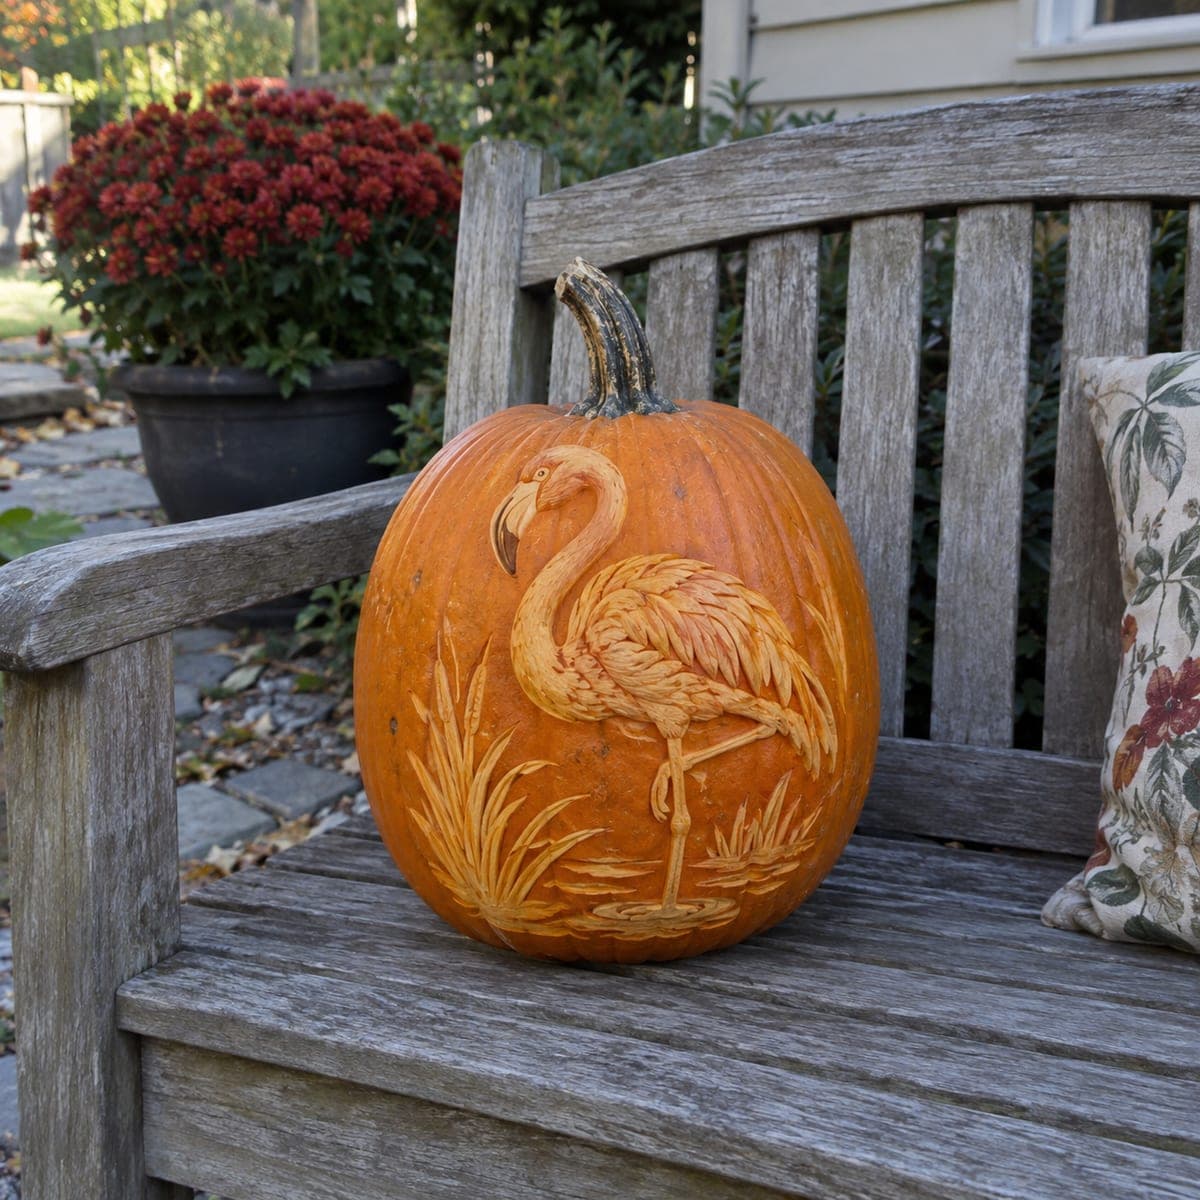
A graceful flamingo standing among marsh grasses is carved in detailed shading on a pumpkin, the bird's long neck, curved beak, and layered feathers all captured in varying depths of peeled flesh that glow warmly from a candle inside. Work from the brightest highlights on the bird's chest outward toward the darker grass at the base. Adding an LED tea light instead of a real flame will let the soft gradients show without casting uneven shadows. A sophisticated nature pumpkin carving idea that rewards careful, patient work.

This is an AI-generated concept image: a realistic, carvable design idea rather than a photo of a finished carve. AI concepts are always labeled and sit out the leaderboard and the contest.

No ratings yet Β· Sign in to rate

Comments (0)

  • No comments yet β€” be the first.

Save without an account. Sign in to like or comment.

Our tips for carving a similar design

The core trick here is skin-peeling at different depths so a single flamingo appears in soft light-to-dark gradients rather than hard holes. You would shave the flesh thin where you want the bird to glow brightest, leave more flesh where you want dimmer tones, and cut fully through only a few small accents. Plan to work from the brightest highlights on the chest and neck outward toward the darker marsh grass at the base.

Written by PumpkinCarvingIdeas.com, inspired by the image above. These are our suggestions, not instructions from the uploader. This approach to the AI concept has not been tested on a real pumpkin.

From pumpkin to porch

  1. Transfer and plan your values

    Print or draw the flamingo, tape it flat to the pumpkin, and poke the outlines with a pin or transfer tool. Before cutting anything, mark which areas will be bright, medium, and dark so you have a value map. Shading is easier when you decide the plan up front rather than guessing mid-carve. Keep the neck, beak, and legs marked clearly since those thin shapes are the trickiest.

  2. Open the pumpkin and thin the wall

    Have an adult cut a lid or, better for shading, a hole in the back or base so the front stays smooth. Scoop out the seeds and scrape the inside wall down to about one inch thick where the design sits. A thinner, even wall lets the peeled areas glow consistently. Take your time and check thickness with a fingertip as you go.

  3. Peel the brightest highlights first

    Using a shallow ribbon or loop tool, shave the pumpkin skin off the chest, upper neck, and front of the body where you want the strongest glow. Remove more flesh for brighter spots and less for softer tones. Work slowly and test with an LED light to judge how bright each area reads. It is easier to remove more later than to put flesh back.

  4. Build the feather and neck gradients

    Move outward into the layered wing feathers and the curve of the long neck, peeling a little less deeply so these read as medium tones. Carve the feathers in overlapping strokes so each layer casts a subtle edge. Keep the beak details and eye shallow so they stay crisp. Leave narrow ridges of untouched skin between shapes to hold the drawing together.

  5. Shade the grass and add small cutouts

    Peel the marsh grasses lightly so they stay dim and frame the bird, and save any full cutouts for last. If you want a few bright accents, cut all the way through only on tiny slivers, such as a gap between the legs or the brightest tip of the chest. Cutting big openings early weakens the wall, so keep these small and do them at the end. Clean up stray edges with a detail knife.

  6. Light it and photograph

    Drop in one or two LED tea lights, never a real flame, so the soft gradients show without flickering shadows. Set the pumpkin on a porch step at dusk and check that the flamingo reads clearly from a few feet away. If any area looks flat, shave a touch more flesh to brighten it. Snap your photo in low light to capture the warm glow.

Gather your supplies

Check things off as you get ready.

Work on a stable surface, keep your free hand out of the cutting path, and have an adult handle sharp tools.

Three levels of light

  • Leave intact

    The untouched pumpkin skin around the bird and the background stays dark, keeping the flamingo's silhouette clear.

  • Peel & shade

    The chest, neck, layered wing feathers, and marsh grass are skin-peeled at varying depths for the mid orange glow and the bird's soft gradients.

  • Cut through

    Only a few tiny accents, like a slim gap between the legs or the brightest chest edge, are cut fully through for pinpoints of bright light.

Learn the carving basics

Before you start cutting

How do I keep the long neck and thin legs from breaking?

Shade them rather than cutting them fully out, since peeled flesh keeps the wall intact and strong. Leave narrow ridges of untouched skin along the edges to act as bridges. Save any full cutouts near the legs for the very end so the pumpkin stays sturdy while you work the rest of the design.

What thickness should the wall be for smooth shading?

Aim for about one inch behind the design so light passes evenly through peeled areas. Scrape the inside until it feels uniform, checking with a fingertip. An even wall is what makes the gradients look smooth instead of blotchy.

Why use an LED instead of a candle for this design?

A candle flame flickers and casts uneven shadows that fight the soft gradients you worked to create. One or two LED tea lights give steady, even light so the shading reads cleanly. LEDs are also safer and will not scorch the thin peeled areas.

Your take belongs here, too.

Changed a detail? Made it simpler? Share a photo of your version and tell the community what worked.

Share your pumpkin

More pumpkins like this

You've reached the end Β· 8 pumpkins
The Patch Report

Fresh pumpkins, in your inbox.

The best new carvings, ideas worth stealing, and how-tos for carving season. Short, seasonal, and gone by November.

A short email during carving season. Unsubscribe anytime. See our privacy policy.