Halloween Pumpkin Carving Contest · Starts October 1st · $500 in prizes
← Back to ideas
@ai_concepts
Aug 29, 2026
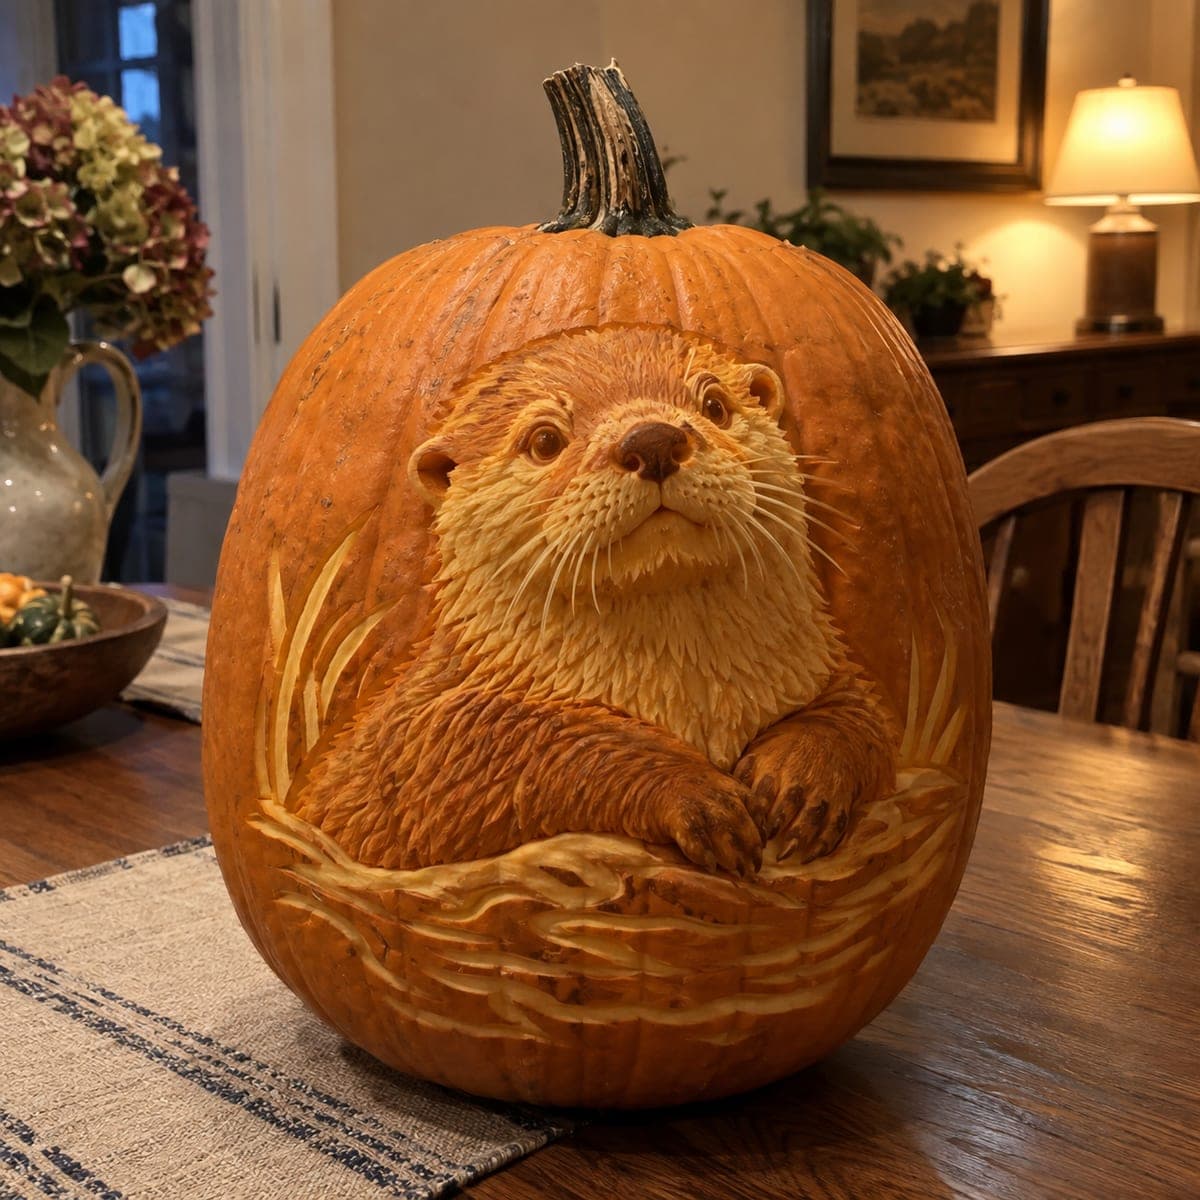
River Otter Portrait Expert Shading Pumpkin CarvingAI
0

River Otter Portrait Expert Shading Pumpkin Carving

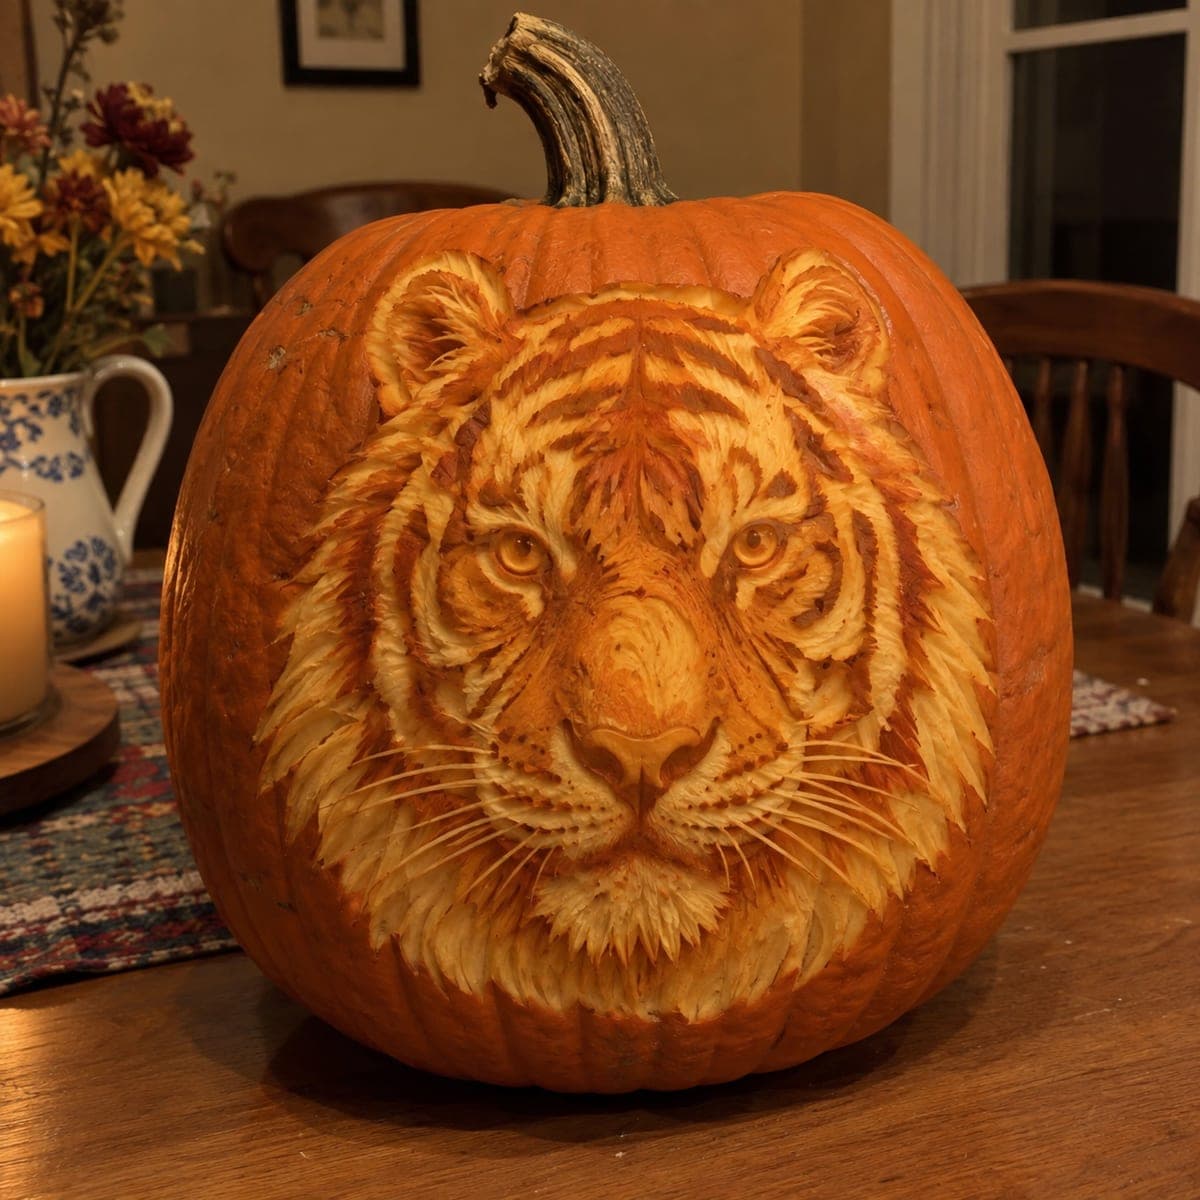
A wide-eyed river otter looks directly out from this pumpkin, its whiskers, rounded ears, and wet fur rendered in astonishing carved relief against reeds and flowing water. Achieving this level of expert pumpkin carving requires a full set of loop and gouge tools, removing the skin in at least three distinct depth layers to create the fur gradients from light chest to dark shoulders. Carve the background water and reeds first at the shallowest depth, then build the otter's face at progressively deeper levels. A warm amber candle inside brings the otter's eyes to luminous life after dark.

This is an AI-generated concept image: a realistic, carvable design idea rather than a photo of a finished carve. AI concepts are always labeled and sit out the leaderboard and the contest.
No ratings yet · Sign in to rate

Comments (0)

  • No comments yet — be the first.

Save without an account. Sign in to like or comment.

Our tips for carving a similar design

This design is really a relief sculpture, not a cut-through jack-o-lantern, so the core trick is removing pumpkin skin in at least three depth layers to fake soft fur gradients. The plan is to shave the shallow reeds and water first, then work the otter face progressively deeper so the pale chest catches the most light and the shoulders stay darker. Since this is an AI concept and no real pumpkin exists, treat the steps as a route you could follow to build something similar.

Written by PumpkinCarvingIdeas.com, inspired by the image above. These are our suggestions, not instructions from the uploader. This approach to the AI concept has not been tested on a real pumpkin.

From pumpkin to porch

  1. Prep and transfer the design

    Pick a tall, smooth-skinned pumpkin and scrape the inside wall on the carving face down to about one inch thick so light can pass through the shaved areas. Tape your otter pattern in place and poke or trace the main outlines: the head, the two front paws, and the reed lines. Keep the eyes, nose, and whisker roots marked clearly since those anchor the whole face. Work on a stable table with good light and let an adult handle every blade.

  2. Shave the background reeds and water

    Start with your shallowest cuts on the reeds and the flowing water band at the bottom. Peel just the top skin so these areas glow a dim orange and sit behind the otter. Leave thin raised ridges between strokes to suggest individual blades of grass and ripples. Working shallow first keeps the pumpkin strong while you build depth later.

  3. Rough in the otter's body layers

    Switch to a loop tool and remove skin across the chest and shoulders, going a little deeper than the reeds. Keep the center of the chest pale and shallow, then dig gradually deeper toward the shoulders and the outer edges of the head for shadow. Rounded scooping, not straight lines, is what reads as a soft animal shape. Check the depth often by holding the pumpkin up to a lamp.

  4. Carve the fur texture and paws

    Use a small gouge to pull short, overlapping strokes that all flow in the direction the fur grows, downward on the chest and outward on the cheeks. Carve the two front paws as slightly raised mounds and define the toes with shallow grooves. Vary your pressure so some strokes are pale and some are deep, which builds the wet, layered look. Take breaks to step back and read the whole face from a few feet away.

  5. Detail the face, eyes, and whiskers

    Deepen the areas around the eyes and nose so they read as the darkest points, then leave the eyes themselves as smooth raised domes for that wet shine. Carve the nose as a rounded dark bump and cut the nostrils last. For whiskers, score very thin shallow lines rather than cutting through, so they stay attached and structurally sound. Keep the rounded ears as gentle raised shapes with a shaded hollow inside.

  6. Light it and photograph

    Drop in a bright warm-white or amber LED puck, never a candle, since the thin shaved wall could scorch. Set the pumpkin in a dim room and check that the pale chest and eyes glow while the shoulders stay shadowed. Mist the carved surface with water and refrigerate it between viewings to slow browning. Shoot photos in low light with the LED on to capture the depth.

Gather your supplies

Check things off as you get ready.

Work on a stable surface, keep your free hand out of the cutting path, and have an adult handle sharp tools.

Three levels of light

  • Leave intact

    The dark nose, the eye pupils, and the deepest shoulder shadows stay as untouched skin.

  • Peel & shade

    The face, chest fur, paws, and background reeds are skin-peeled at different depths for a soft dim glow, with the pale chest shaved thinnest.

  • Cut through

    Optionally cut fully through only tiny points such as nostril openings or a bright eye highlight for a small sharp glint.

Learn the carving basics

Before you start cutting

Do I cut all the way through anywhere on this otter?

Mostly no. This is a relief carving where you shave layers of skin rather than cut openings, so the light glows through thinned pumpkin walls. Reserve full cutouts for very small accents like the nostrils, and save those for last so the surface stays strong while you work.

How do I keep the whiskers from breaking off?

Do not carve whiskers as free-standing strands, since thin projecting pieces snap easily. Instead score them as shallow surface lines that stay fully attached to the cheek. Under raking light they will still read as fine whiskers without any fragile structure.

How do I get the fur to look layered and soft?

The softness comes from working in at least three depth layers and from stroke direction. Keep the chest pale and shallow, go deeper toward the shoulders, and pull all your gouge strokes in the direction the fur grows. Varying your pressure so some strokes are light and some are deep is what sells the wet, layered coat.

Your take belongs here, too.

Changed a detail? Made it simpler? Share a photo of your version and tell the community what worked.

Share your pumpkin

More pumpkins like this

You've reached the end · 8 pumpkins
The Patch Report

Fresh pumpkins, in your inbox.

The best new carvings, ideas worth stealing, and how-tos for carving season. Short, seasonal, and gone by November.

A short email during carving season. Unsubscribe anytime. See our privacy policy.