Halloween Pumpkin Carving Contest · Starts October 1st · $500 in prizes
← Back to ideas
@ai_concepts
Aug 25, 2026
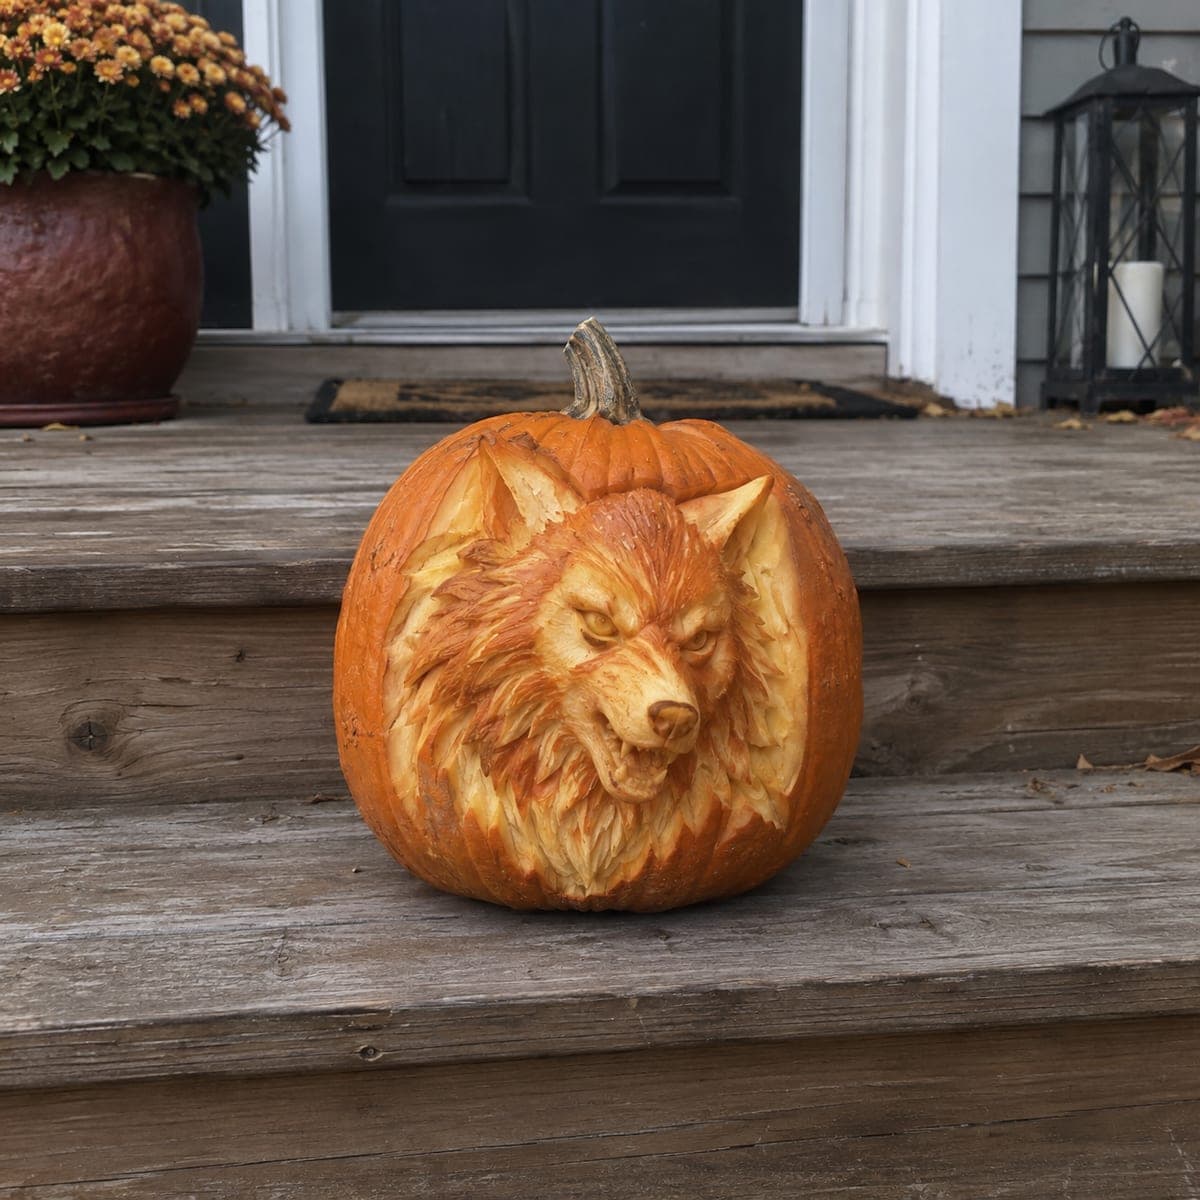
Fierce Wolf Portrait Shaded Pumpkin on Front StepsAI
0

Fierce Wolf Portrait Shaded Pumpkin on Front Steps

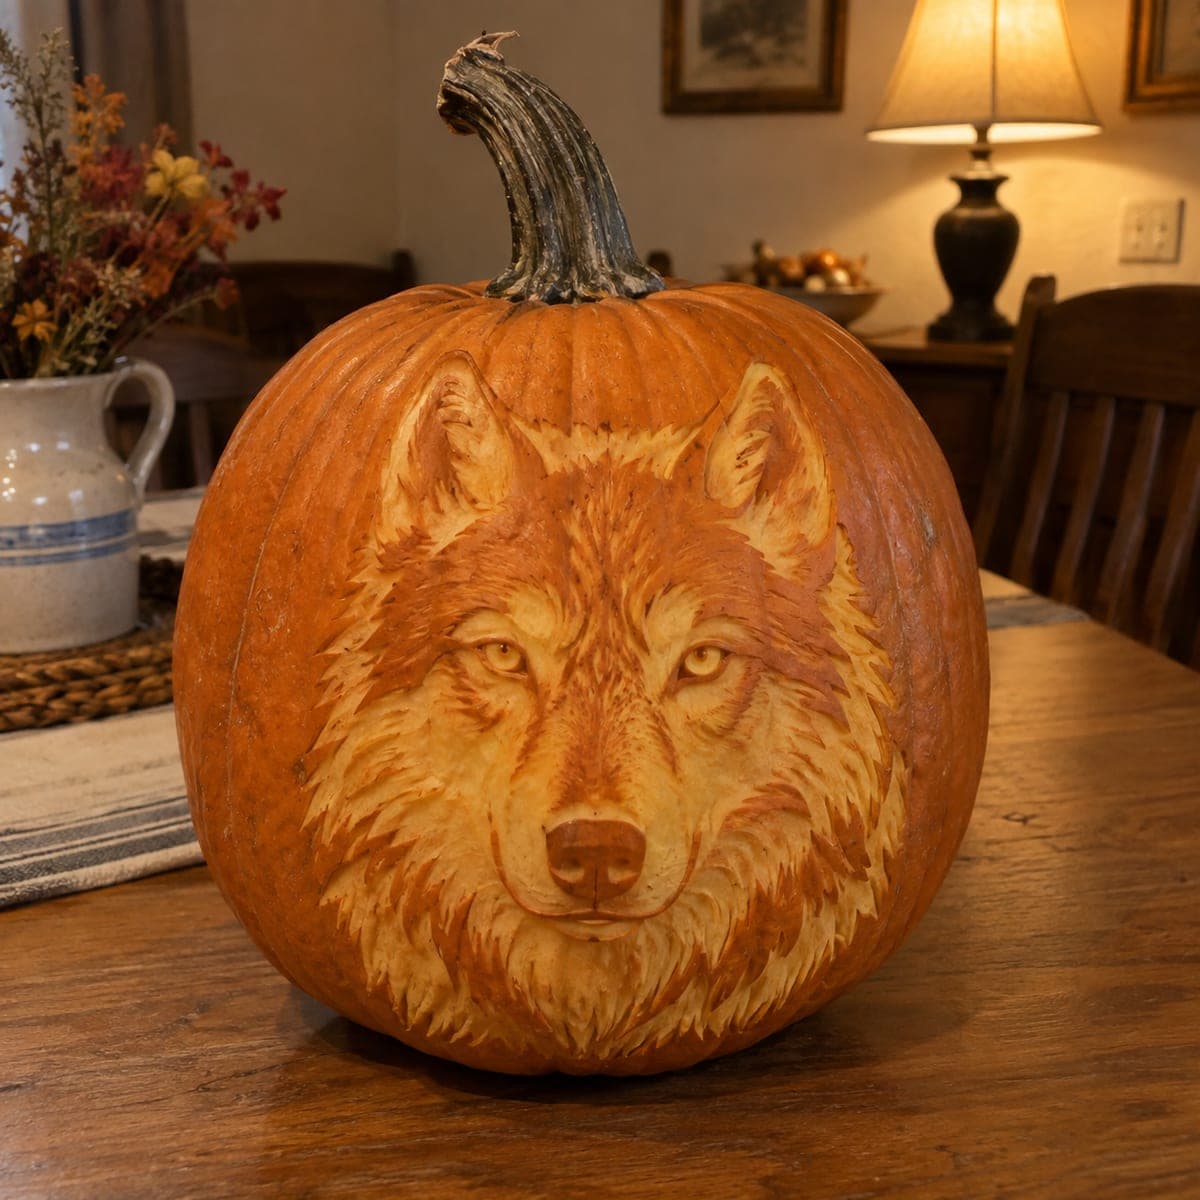
A snarling wolf with windswept fur and glowing amber eyes commands the front of this pumpkin, carved in deep sculptural shading that brings the animal's muzzle, brow ridge, and thick ruff forward in three-dimensional relief. The technique removes the outer skin at multiple depths, with the deepest cuts forming the dark eye sockets and the shallowest passes creating the pale fur highlights. Begin with a rough outline using a detail knife, then switch to a Dremel with a cylinder bit to carve the fur directionally in short strokes. Positioned on stone steps at night, the warm glow from within turns the wolf's eyes an eerie orange.

This is an AI-generated concept image: a realistic, carvable design idea rather than a photo of a finished carve. AI concepts are always labeled and sit out the leaderboard and the contest.

No ratings yet · Sign in to rate

Comments (0)

  • No comments yet — be the first.

Save without an account. Sign in to like or comment.

Our tips for carving a similar design

The core trick here is relief shading, where you never cut all the way through the pumpkin and instead remove skin and flesh at several depths so light glows through the thin spots. The plan is to build the wolf's face in layers: deepest for the shadowed eye sockets and fur gaps, shallowest for the pale highlights along the muzzle and brow. Work from a rough outline toward finer directional fur strokes.

Written by PumpkinCarvingIdeas.com, inspired by the image above. These are our suggestions, not instructions from the uploader. This approach to the AI concept has not been tested on a real pumpkin.

From pumpkin to porch

  1. Pick a thick-walled pumpkin and open the back

    Choose a large pumpkin with a smooth, blemish-free front and the thickest wall you can find, since relief shading needs plenty of flesh to carve into. Cut a round access hole in the back, not the top, so the stem and front stay intact. Scrape the inside of the front wall until it is about an inch thick and even. A thinner wall glows more readily when you get to the shallow highlight passes.

  2. Transfer and outline the wolf

    Tape your wolf portrait stencil to the front and poke through the main lines with a stylus or pin. Use a detail knife to score a shallow outline of the head, ears, muzzle, and the outer edge of the thick ruff. Keep these first cuts light, just enough to mark your boundaries. Step back and check the proportions before you remove any skin.

  3. Peel the skin to set your mid tones

    Switch to a ribbon or gouge tool and peel the outer skin off the whole wolf shape, leaving the surrounding pumpkin skin untouched so the background stays dark. This first peel gives you the base glow layer. Leave the eye areas and the deepest fur shadows alone for now. Work slowly and keep your bracing hand behind the blade at all times.

  4. Carve the fur directionally

    An adult should use a rotary tool with a small cylinder bit to sculpt the fur in short strokes that follow the direction it grows, sweeping back from the muzzle and out along the ruff. Go deeper in the gaps between fur clumps and stay shallow on the raised strands to build contrast. Take the eye sockets and the inside of the open mouth deepest so they read as shadow. Wear a dust mask and eye protection, and pause often to wipe away pulp and check your depth against the light.

  5. Push the highlights and eyes thin

    For the brightest spots, the bridge of the muzzle, the top of the brow, and the tips of the fur, carve the wall very thin so it glows almost white when lit. Leave a slightly thicker layer over the eyes so they read as a warm amber rather than blowing out. Keep small bridges of flesh intact around the ears and any delicate fur tips so nothing snaps off. Test frequently with your light inside.

  6. Light it and photograph on the steps

    Drop in a battery LED, warm white or amber, to make the eyes glow that eerie orange without the fire risk of a candle. Set the pumpkin on stone or wood steps at dusk and let the low side light rake across the relief to deepen the shadows. Mist the cut surfaces with water if they start to dry and curl during your shoot. Photograph early, since a heavily shaded pumpkin like this dries out faster than a simple cutout.

Gather your supplies

Check things off as you get ready.

Work on a stable surface, keep your free hand out of the cutting path, and have an adult handle sharp tools.

Three levels of light

  • Leave intact

    The background pumpkin skin around the head and the darkest eye sockets stay untouched for deep shadow.

  • Peel & shade

    The main face and ruff get skin-peeled for a mid amber glow, including the eyes left slightly thick.

  • Cut through

    The muzzle bridge, brow ridge, and fur tips are carved thinnest for the brightest highlights.

Learn the carving basics

Before you start cutting

This looks like a 3D sculpture, not a see-through carving. How does that work?

It is a relief carving, so you never cut all the way through the front wall. You remove skin and flesh at different depths, and the light glows through the thin areas while the thick and untouched areas stay dark. That difference in brightness is what creates the sculpted, three-dimensional look.

How thick should I leave the wall for the glow to show?

Aim for about an inch across most of the face, then thin the highlight areas down to a quarter inch or less so they light up brightly. Leave the eyes a touch thicker so they read as amber instead of washing out white. Test with your LED inside as you go, since every pumpkin varies.

Can a first-timer pull this off?

This is an expert-level project because of the layered depth control and rotary fur work, so it helps to have shaded a pumpkin before. If you are newer, practice on a spare pumpkin or start with a simpler shaded animal face. Give yourself a few hours and good light.

Your take belongs here, too.

Changed a detail? Made it simpler? Share a photo of your version and tell the community what worked.

Share your pumpkin

More pumpkins like this

You've reached the end · 8 pumpkins
The Patch Report

Fresh pumpkins, in your inbox.

The best new carvings, ideas worth stealing, and how-tos for carving season. Short, seasonal, and gone by November.

A short email during carving season. Unsubscribe anytime. See our privacy policy.