Halloween Pumpkin Carving Contest Β· Starts October 1st Β· $500 in prizes
← Back to ideas
@ai_concepts
Aug 23, 2026
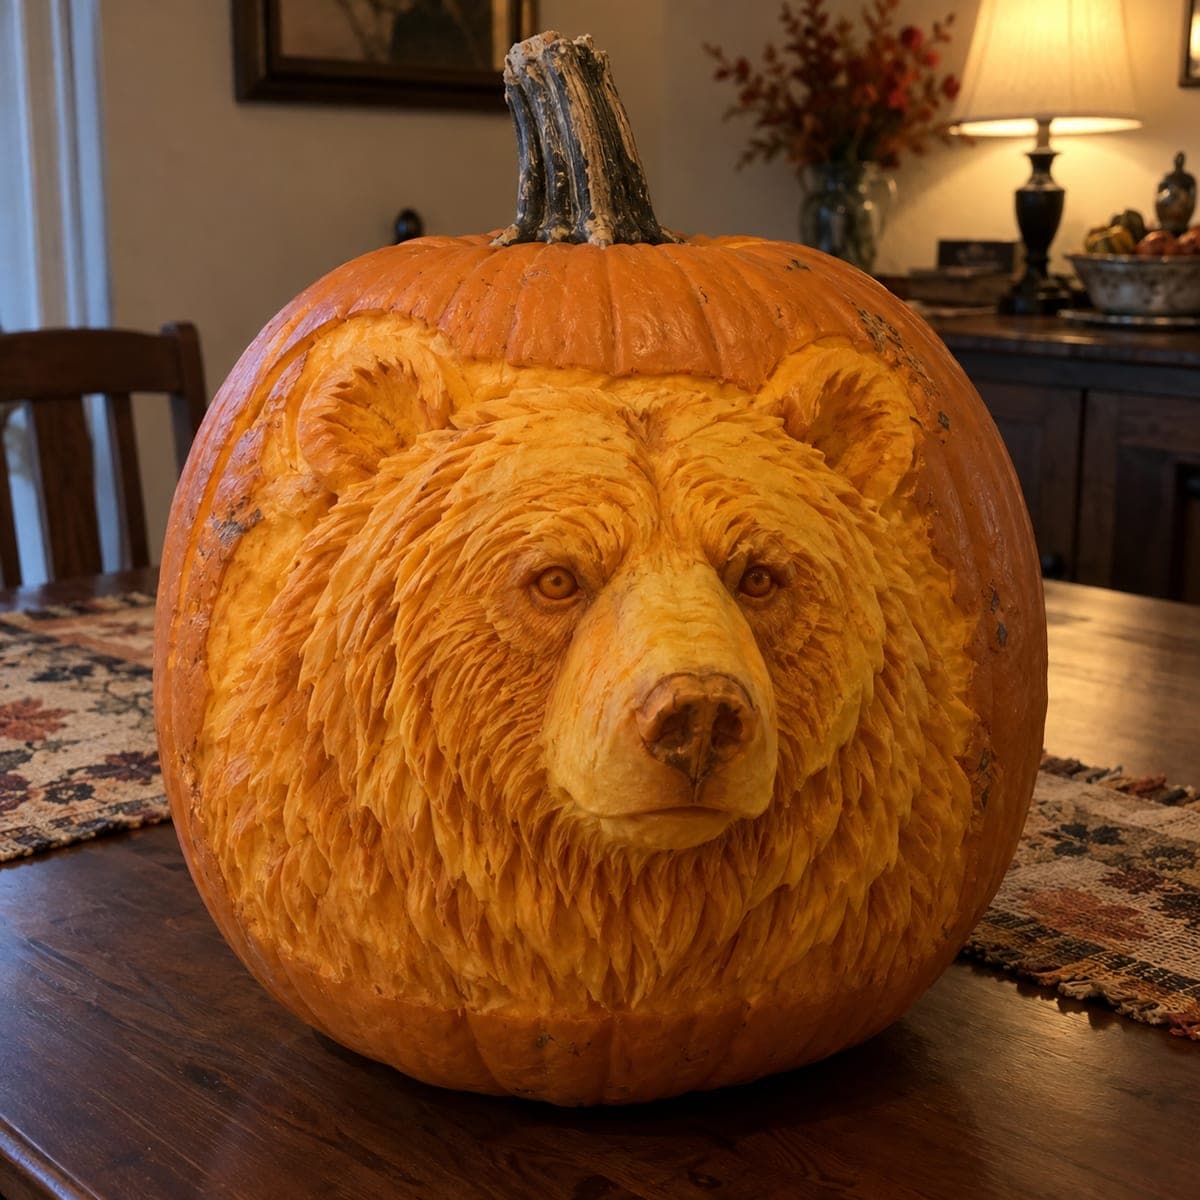
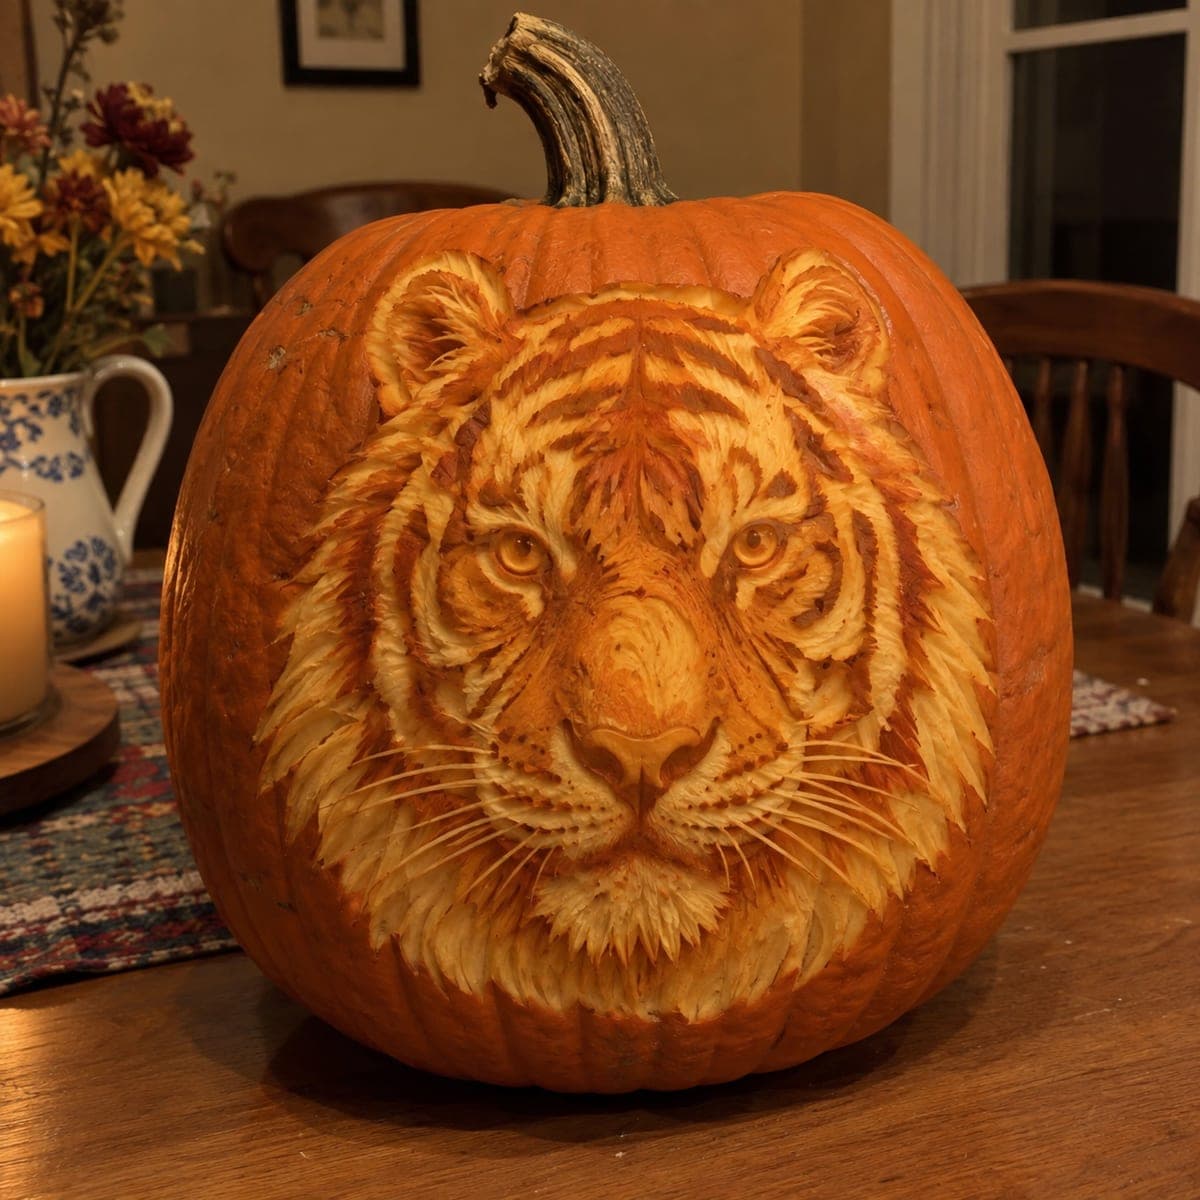
Grizzly Bear Face Expert Shading Pumpkin CarvingAI
0

Grizzly Bear Face Expert Shading Pumpkin Carving

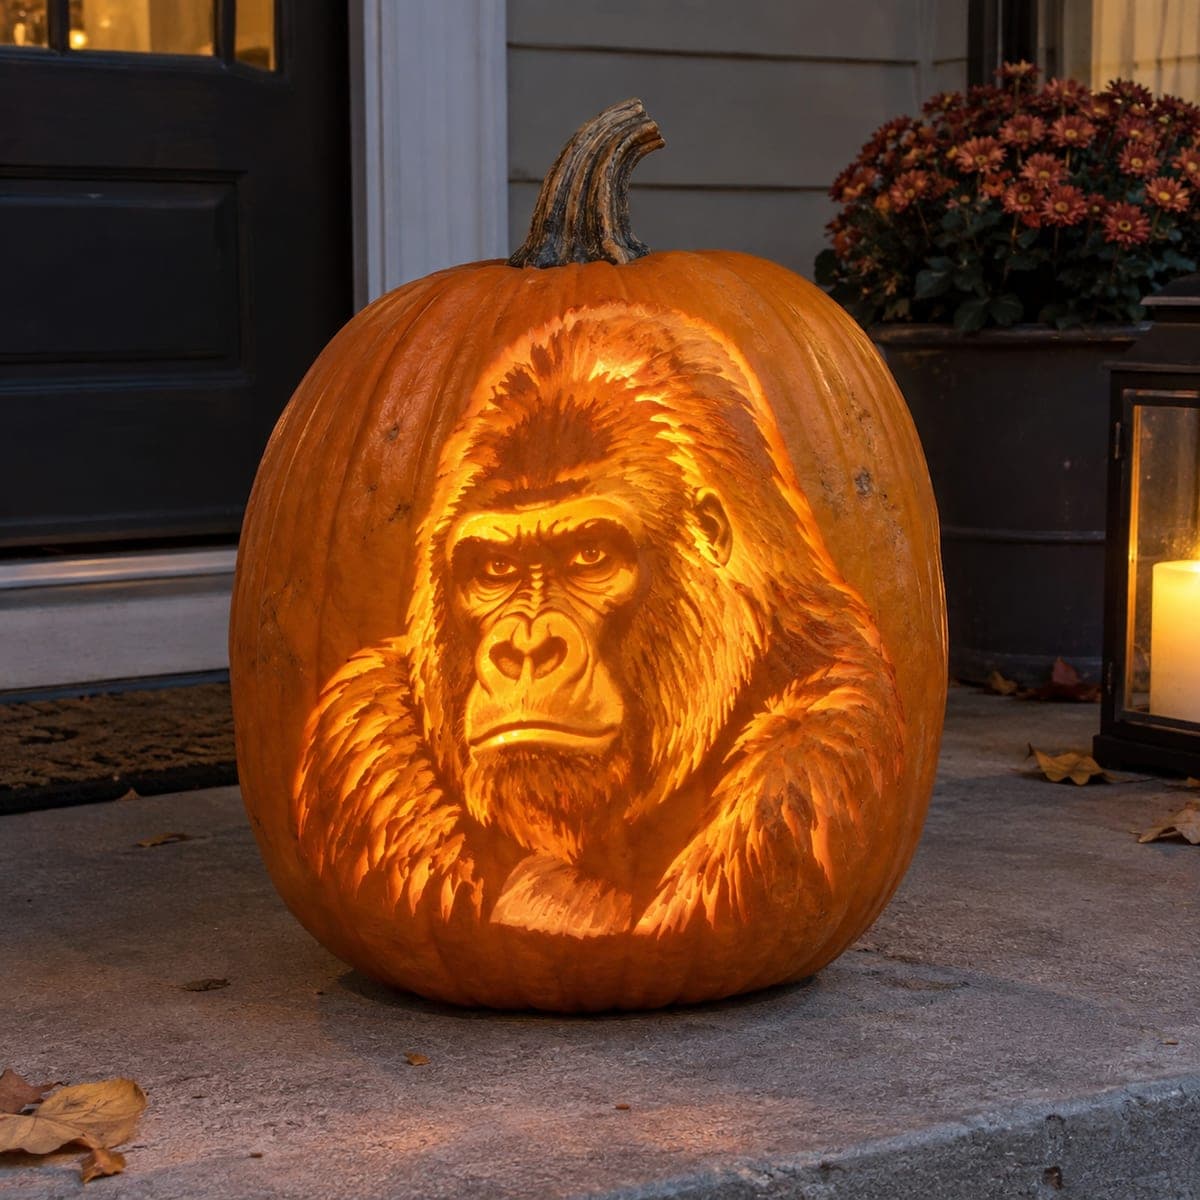
A massive grizzly bear fills the entire face of this pumpkin, its dense fur and intense amber eyes carved in breathtaking multi-level shading that rivals a woodcut print. This pumpkin carving idea demands a loop tool set, a fine V-gouge, and several hours of careful work, building the fur texture in short overlapping strokes from the outer edges inward to the nose. Removing more skin depth around the eyes makes them appear to glow with the most light, while the darkest fur areas are left nearly unpeeled. A single bright candle inside amplifies every depth variation for a striking nighttime display.

This is an AI-generated concept image: a realistic, carvable design idea rather than a photo of a finished carve. AI concepts are always labeled and sit out the leaderboard and the contest.
No ratings yet Β· Sign in to rate

Comments (0)

  • No comments yet β€” be the first.

Save without an account. Sign in to like or comment.

Our tips for carving a similar design

The whole effect here comes from relief shading, carving the skin at different depths instead of cutting all the way through. You build the bear's dense fur with short overlapping strokes and reserve the deepest skin removal for the eyes so they catch the most glow. Work from the outer edges inward toward the nose so every layer of fur overlaps naturally.

Written by PumpkinCarvingIdeas.com, inspired by the image above. These are our suggestions, not instructions from the uploader. This approach to the AI concept has not been tested on a real pumpkin.

From pumpkin to porch

  1. Transfer the portrait and plan your depths

    Choose a large, tall pumpkin with a smooth flat face and clean out the inside through a bottom hole so the front stays solid. Tape your bear stencil in place and poke or trace the main outlines: the head shape, ears, eyes, muzzle, and the boundary between light and dark fur. Before cutting, mark which zones stay dark, which get lightly peeled, and which get carved deepest. A clear map now saves you from over-cutting later.

  2. Shave down the background and set the head

    Use a wide loop tool to peel back the skin around the bear's head so the face reads as raised relief against a dimmer background. Keep the outer edge of the head slightly higher so it stands forward. Work slowly and check your depth often, since you cannot put pumpkin back. Rounding the cheeks and forehead now gives the fur strokes a surface to follow.

  3. Carve the fur in short overlapping strokes

    Switch to a fine V-gouge and pull short curved strokes that all flow outward to inward, from the edges of the face toward the nose. Overlap each row like shingles so no flat gaps show. Vary your pressure so some strokes are deeper and brighter and others stay shallow and dim. This layered texture is what gives the coat its woodcut look, so take your time and rotate the pumpkin as you go.

  4. Deepen the eyes and shape the muzzle

    Remove more skin depth around and inside the eyes so they glow brightest, but leave a thin skin layer over the eyeball rather than cutting fully through. Carve small crisp lines at the corners to give the intense expression. Round the muzzle forward with the loop tool and hollow the nostrils just slightly for shadow. Keep the nose tip as raised skin so it stays a warm mid tone.

  5. Balance the light and dark zones

    Step back and study the contrast. Leave the darkest fur around the outer edges and under the chin nearly unpeeled so they stay in shadow. Lightly skin-peel the mid areas of the cheeks and forehead for a soft glow. Add final fine strokes anywhere the texture looks flat.

  6. Light it and photograph

    Set a bright LED puck or a couple of LED lights inside, never a candle, since the flame heat and flicker will dull this detailed shading and dry the thin areas. Test in a dark room and adjust the light position until the eyes glow and the fur depth pops. Wipe the carved surface and mist it if it starts to curl. Shoot your photo the same night while the relief is crisp.

Gather your supplies

Check things off as you get ready.

Work on a stable surface, keep your free hand out of the cutting path, and have an adult handle sharp tools.

Three levels of light

  • Leave intact

    The darkest outer fur, the chin, and the shadowed sides of the head stay untouched and dark.

  • Peel & shade

    The mid cheeks, forehead, ears, and nose tip get a shallow skin-peel for a soft orange glow.

  • Cut through

    The eye sockets get the deepest skin removal so they read brightest, while keeping a thin skin layer intact.

Learn the carving basics

Before you start cutting

Do I cut all the way through anywhere on this design?

No, this is a relief carving, so almost everything is skin removal at varying depths rather than full cutouts. Even the bright eyes keep a thin translucent skin layer so they glow instead of showing an open hole. Cutting through would break the woodcut shading effect and weaken the face.

How do I keep the fur from looking flat or muddy?

Vary the depth and length of your V-gouge strokes and always overlap rows in one consistent direction, edge to nose. Alternate deeper bright cuts with shallow dim ones so the coat has contrast. Step back often under light to spot flat patches and add strokes where needed.

This is a lot of work, how long should I budget?

An expert-level shaded portrait like this can take several hours in one sitting. Carve it the day you plan to display it, since fine relief detail dries and curls within a day or two. Keep the pumpkin misted and wrapped if you need to pause.

Your take belongs here, too.

Changed a detail? Made it simpler? Share a photo of your version and tell the community what worked.

Share your pumpkin

More pumpkins like this

You've reached the end Β· 8 pumpkins
The Patch Report

Fresh pumpkins, in your inbox.

The best new carvings, ideas worth stealing, and how-tos for carving season. Short, seasonal, and gone by November.

A short email during carving season. Unsubscribe anytime. See our privacy policy.