Halloween Pumpkin Carving Contest · Starts October 1st · $500 in prizes
← Back to ideas
@ai_concepts
Aug 11, 2026
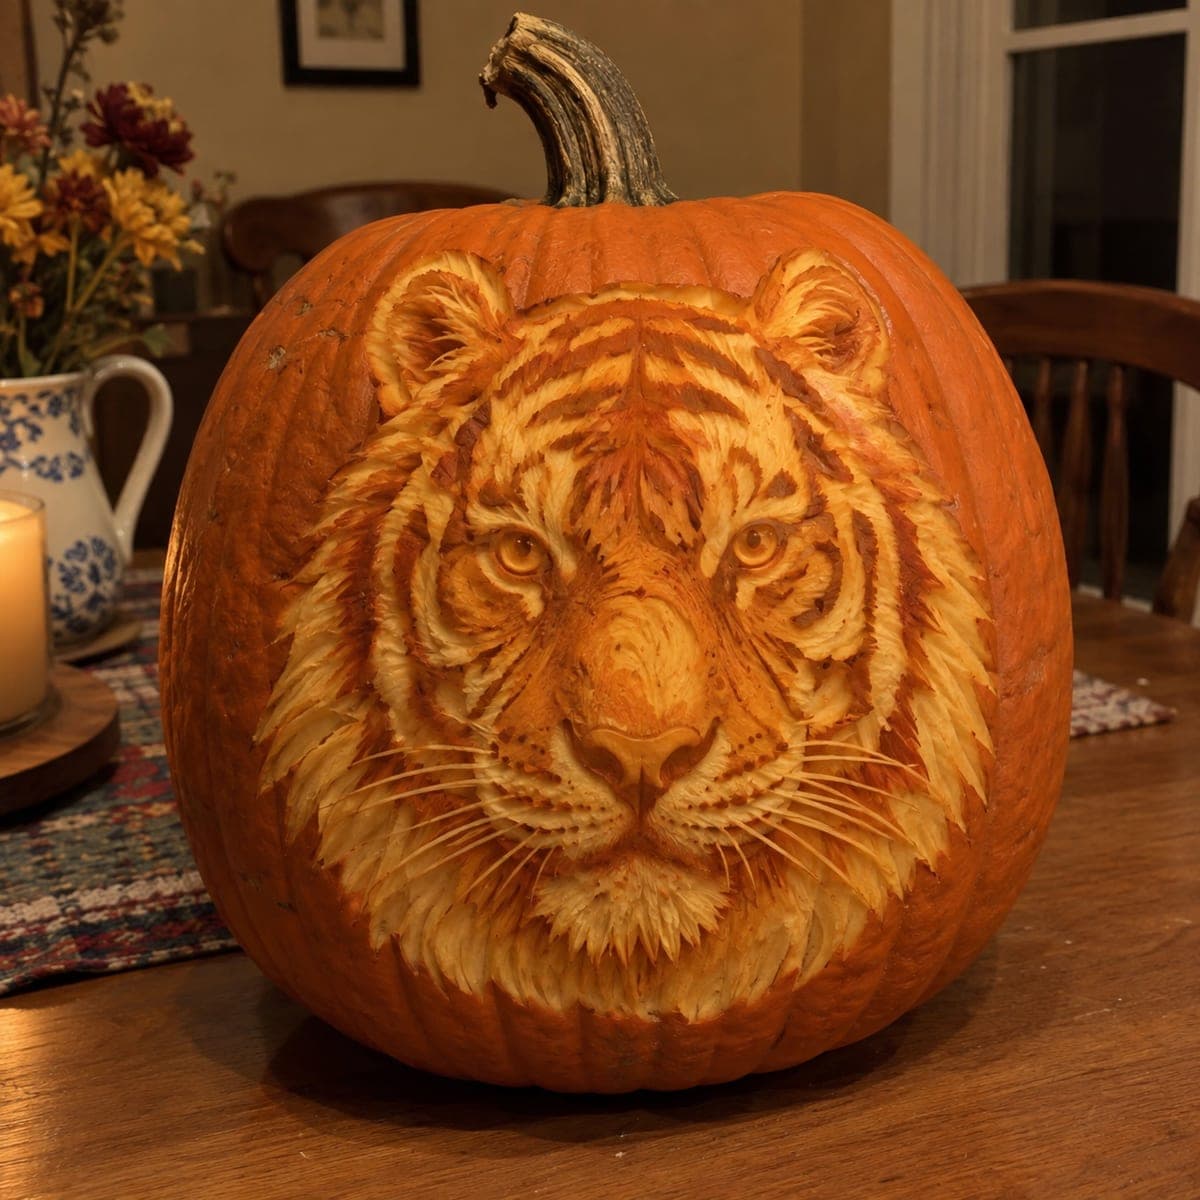
Intense Tiger Face Shaded Pumpkin CarvingAI
0

Intense Tiger Face Shaded Pumpkin Carving

A full-face Bengal tiger portrait dominates this pumpkin, with every whisker, stripe, and golden eye carved in painstaking surface-shading detail. Layers of skin are removed at different depths to produce the rich orange-and-cream fur gradient that distinguishes this expert pumpkin carving idea. Start with the eyes and nose as anchor points, then work outward in the stripe pattern using a fine loop tool. Display unlit during the day to appreciate the depth, then add a battery candle at night to bring the eyes to life.

This is an AI-generated concept image: a realistic, carvable design idea rather than a photo of a finished carve. AI concepts are always labeled and sit out the leaderboard and the contest.

No ratings yet · Sign in to rate

Comments (0)

  • No comments yet — be the first.

Save without an account. Sign in to like or comment.

Our tips for carving a similar design

The core trick here is relief shading, where almost nothing is cut all the way through and the whole face is built from skin peeled to different depths. You work the fur, stripes, and eyes as a gradient, going deeper for cream tones and leaving skin thick for the dark stripes. Plan it as a full portrait that fills the front of a large, smooth pumpkin so you have room for the detail.

Written by PumpkinCarvingIdeas.com, inspired by the image above. These are our suggestions, not instructions from the uploader. This approach to the AI concept has not been tested on a real pumpkin.

From pumpkin to porch

  1. Pick a big pumpkin and transfer the tiger

    Choose the largest, roundest pumpkin you can find with a smooth, blemish-free front face. Scrub it clean and dry it well. Tape your tiger stencil flat over the front and poke the main outlines with a pin or transfer tool: the eyes, nose, muzzle, ear edges, and the boundaries between light fur and dark stripes. Since this is a shading design, you do not thin the wall from inside, so leave it whole for now.

  2. Anchor the eyes and nose first

    Start with the eyes and nose because they set the whole expression. Peel the skin around each eye to different depths so the iris glows brighter than the surrounding fur, and leave a thin dark rim to define the shape. Carve the nose as a soft raised mound by removing skin around it rather than cutting into it. Work slowly with a fine loop tool and check the face from a few feet back often.

  3. Build the stripes as depth changes

    Map the stripes by leaving the dark bands as untouched or barely scratched skin and peeling the fur between them down to the pale flesh. The deeper you scrape, the lighter and brighter that area reads. Keep your loop tool moving in the direction the fur grows so the strokes look natural. Do not cut through the wall anywhere in the stripe pattern.

  4. Shade the cheeks and fur gradient

    Work outward from the face into the cheek ruff and mane, varying your scraping depth to create the orange-to-cream gradient. Use short, flicking strokes along the edges so the fur breaks up into individual tufts instead of a hard line. Feather the outer edge of the portrait so it fades into the pumpkin skin rather than ending abruptly. Step back frequently to balance light and dark across both sides.

  5. Carve the whiskers as thin channels

    Add the whiskers last as fine grooves scraped into the skin, not cutouts, so they stay crisp without weakening anything. Keep each one a shallow line that catches light. If you want a couple of brighter accent whiskers, cut those few all the way through, but keep them short and leave plenty of solid skin between them so nothing tears. Clean up any rough edges around the eyes and nose.

  6. Light it and photograph

    For a shaded carving like this, daylight shows off the depth best, so display it unlit during the day. At night, cut a small access hole in the back, hollow just enough to seat a battery LED, and slide it in. A warm flickering LED makes the peeled eyes and cream fur glow. Never use a real candle, the thin peeled areas scorch easily. Snap your photo in a dim room with the LED as the only light.

Gather your supplies

Check things off as you get ready.

Work on a stable surface, keep your free hand out of the cutting path, and have an adult handle sharp tools.

Three levels of light

  • Leave intact

    The dark tiger stripes and the outer rim of the face stay as untouched skin.

  • Peel & shade

    The orange body fur and shaded cheeks are peeled to a mid depth for a dim glow.

  • Cut through

    Only the golden eyes and a few accent whiskers are cut through or scraped very thin for the brightest light.

Learn the carving basics

Before you start cutting

Do I need to hollow out the whole pumpkin for a shading carving?

No, and that is what makes this design tricky. Since almost everything is surface shading, you leave the wall thick to hold detail. Only hollow a small pocket at the back to seat the LED light.

How do I keep the fur looking soft instead of blocky?

Use short, directional strokes that follow the way real fur grows, and vary your scraping depth gradually rather than in hard steps. Feather the edges with a fine tool so tufts break up. Step back every few minutes, because fur reads better from a distance than up close.

This is an AI concept image, so can a real pumpkin actually look like this?

You can get close, though a real pumpkin will never be quite this flawless. The shading technique is completely real and achievable with patience and a good loop tool. Just keep whiskers as shallow grooves and cut only a few all the way through so the surface stays strong.

Your take belongs here, too.

Changed a detail? Made it simpler? Share a photo of your version and tell the community what worked.

Share your pumpkin

More pumpkins like this

You've reached the end · 8 pumpkins
The Patch Report

Fresh pumpkins, in your inbox.

The best new carvings, ideas worth stealing, and how-tos for carving season. Short, seasonal, and gone by November.

A short email during carving season. Unsubscribe anytime. See our privacy policy.