Halloween Pumpkin Carving Contest · Starts October 1st · $500 in prizes
← Back to ideas
@ai_concepts
Aug 9, 2026
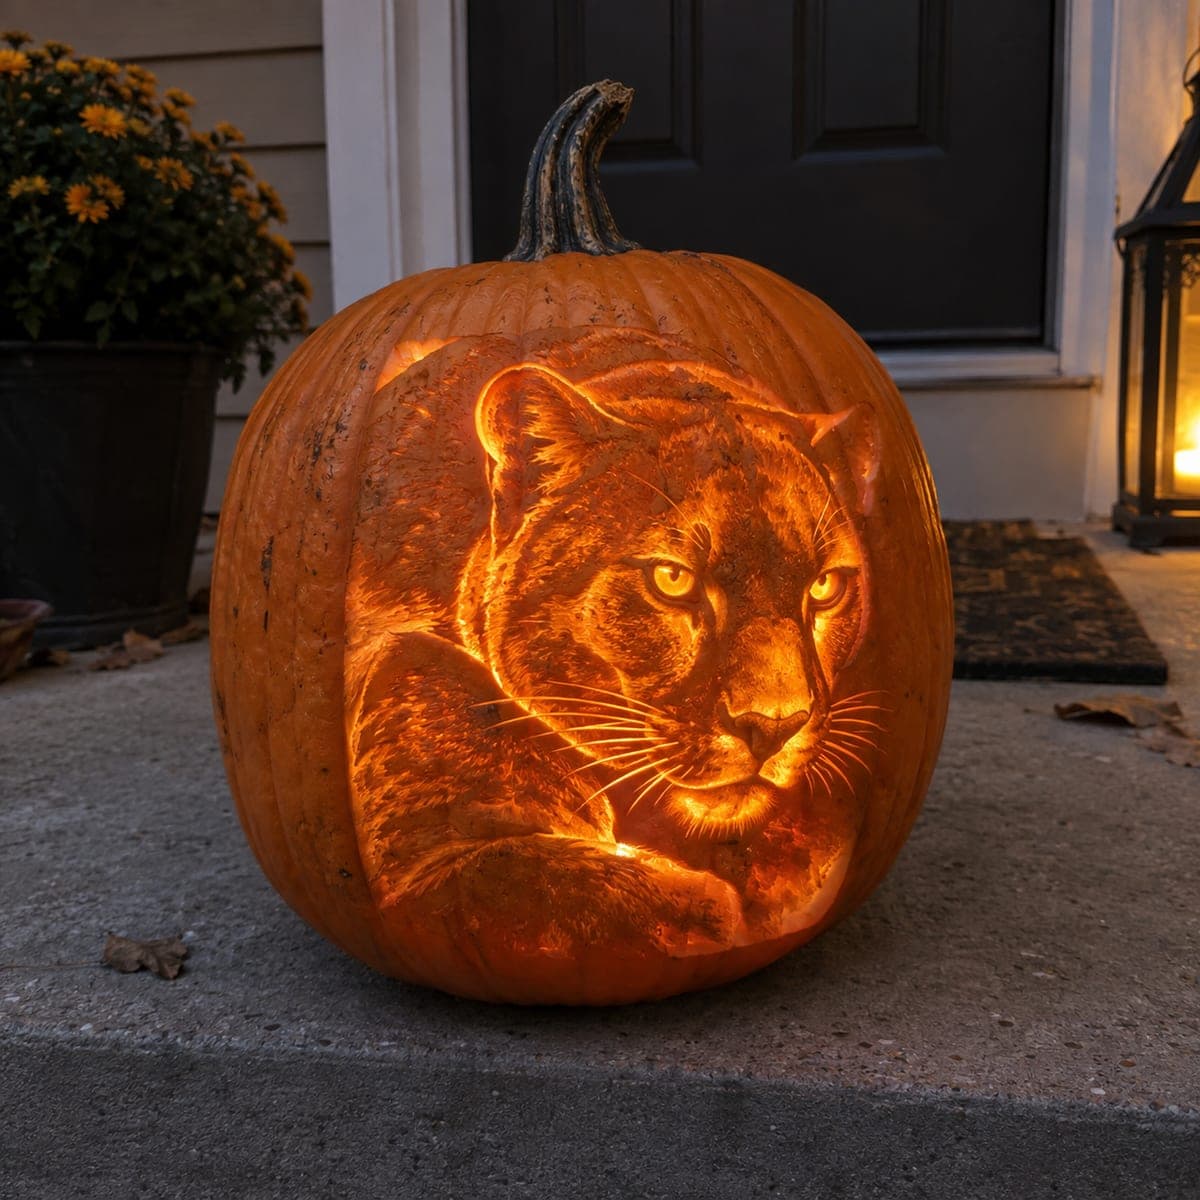
Realistic Tiger Face Shaded Pumpkin PortraitAI
0

Realistic Tiger Face Shaded Pumpkin Portrait

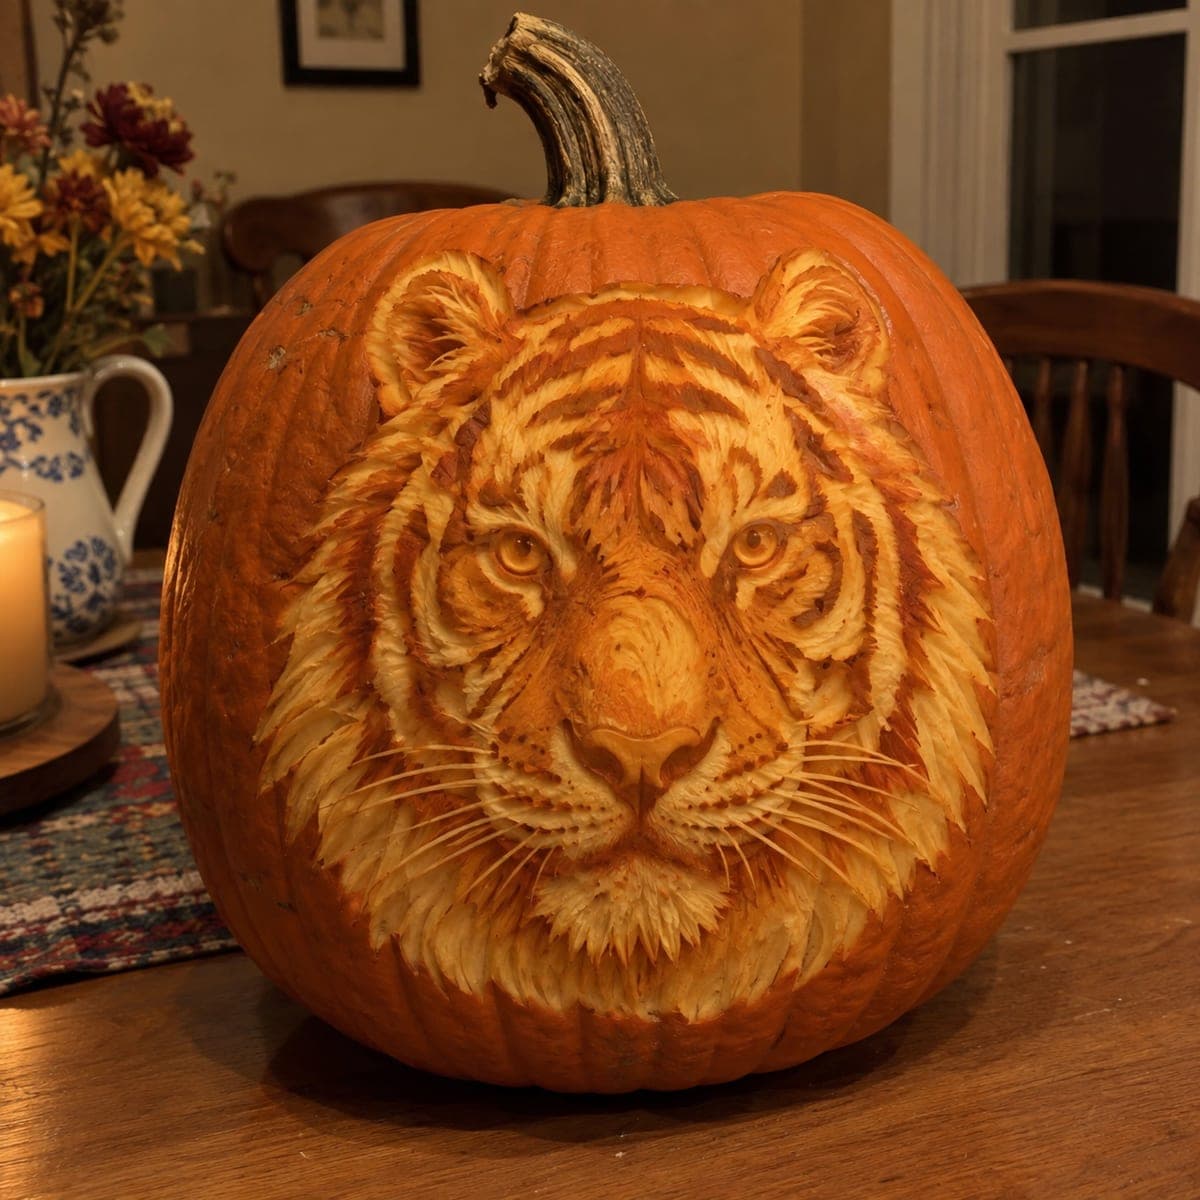
A tiger stares out of this pumpkin head-on, its stripes, ruff, and amber eyes built entirely from etched carving at different depths so the candlelight paints the fur. The symmetry is the hard part; draw a center line down the pumpkin and complete each stripe on both sides before moving on. Leave the stripes as untouched dark skin, shave the cheek fur to a mid glow, and thin the eyes and muzzle most for the burning focal point.

This is an AI-generated concept image: a realistic, carvable design idea rather than a photo of a finished carve. AI concepts are always labeled and sit out the leaderboard and the contest.

No ratings yet · Sign in to rate

Comments (0)

  • No comments yet — be the first.

Save without an account. Sign in to like or comment.

Our tips for carving a similar design

The core trick here is depth control: every part of the tiger is etched rather than cut clean through, so the light glows through skin of different thicknesses instead of open holes. You plan the whole face around a center line and grade the surface from dark stripes to bright muzzle. Symmetry and patience carry this one, so work both sides of each feature together.

Written by PumpkinCarvingIdeas.com, inspired by the image above. These are our suggestions, not instructions from the uploader. This approach to the AI concept has not been tested on a real pumpkin.

From pumpkin to porch

  1. Pick a tall pumpkin and gut it well

    Choose a large, smooth pumpkin with a broad, flat-ish front to hold the face. Cut a lid or a bottom access hole and scoop the inside clean. Thin the carving wall on the front to about one inch so light passes through the shaved areas. A steady, even wall thickness is what makes shading read correctly.

  2. Transfer the stencil on a center line

    Draw a vertical center line down the front and mark the eye line across it. Tape your tiger stencil down and poke the outlines through with a transfer tool or pin. Because the face is symmetric, check that matching stripes land the same distance from the center line on each side. Fixing alignment now is far easier than after you start cutting.

  3. Etch the stripes and fur ridges first

    With a fine detail loop, lightly score the outlines of the stripes, ruff, and whiskers. Work each stripe on the left, then its twin on the right, before moving to the next pair. Keep these lines shallow at this stage so you can still adjust. Leaving the stripes as untouched skin keeps them dark against the glow.

  4. Shave the cheek fur to a mid glow

    Switch to a wider ribbon tool and skin off the outer layer across the cheeks and ruff, leaving a thin translucent layer. This gives the soft mid orange that reads as fur. Feather the strokes outward in the direction the fur grows so the light looks brushed. Keep the raised stripes proud so they stand dark above the glowing fur.

  5. Thin the eyes and muzzle most

    Carve the eyes, nose, and muzzle down thinnest so they burn brightest as the focal point. Do not cut fully through; leave a sliver of skin so the amber eyes keep their shape and the whiskers stay bridged to the face. Any long whisker lines should stay attached at both ends so they do not break. Save the deepest, brightest thinning for last so the wall stays strong while you work.

  6. Light it and photograph at dusk

    Drop in a bright LED puck or two, never a candle, since the thin walls and fine detail heat up fast. Warm white LEDs make the eyes and muzzle glow amber like the concept. Step back in low light to check that stripes stay dark and the fur grades smoothly. Mist the cut edges and refrigerate between showings to keep the etching crisp.

Gather your supplies

Check things off as you get ready.

Work on a stable surface, keep your free hand out of the cutting path, and have an adult handle sharp tools.

Three levels of light

  • Leave intact

    The tiger stripes and outer fur edges stay as untouched skin so they read dark.

  • Peel & shade

    The cheek fur and ruff are skin-peeled to a thin layer for a soft mid orange glow.

  • Cut through

    The eyes, nose, and muzzle are thinned nearly through for the brightest burning focal point.

Learn the carving basics

Before you start cutting

How do I keep the face symmetric?

Draw a center line down the pumpkin before anything else and mark a matching eye line. Carve each feature in pairs, doing the left stripe and then its right twin before moving on. Checking as you go keeps small drifts from adding up into a lopsided face.

This is an AI concept, so can a real pumpkin look like this?

Yes, with patience. The whole effect comes from shading depths rather than open cuts, so a real pumpkin needs an even, fairly thin front wall. Keep whiskers bridged at both ends and never cut the eyes fully through, and the fur painting effect is achievable.

Do I ever cut all the way through?

Barely, if at all. This design is built from shaved and thinned skin, not open holes, so the light glows through rather than blasting out. If you want a brighter eye, thin it to a sliver instead of cutting a hole so it holds its shape.

Your take belongs here, too.

Changed a detail? Made it simpler? Share a photo of your version and tell the community what worked.

Share your pumpkin

More pumpkins like this

You've reached the end · 8 pumpkins
The Patch Report

Fresh pumpkins, in your inbox.

The best new carvings, ideas worth stealing, and how-tos for carving season. Short, seasonal, and gone by November.

A short email during carving season. Unsubscribe anytime. See our privacy policy.