Halloween Pumpkin Carving Contest · Starts October 1st · $500 in prizes
← Back to ideas
@ai_concepts
Aug 17, 2026
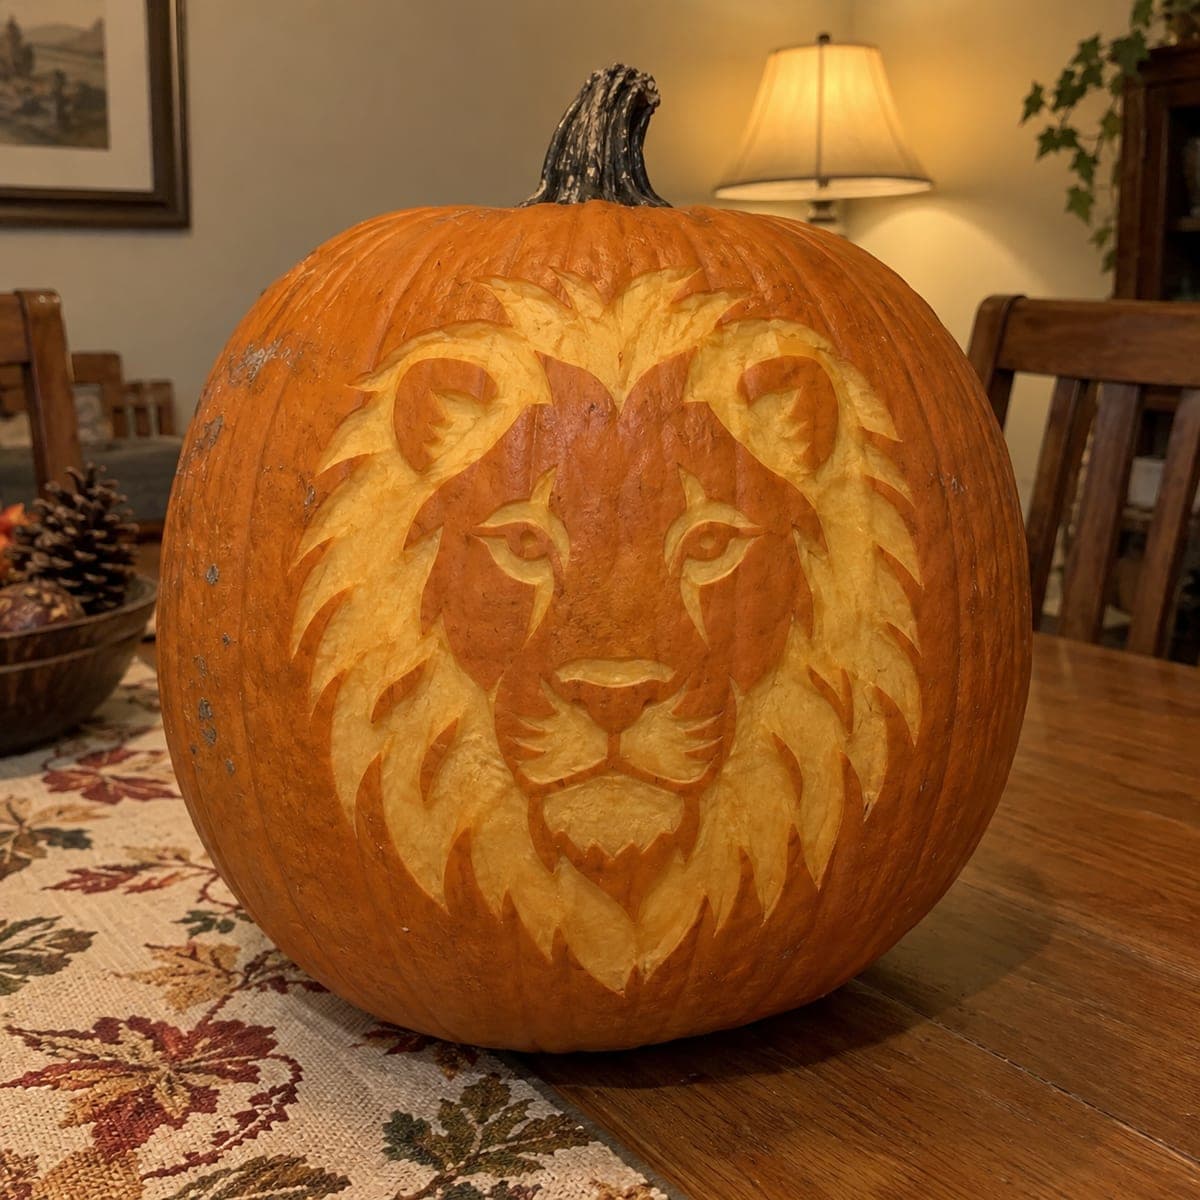
Majestic Lion Portrait Pumpkin With Layered ManeAI
0

Majestic Lion Portrait Pumpkin With Layered Mane

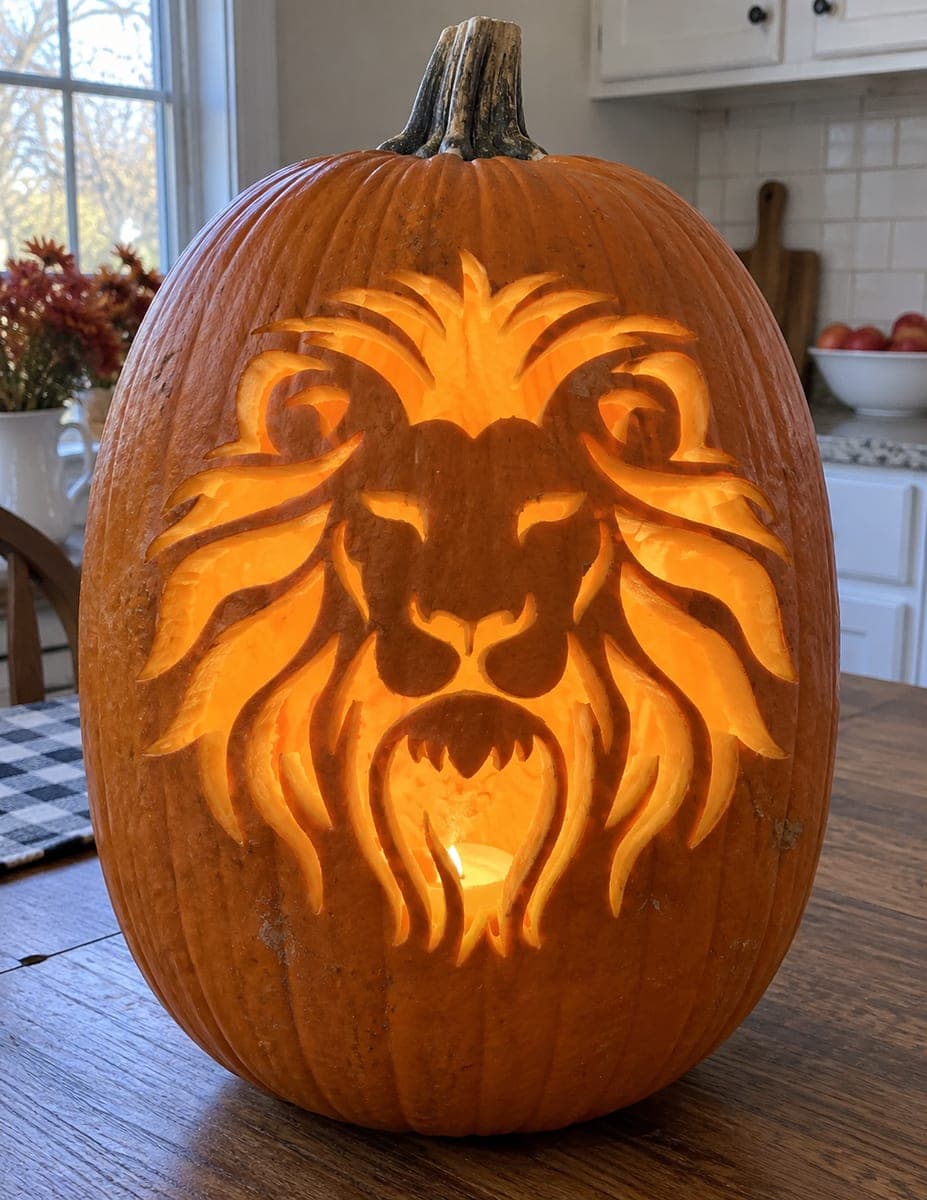
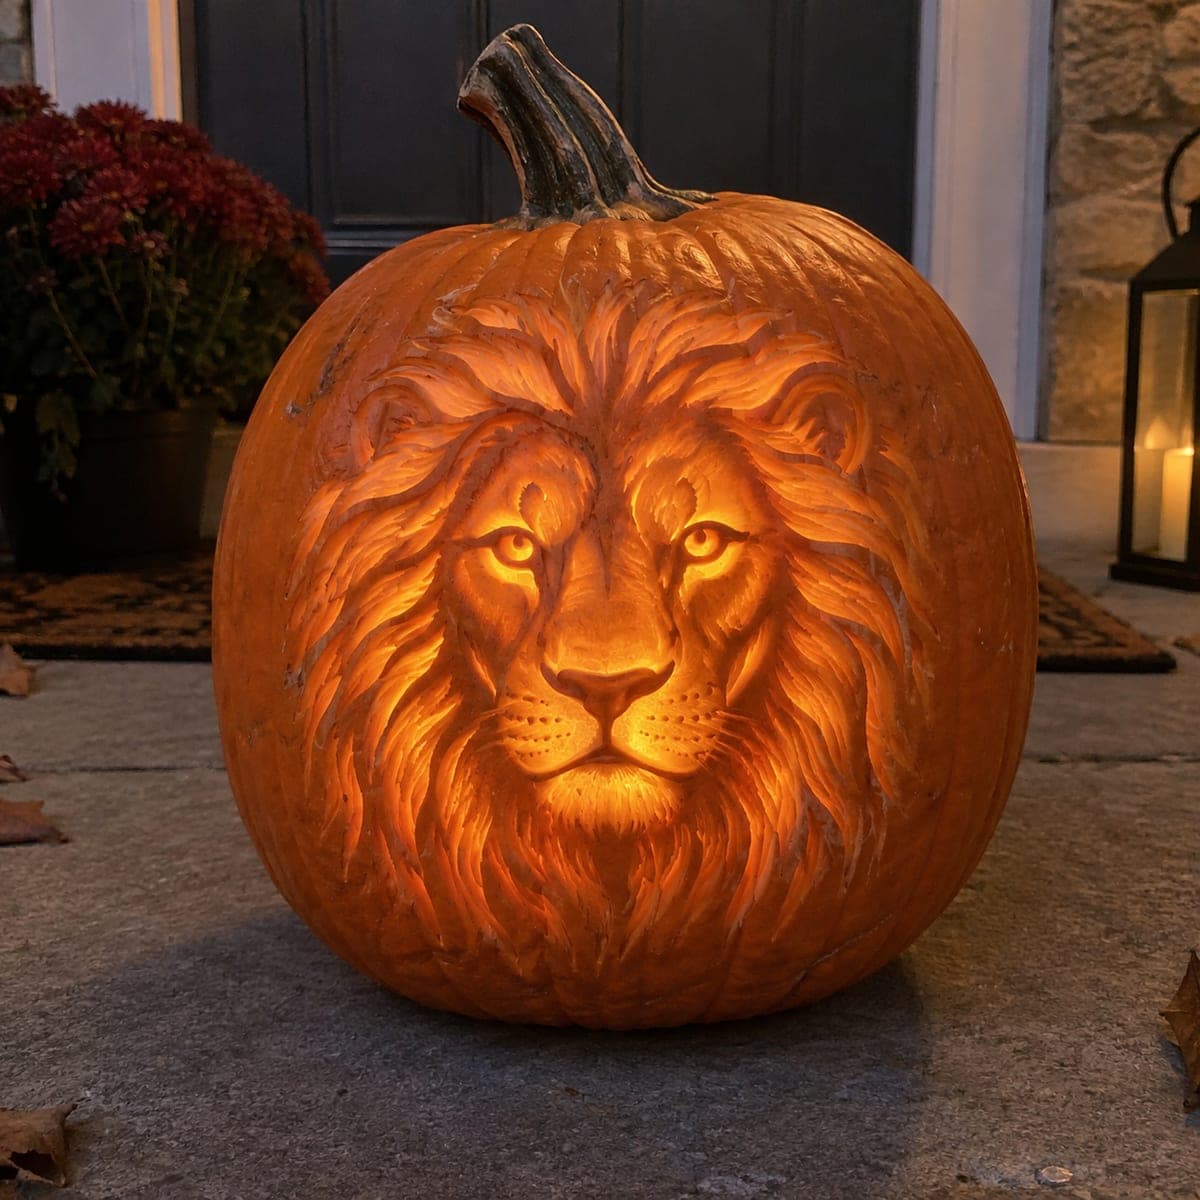
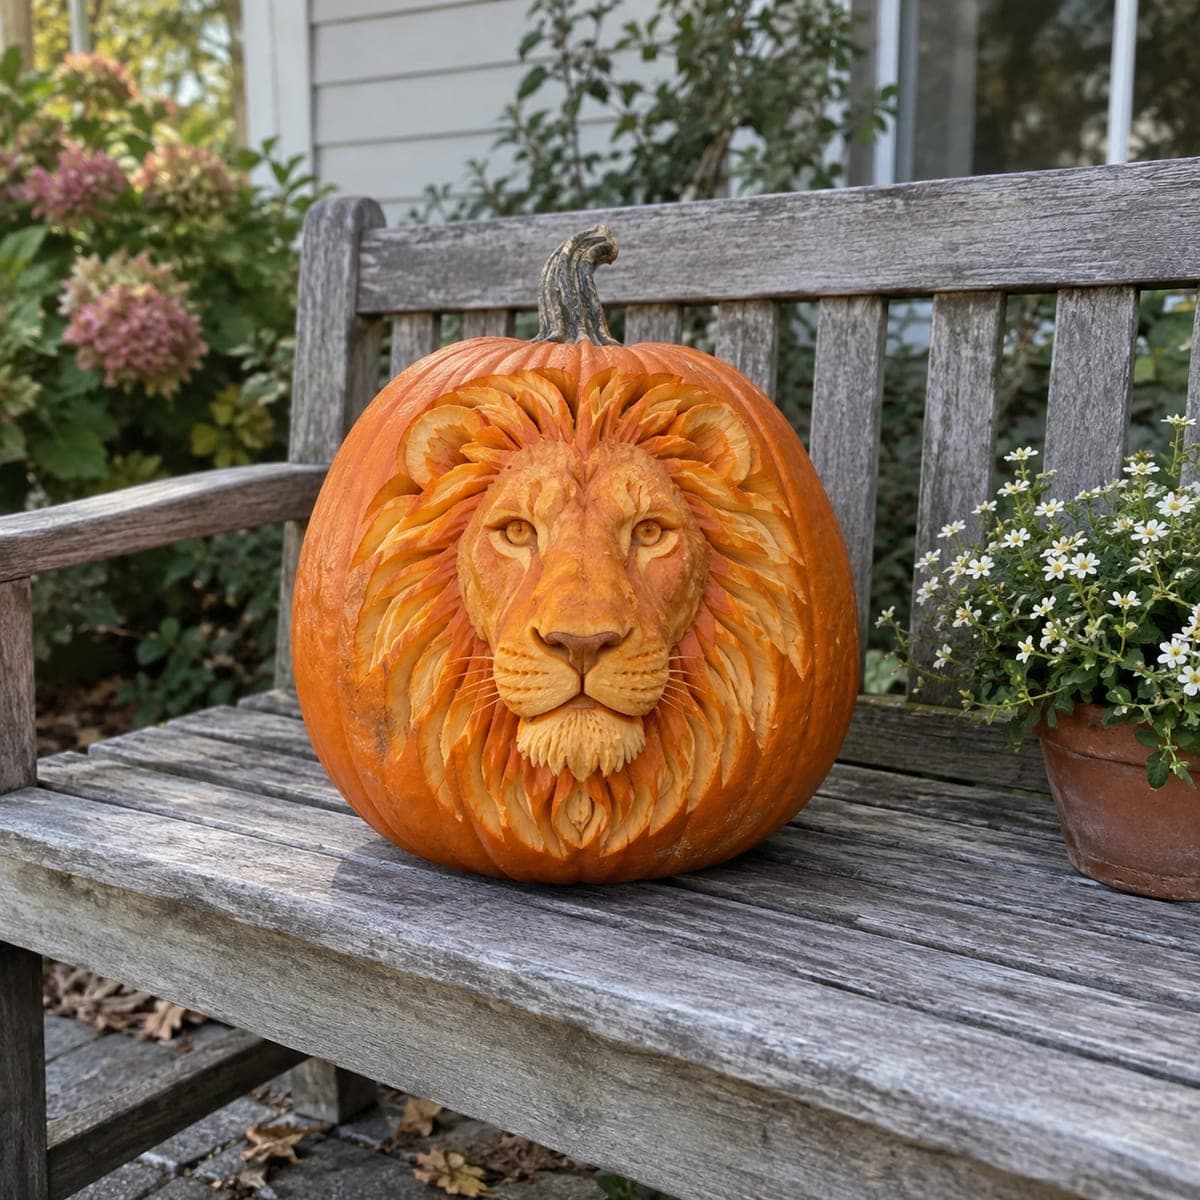
A lion gazes straight ahead from this pumpkin, its mane radiating in flame-like peeled strokes that frame a calmly detailed face. The whole portrait is surface-carved, so it displays beautifully indoors without any candle. Transfer the design with transfer paper or a printed stencil and pin pricks, carve the symmetrical facial features first while the surface is firm, then work outward through the mane one layer at a time.

This is an AI-generated concept image: a realistic, carvable design idea rather than a photo of a finished carve. AI concepts are always labeled and sit out the leaderboard and the contest.

No ratings yet · Sign in to rate

Comments (0)

  • No comments yet — be the first.

Save without an account. Sign in to like or comment.

Our tips for carving a similar design

The core trick here is that almost nothing is cut all the way through. The mane and face are built from peeled skin at different depths, so the whole design reads as a warm glowing portrait against dark, untouched pumpkin. Carve the symmetrical face first while the surface is firm, then radiate outward through the mane one flame-shaped layer at a time.

Written by PumpkinCarvingIdeas.com, inspired by the image above. These are our suggestions, not instructions from the uploader. This approach to the AI concept has not been tested on a real pumpkin.

From pumpkin to porch

  1. Prep and transfer the design

    Pick a tall, smooth pumpkin with an even front and wipe it clean and dry. Since this is a surface portrait, you can leave the pumpkin whole rather than cutting a lid. Tape a printed stencil over the front and transfer it with a poking tool along the outlines, or trace with transfer paper. Step back and check that the eyes and nose sit level before you start cutting.

  2. Establish the face outline

    With a fine detail knife, lightly score the outer edge of the lion's face and the boundary where the face meets the mane. Keep these first passes shallow so you can correct the line if it drifts. Work slowly around the muzzle, cheeks, and forehead. Getting a clean, symmetrical face border now makes every later layer easier to place.

  3. Carve the eyes, nose, and muzzle

    Use a small ribbon or loop tool to peel the skin around the eyes, brow ridges, and the bridge of the nose so those shapes glow a soft orange. Leave a thin line of untouched skin for the eye slits and the outline of the nose so the features stay crisp. Vary how deep you scrape to suggest the rounded snout and cheeks. Take your time here, since the face is the focal point and small slips show.

  4. Peel the inner mane

    Move outward and start peeling the mane in flame-like strokes that fan away from the face. Keep each stroke as a separate peeled shape and leave narrow ridges of darker skin between them so the strands stay defined. Scrape the innermost tufts a little deeper for extra brightness near the face. Work in one small section at a time so you always have firm skin to brace against.

  5. Build the outer mane layers

    Continue the same peeling technique through the outer mane, letting the strokes get longer and more pointed toward the edges. Alternate deeper and shallower peels to create the layered, radiating texture. Leave the very outer background completely untouched so the mane tips fade into the dark. If you want a few points of extra sparkle, you can cut fully through only the tiny gaps between the outermost mane tips.

  6. Clean up and light it

    Go back over the whole portrait and even out any patchy spots, sharpening the ridges between mane strands. Brush away loose pulp and pat the carved areas dry. Set a battery LED puck behind or beside the pumpkin, or simply display it in a lamp-lit room, since the peeled surface reads beautifully without any inner light. Snap your photo in soft light to show off the depth.

Gather your supplies

Check things off as you get ready.

Work on a stable surface, keep your free hand out of the cutting path, and have an adult handle sharp tools.

Three levels of light

  • Leave intact

    The outer background and the thin ridges between mane strands stay as untouched dark skin.

  • Peel & shade

    The entire mane and most of the face are skin-peeled at varying depths for a soft orange glow.

  • Cut through

    Optionally only the tiny gaps between the outermost mane tips are cut through for small bright accents.

Learn the carving basics

Before you start cutting

Do I need to hollow out the pumpkin for this design?

No. This is a surface relief portrait, so you can leave the pumpkin whole and just peel the skin. That keeps the wall firm and easy to carve. If you want a little backlight, set an LED beside or behind it rather than inside.

How do I keep the mane from looking like a solid blob?

Treat each mane stroke as its own peeled shape and leave a narrow ridge of darker skin between neighboring strokes. Those thin untouched lines are what separate the strands and give the mane its layered flame look. Varying your scraping depth also helps some tufts pop forward.

What if my two eyes come out uneven?

Carve the face features first while the surface is firm and check symmetry against your transferred guide before scraping deep. Peel a little at a time and compare left to right often. If one eye drifts, you can gently widen the peel around it to match its partner, since shallow relief is forgiving.

Your take belongs here, too.

Changed a detail? Made it simpler? Share a photo of your version and tell the community what worked.

Share your pumpkin

More pumpkins like this

You've reached the end · 8 pumpkins
The Patch Report

Fresh pumpkins, in your inbox.

The best new carvings, ideas worth stealing, and how-tos for carving season. Short, seasonal, and gone by November.

A short email during carving season. Unsubscribe anytime. See our privacy policy.