Halloween Pumpkin Carving Contest · Starts October 1st · $500 in prizes
← Back to ideas
@ai_concepts
Jul 22, 2026
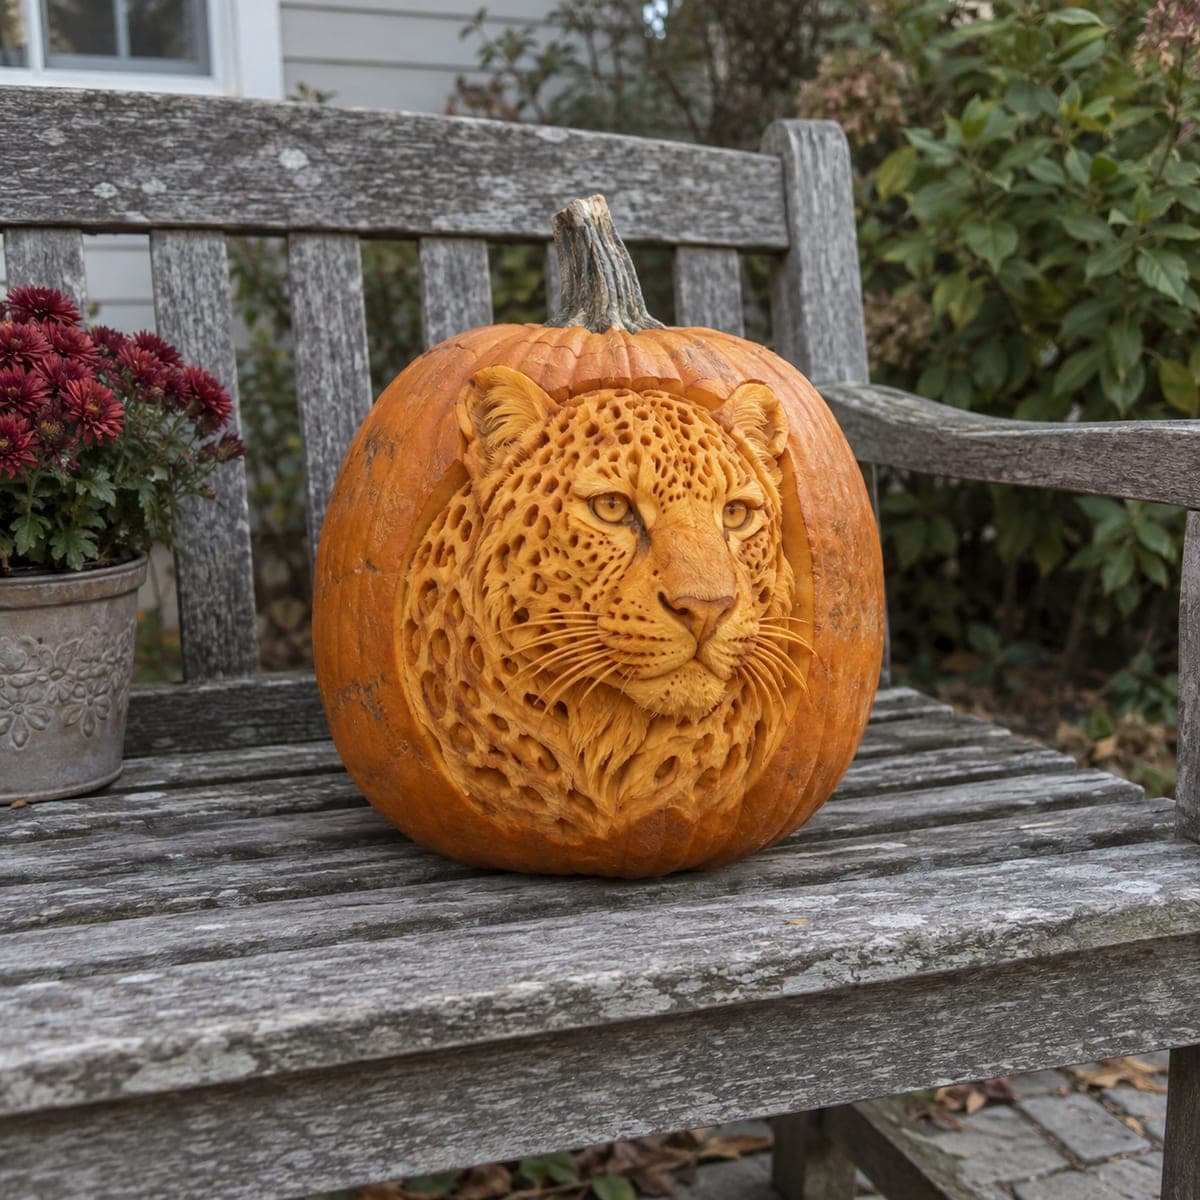
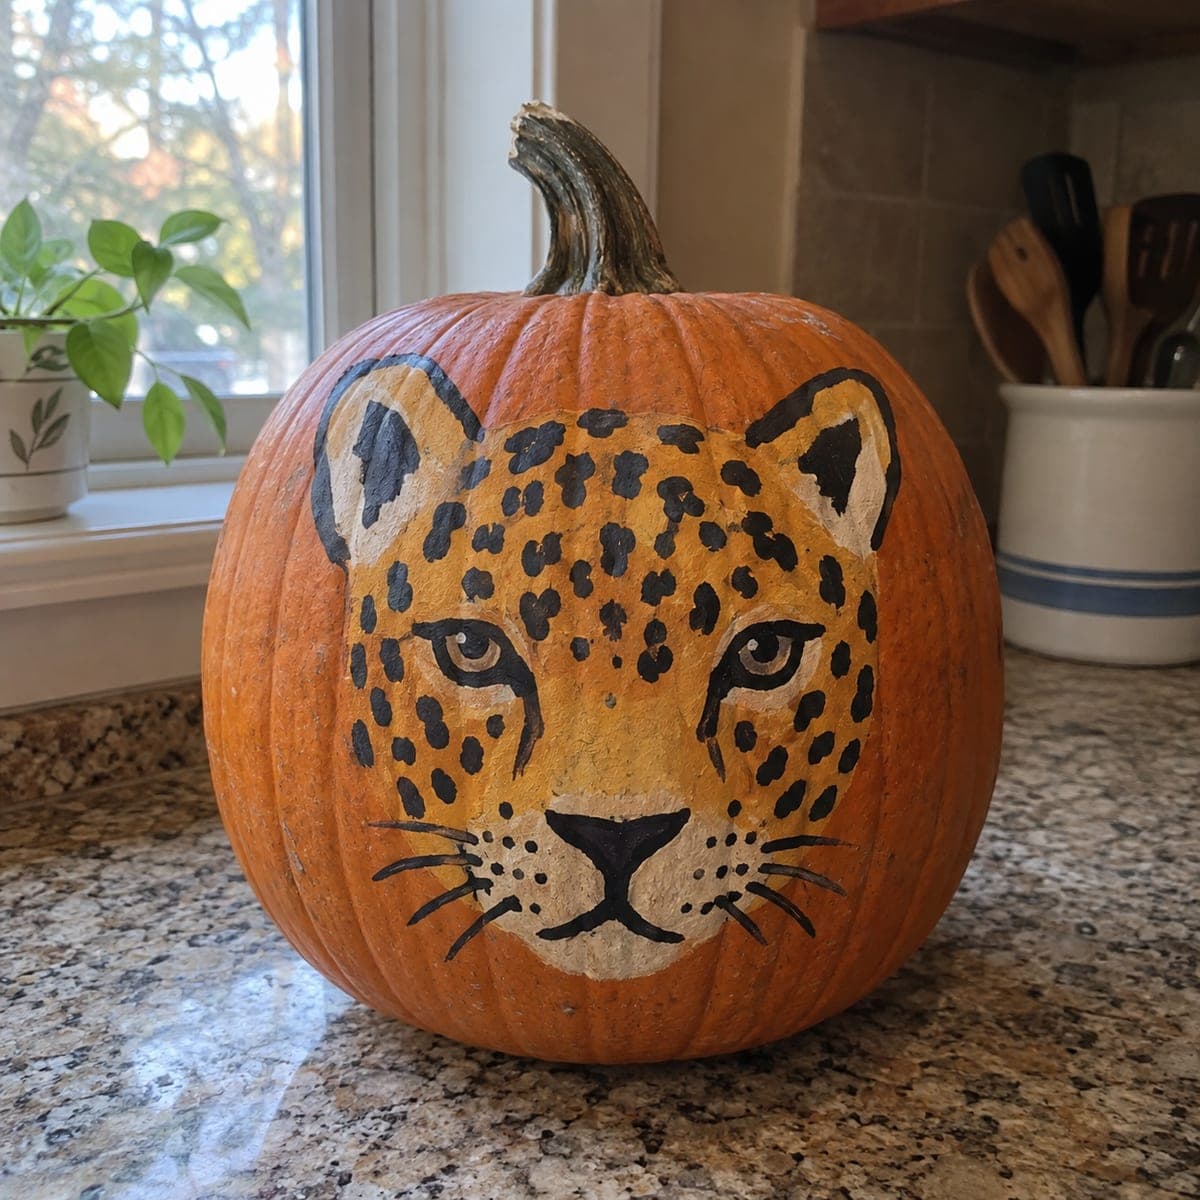
Leopard Face Relief Carved Pumpkin on Garden BenchAI
0

Leopard Face Relief Carved Pumpkin on Garden Bench

A fierce leopard portrait fills the pumpkin's face with meticulous relief carving, capturing the rosette spots, piercing amber eyes, and bristling whiskers in stunning dimensional detail. Achieving this level of shading and texture requires loop tools, linoleum gouges, and a steady hand, making it an expert-level pumpkin carving project. Begin by transferring the outline with a stylus transfer method, then carve the darkest shadow areas deepest and leave highlights close to the skin surface. This piece looks striking in both daylight and candlelight.

This is an AI-generated concept image: a realistic, carvable design idea rather than a photo of a finished carve. AI concepts are always labeled and sit out the leaderboard and the contest.

No ratings yet · Sign in to rate
Comments (0)

  • No comments yet — be the first.

Save without an account. Sign in to like or comment.

Our tips for carving a similar design

This design is built entirely from relief carving, meaning you shave the skin to different depths instead of cutting all the way through. The core trick is depth mapping: shadows around the eyes, nose, and rosette spots go deepest, while the bright muzzle and forehead stay close to the surface. Plan your whole value map before you touch a tool so the face reads clearly in any light. Since this is an AI concept image, treat it as a target to aim for rather than a real carved pumpkin.

Written by PumpkinCarvingIdeas.com, inspired by the image above. These are our suggestions, not instructions from the uploader. This approach to the AI concept has not been tested on a real pumpkin.

From pumpkin to porch

  1. Pick a broad pumpkin and gut it well

    Choose a large pumpkin with a wide, flat front so the leopard face has room to spread. Cut a lid from the bottom or back rather than the top so the stem stays intact for the display. Scrape the inside wall behind the face down to about one inch thick using a loop tool. A thinner, even wall makes relief shading far more predictable when the LED is on.

  2. Transfer the outline cleanly

    Tape a printed leopard stencil over the flat front and trace the main shapes with a stylus, pressing dents into the skin. Mark the eye outlines, nose, muzzle border, ear edges, and the biggest rosette clusters. Go back and dot in your darkest shadow zones with a marker so you have a value map. Take a reference photo before you start cutting in case the guide lines rub away.

  3. Establish the deepest shadows first

    Using a small loop tool, carve the darkest areas deepest: the eye sockets, the sides of the nose, under the chin, and the recesses between fur clumps. Removing skin here lets that dim orange glow separate the features. Work slowly and check often, because you cannot add pumpkin back once it is gone. Keep the muzzle and forehead ridges raised as your brightest highlights.

  4. Build the fur and rosette texture

    Switch to a fine linoleum gouge to carve the flowing fur strokes and the ring-shaped rosette spots. Pull each stroke in the direction the fur grows, fanning out from the nose and down the cheeks. Vary your pressure so some spots peel just the outer skin and others cut a touch deeper. Leave thin bridges of skin between close spots so the surface stays strong.

  5. Refine the eyes and whiskers

    The amber eyes are the focal point, so carve them almost through to a thin translucent layer for the brightest, most alive glow. Keep the whiskers as raised skin lines with the space around them peeled, rather than cutting the whiskers out, so they stay attached and structurally sound. Soften every hard edge with a light second pass. Step back frequently to make sure both sides of the face stay balanced.

  6. Light it and photograph outdoors

    Drop in a battery LED puck, warm white if you have it, and test the glow in a dark room. Adjust any flat-looking areas by peeling a little more skin where you want more light. For an outdoor bench display like the concept image, coat cut surfaces with petroleum jelly to slow drying. Shoot photos at dusk to capture both the daylight relief and the inner glow.

Gather your supplies

Check things off as you get ready.

Work on a stable surface, keep your free hand out of the cutting path, and have an adult handle sharp tools.

Three levels of light

  • Leave intact

    The untouched orange skin around the leopard and the outer forehead ridges stay dark for contrast.

  • Peel & shade

    Fur strokes, cheeks, and the rosette rings glow dim orange where only the outer skin is shaved.

  • Cut through

    The amber eyes are thinned nearly through so they read as the brightest points on the face.

Learn the carving basics

Before you start cutting

Do I really carve none of this all the way through?

Almost none of it. Relief carving relies on shaving to different depths, so the light passes through thin skin instead of open holes. Only the eyes are thinned to a near-translucent layer for a bright accent, and even those keep a skin membrane so the face stays intact.

How do I keep the whiskers from breaking off?

Do not cut the whiskers out as free strands. Instead, leave each whisker as a raised line of skin and carve away the area around it, so it stays anchored to the pumpkin on both ends. This keeps the delicate detail structurally sound for an outdoor display.

What light works best for this level of detail?

Use a warm white battery LED puck, never a candle. A steady LED shows off the depth shading evenly and will not scorch the thin eye areas or dry out the carving from heat. Test it in a dark room and peel a little more skin anywhere you want a brighter glow.

Your take belongs here, too.

Changed a detail? Made it simpler? Share a photo of your version and tell the community what worked.

Share your pumpkin

More pumpkins like this

You've reached the end · 8 pumpkins
The Patch Report

Fresh pumpkins, in your inbox.

The best new carvings, ideas worth stealing, and how-tos for carving season. Short, seasonal, and gone by November.

A short email during carving season. Unsubscribe anytime. See our privacy policy.