Halloween Pumpkin Carving Contest · Starts October 1st · $500 in prizes
← Back to ideas
@ai_concepts
Aug 4, 2026
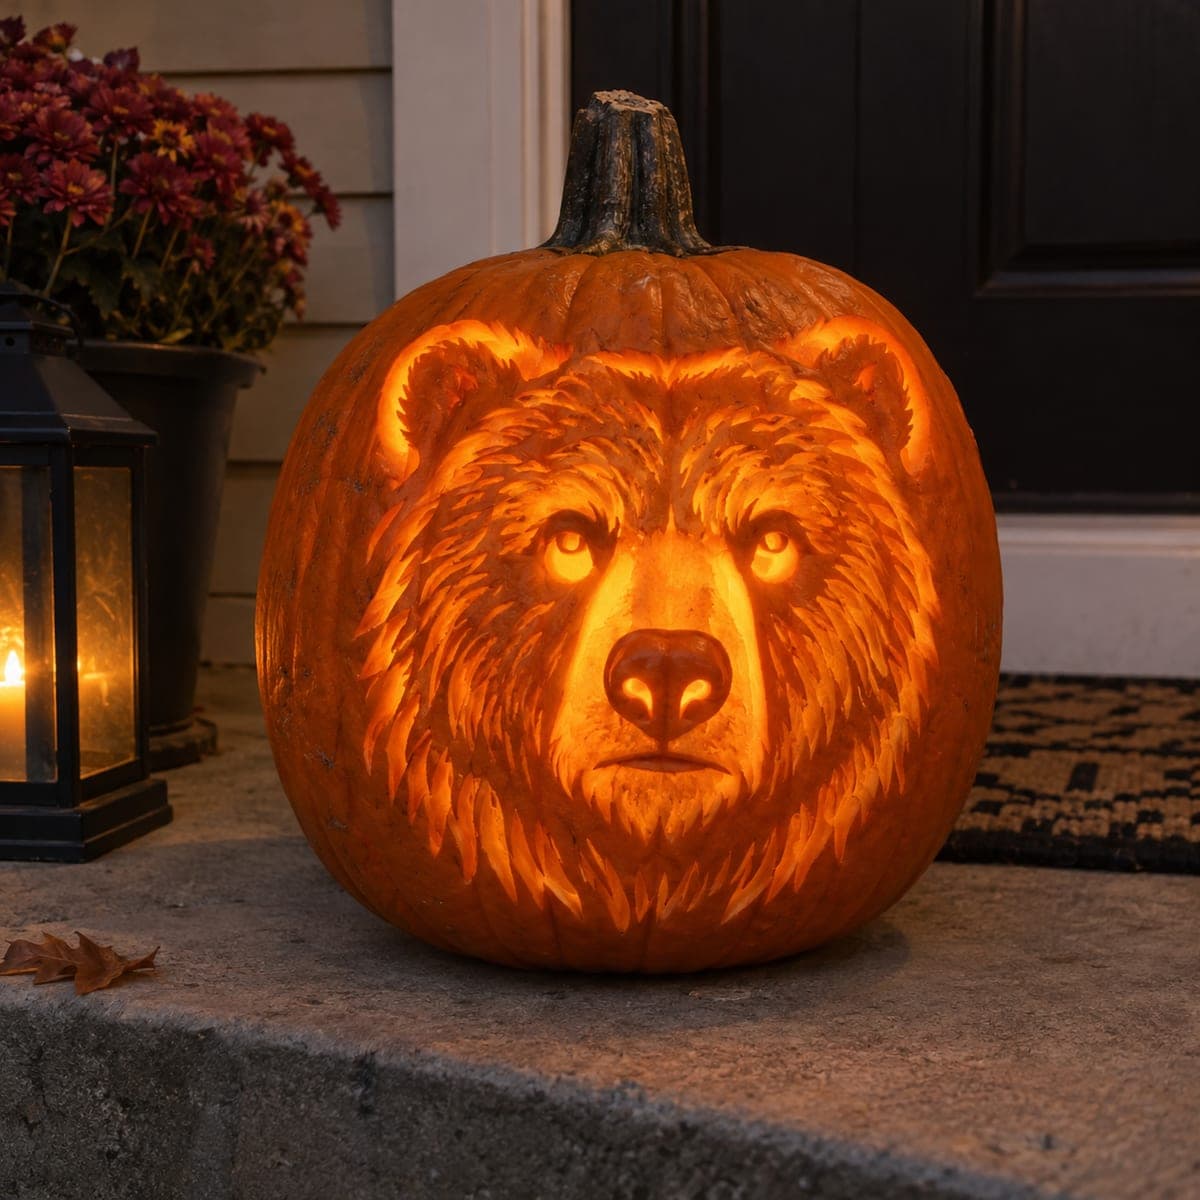
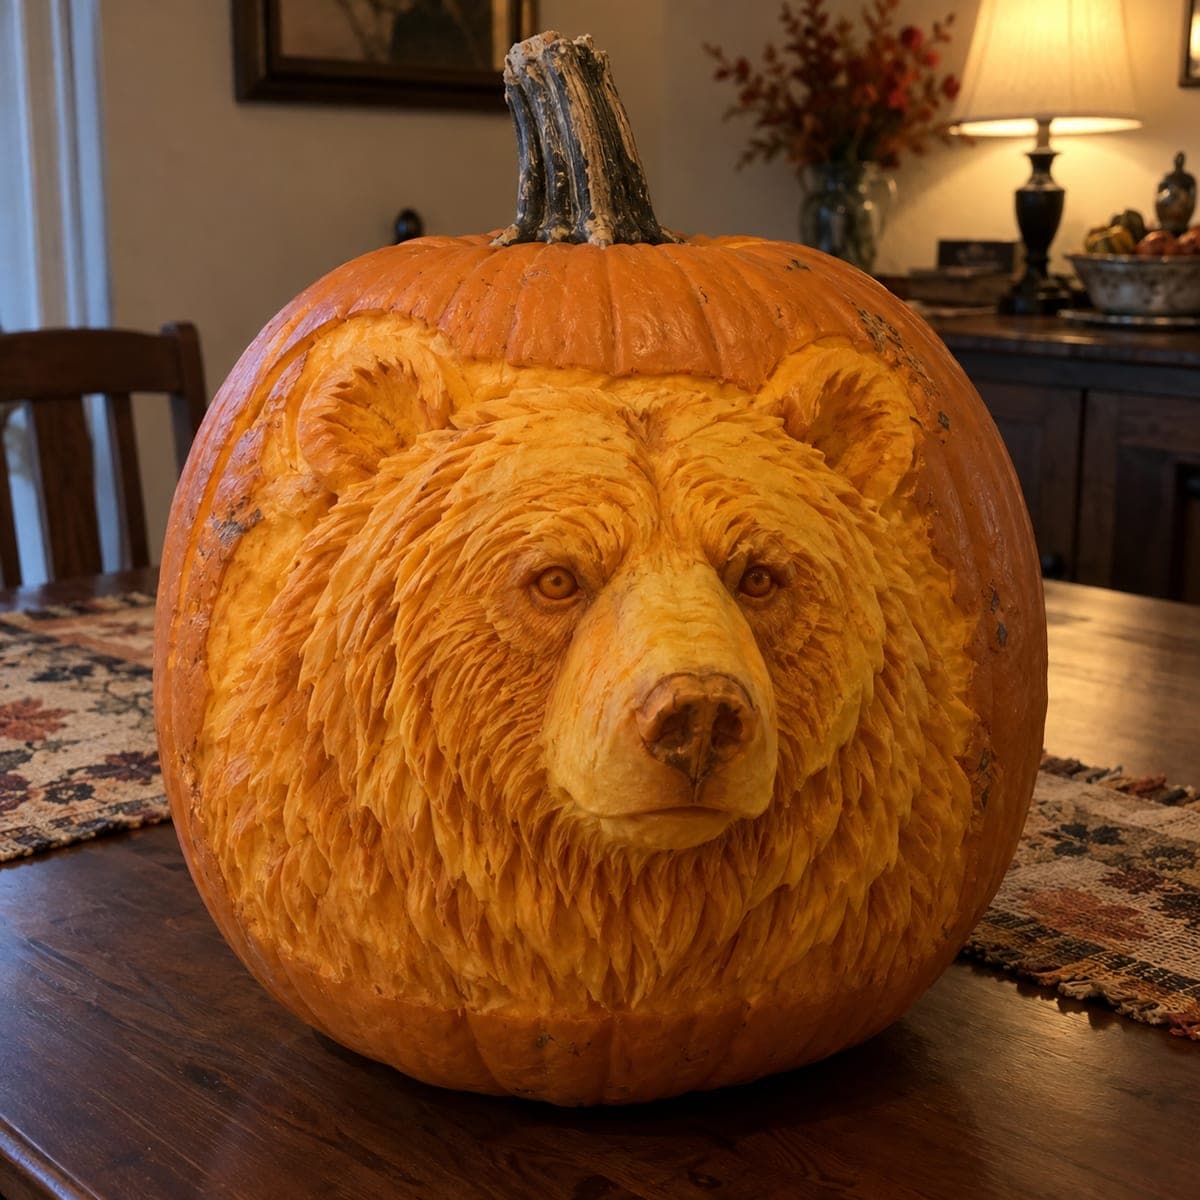
Grizzly Bear Face Realistic Pumpkin CarvingAI
0

Grizzly Bear Face Realistic Pumpkin Carving

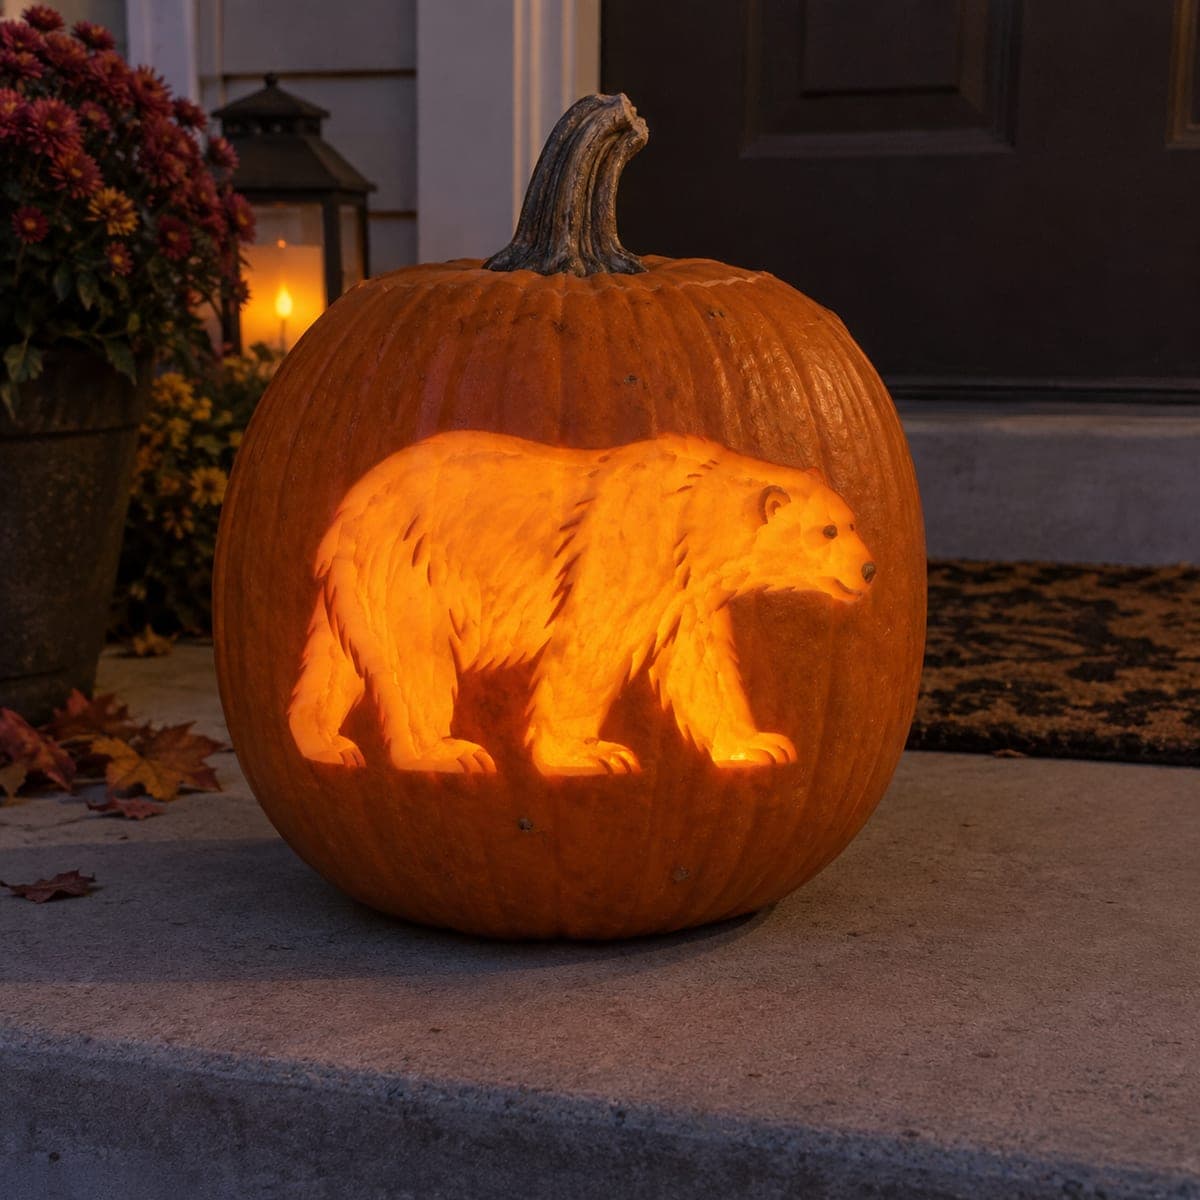
A grizzly bear stares straight out of this pumpkin, its muzzle, brow, and layered fur etched so deeply and evenly that the lit carving looks like a glowing bronze sculpture. Realistic animal shading at this level is all about depth control, keeping the nose and eye rims dark and thick while shaving the cheeks and brow highlights nearly to the flesh. Rough in the big fur masses before any fine strokes, and step back often. One of the most impressive porch pieces a patient carver can attempt.

This is an AI-generated concept image: a realistic, carvable design idea rather than a photo of a finished carve. AI concepts are always labeled and sit out the leaderboard and the contest.

No ratings yet · Sign in to rate
Comments (0)

  • No comments yet — be the first.

Save without an account. Sign in to like or comment.

Our tips for carving a similar design

The whole illusion here comes from depth control: the nose and eye rims stay dark and thick while the brow, cheeks, and muzzle highlights get shaved almost to the flesh so they glow. The plan is to rough in the big fur masses and facial planes first, then add fine directional fur strokes last. Since this is a concept image, treat it as a target look you build up gradually rather than a fixed set of cuts.

Written by PumpkinCarvingIdeas.com, inspired by the image above. These are our suggestions, not instructions from the uploader. This approach to the AI concept has not been tested on a real pumpkin.

From pumpkin to porch

  1. Prep the pumpkin and transfer the design

    Pick a tall, wide pumpkin with a smooth front and cut a lid from the bottom or back so the face stays intact. Scrape the inside wall down to about one inch on the carving side to make shaving easier. Tape your bear pattern flat and poke the main outlines: face shape, ears, eyes, nose, and the boundary of the fur mane. Mark which zones are dark, dim, and bright before you touch a blade.

  2. Rough in the big shapes

    Using a wide loop tool, shave the broad brow and cheek highlights first, removing skin in large even passes. Keep the nose, the deep eye sockets, and the outer edges of the fur untouched for now so you have dark anchors. Work symmetrically and step back after each pass to check the two sides match. Do not chase detail yet, just build the main light and dark masses.

  3. Shape the muzzle and eyes

    Carve the muzzle as a rounded form that catches the most light, thinning the skin over the bridge of the nose while leaving the nostrils and nose pad dark and thick. Hollow the eye sockets deeper and leave a thin ring of skin around each eye so the stare reads sharp. Give the eyes a slightly angry downward brow by keeping that ridge shaded. Blend the transitions with a smaller loop so no hard steps show.

  4. Layer the fur texture

    Switch to a small U-gouge and pull short directional strokes that follow how fur would grow, flowing out and down from the face center. Vary how deep you cut so some strokes glow and others stay dim, which creates the layered look. Overlap rows like shingles and keep the outer mane edges shallow so the silhouette stays soft. Work in small sections and clean out chips as you go.

  5. Push the brightest highlights

    Go back to the brow ridges, the top of the muzzle, and a few key fur tufts and shave those spots the thinnest so they read almost white when lit. Leave the nose pad, eye rims, and deep fur channels dark for contrast. Avoid cutting fully through anywhere on the face, since blown-out holes would break the sculpted effect. Hold a flashlight behind the wall to preview the glow and adjust thin spots.

  6. Light it and photograph

    Drop in a bright battery LED puck, warm white if you have it, and set it low so light rakes up through the shaved areas. Skip candles, since the enclosed carving needs steady even light and stays cooler. Set the pumpkin on a porch step at dusk and shoot slightly above eye level so the bear stares back. Mist the cut surfaces with water if edges start to dry and curl.

Gather your supplies

Check things off as you get ready.

Work on a stable surface, keep your free hand out of the cutting path, and have an adult handle sharp tools.

Three levels of light

  • Leave intact

    Nose pad, nostrils, eye rims, and the deepest fur channels stay as untouched skin for dark definition.

  • Peel & shade

    Cheeks, muzzle sides, and most fur strokes get skin-peeled to varying depths for a soft mid glow.

  • Cut through

    Nothing is cut fully through on the face, so keep all light coming from thin shaved highlights rather than open holes.

Learn the carving basics

Before you start cutting

How thin can I shave the highlights without breaking through?

Aim to leave about an eighth of an inch of skin on the brightest spots like the brow and muzzle top. Check by holding a flashlight behind the wall, since a warm even glow means you are close and a bright pinhole means you have gone too far. Work up to thin gradually rather than trying to hit it in one pass.

Do I need to cut any holes for the eyes to look sharp?

No, the stare comes from depth and shading, not open cutouts. Hollow the sockets deep and leave a thin ring of skin around each eye so light climbs the rims. Keeping the eyes as shaved skin rather than holes is what gives that bronze sculpture feel.

What order keeps the fur from looking flat?

Rough in the big light and dark masses first so the face has structure, then add fur strokes only near the end. Follow the natural direction fur would grow and vary your depth so some strokes glow and others stay dim. Overlapping shallow and deep rows is what builds the layered look.

Your take belongs here, too.

Changed a detail? Made it simpler? Share a photo of your version and tell the community what worked.

Share your pumpkin

More pumpkins like this

You've reached the end · 8 pumpkins
The Patch Report

Fresh pumpkins, in your inbox.

The best new carvings, ideas worth stealing, and how-tos for carving season. Short, seasonal, and gone by November.

A short email during carving season. Unsubscribe anytime. See our privacy policy.