Halloween Pumpkin Carving Contest · Starts October 1st · $500 in prizes
← Back to ideas
@ai_concepts
Sep 8, 2026
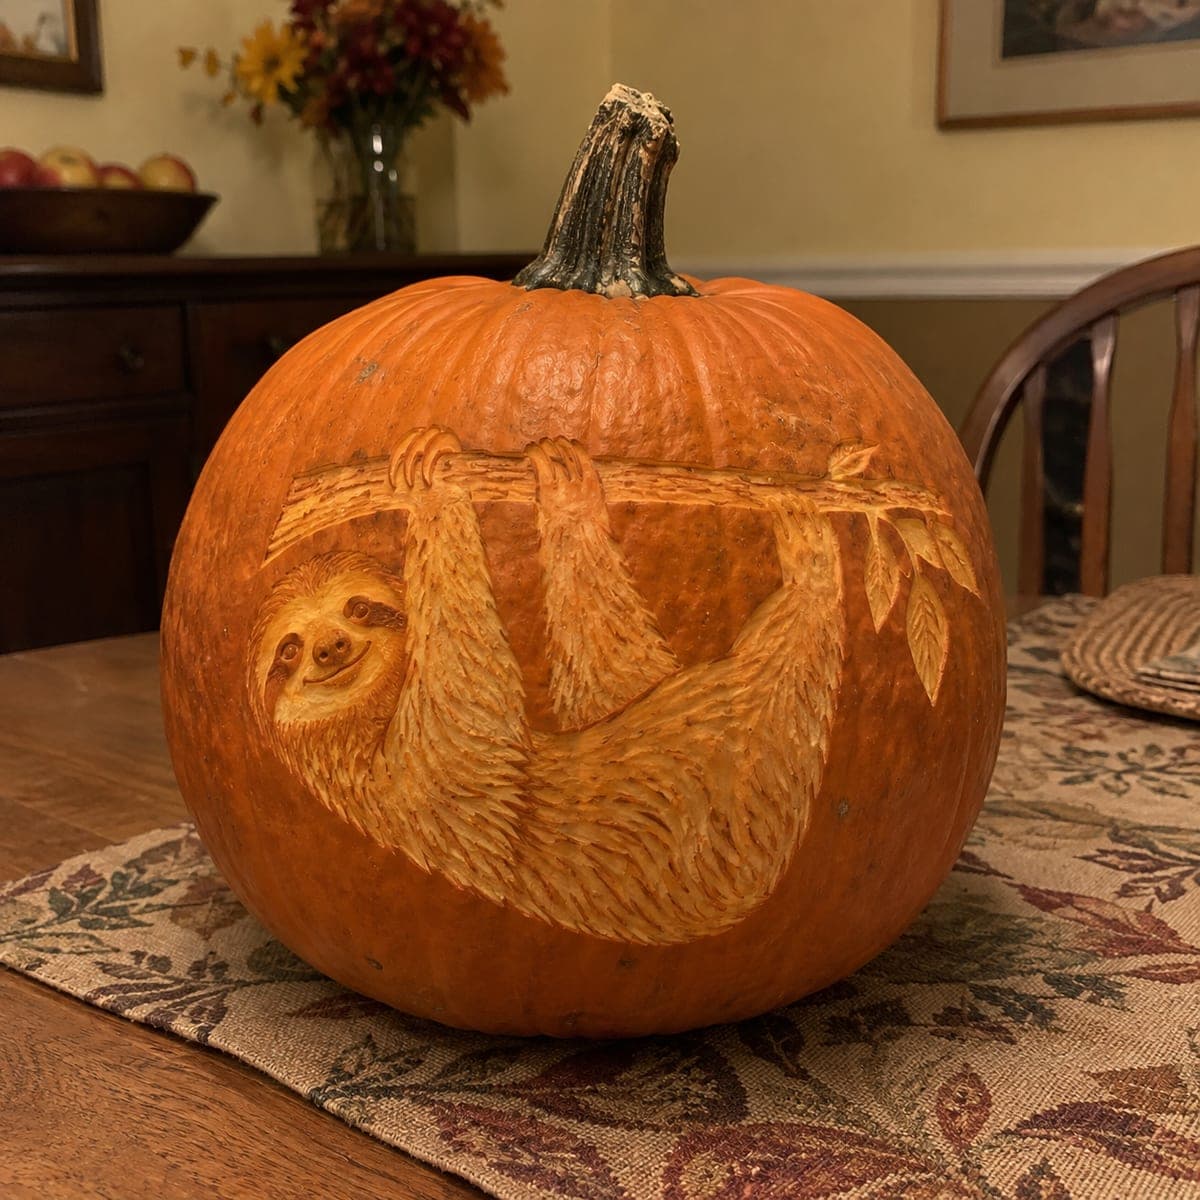
Sloth Hanging from Branch Shaded PumpkinAI
0

Sloth Hanging from Branch Shaded Pumpkin

A three-toed sloth clings to a branch with a contented smile in this deeply etched pumpkin, the animal's long claws, shaggy fur, and circular face mask all rendered in warm amber tones through expert shading. The fur texture was built up using overlapping short cuts that follow the natural direction of the sloth's coat, giving the carving a soft, fuzzy appearance. Choose a round, smooth-skinned pumpkin for this design so the fine fur lines are not interrupted by surface ridges. This whimsical pumpkin idea is a crowd-pleasing pumpkin carving for animal lovers who want something beyond the standard seasonal characters.

This is an AI-generated concept image: a realistic, carvable design idea rather than a photo of a finished carve. AI concepts are always labeled and sit out the leaderboard and the contest.


No ratings yet · Sign in to rate

Comments (0)

  • No comments yet — be the first.

Save without an account. Sign in to like or comment.

Our tips for carving a similar design

This design is almost entirely a shading study, with no big cutouts to carry it. The trick is building shaggy fur from thousands of short, overlapping scoops that follow the direction the coat grows, then peeling the face mask and branch to catch the most light. Plan your fur direction before you touch a tool so the whole animal reads as soft and rounded.

Written by PumpkinCarvingIdeas.com, inspired by the image above. These are our suggestions, not instructions from the uploader. This approach to the AI concept has not been tested on a real pumpkin.

From pumpkin to porch

  1. Pick and prep a smooth pumpkin

    Choose a round pumpkin with as few ridges and blemishes as possible so your fur lines stay clean. Cut a lid from the bottom or the back rather than the top, which keeps the carving face intact and makes it easy to seat an LED light. Scrape the inside wall behind the design down to about one inch thick so the peeled skin will glow evenly. A thinner wall shades much more predictably than a thick one.

  2. Transfer the sloth and branch

    Tape your stencil over the flattest part of the pumpkin and poke the outlines with a pin or a transfer tool. Mark the branch line across the top, the round face mask, the two hanging arms with long claws, and the curled body and tail. Keep the pin holes close together on curves like the face so you do not lose the shape. Step back and check the sloth sits comfortably below the branch before you cut anything.

  3. Establish the darkest outlines

    Leave the outer background skin untouched so the animal pops against the dark orange. Use the tip of a small loop tool to define the edge of the branch, the arms, and the body, cutting just deep enough to separate shapes. Do not peel anything yet, since these first lines act as your map. Working from map lines outward keeps your later shading from wandering.

  4. Build the fur in layers

    Switch to a fine detail loop and make short, curved scoops that follow the direction of the coat, sweeping down the arms and around the belly. Overlap each stroke slightly so no bare gaps show, and vary the depth so some fur catches more light than the rest. Keep your free hand behind the blade path and pull cuts toward open space, never toward your fingers. This is slow work, so take breaks to keep your strokes even.

  5. Peel the face, claws, and leaves

    Skin-peel the round face mask, the muzzle, the long claws, and the branch leaves so they glow a soft amber and separate from the fuzzy body. Carve the closed, smiling mouth and the small nose as shallow lines, and leave narrow ridges of skin as bridges so the face features stay attached and structurally strong. Peel the top surface of the branch a touch brighter than the fur to anchor the scene. Keep every claw connected to an arm rather than cutting it free.

  6. Light it and photograph

    Drop in a battery LED and rotate the pumpkin until the fur texture catches the most warmth. If any area looks flat, add a few more scoop cuts to deepen the contrast. Wipe the cut surfaces and rub on a little petroleum jelly to slow drying and keep the amber tones fresh. Shoot your photo in a dim room so the peeled face and claws read clearly against the dark background.

Gather your supplies

Check things off as you get ready.

Work on a stable surface, keep your free hand out of the cutting path, and have an adult handle sharp tools.

Three levels of light

  • Leave intact

    The outer background and the deepest shadow lines around the arms and body stay as untouched skin.

  • Peel & shade

    Most of the sloth's shaggy fur is peeled at varying depths for a soft, mid amber glow.

  • Cut through

    The round face mask, claws, branch top, and leaves are peeled brightest, with no full openings so the design holds together.

Learn the carving basics

Before you start cutting

Do I need to cut all the way through anywhere?

No, this is a shading design and works best with no full cutouts. Everything is either untouched skin or peeled skin at different depths. That keeps the pumpkin strong and lets the LED glow softly through the thin walls.

How do I keep the fur from looking messy?

Decide the growth direction for each body part first, then commit to short strokes that all follow that flow. Overlap the scoops so there are no bare patches, and vary the depth a little for a natural fuzzy look. Consistent direction is what makes fur read as fur instead of random scratches.

This is an AI concept, so can a real pumpkin actually look like this?

Yes, a similar sloth is achievable with patient shading, though the pictured image is a digital concept and no real pumpkin was carved. Keep the claws attached to the arms and leave small skin bridges in the face so thin details do not crumble. Budget a few hours, since the fur texture is the slow part.

Your take belongs here, too.

Changed a detail? Made it simpler? Share a photo of your version and tell the community what worked.

Share your pumpkin

More pumpkins like this

You've reached the end · 8 pumpkins
The Patch Report

Fresh pumpkins, in your inbox.

The best new carvings, ideas worth stealing, and how-tos for carving season. Short, seasonal, and gone by November.

A short email during carving season. Unsubscribe anytime. See our privacy policy.