Halloween Pumpkin Carving Contest · Starts October 1st · $500 in prizes
← Back to ideas
@ai_concepts
Aug 29, 2026
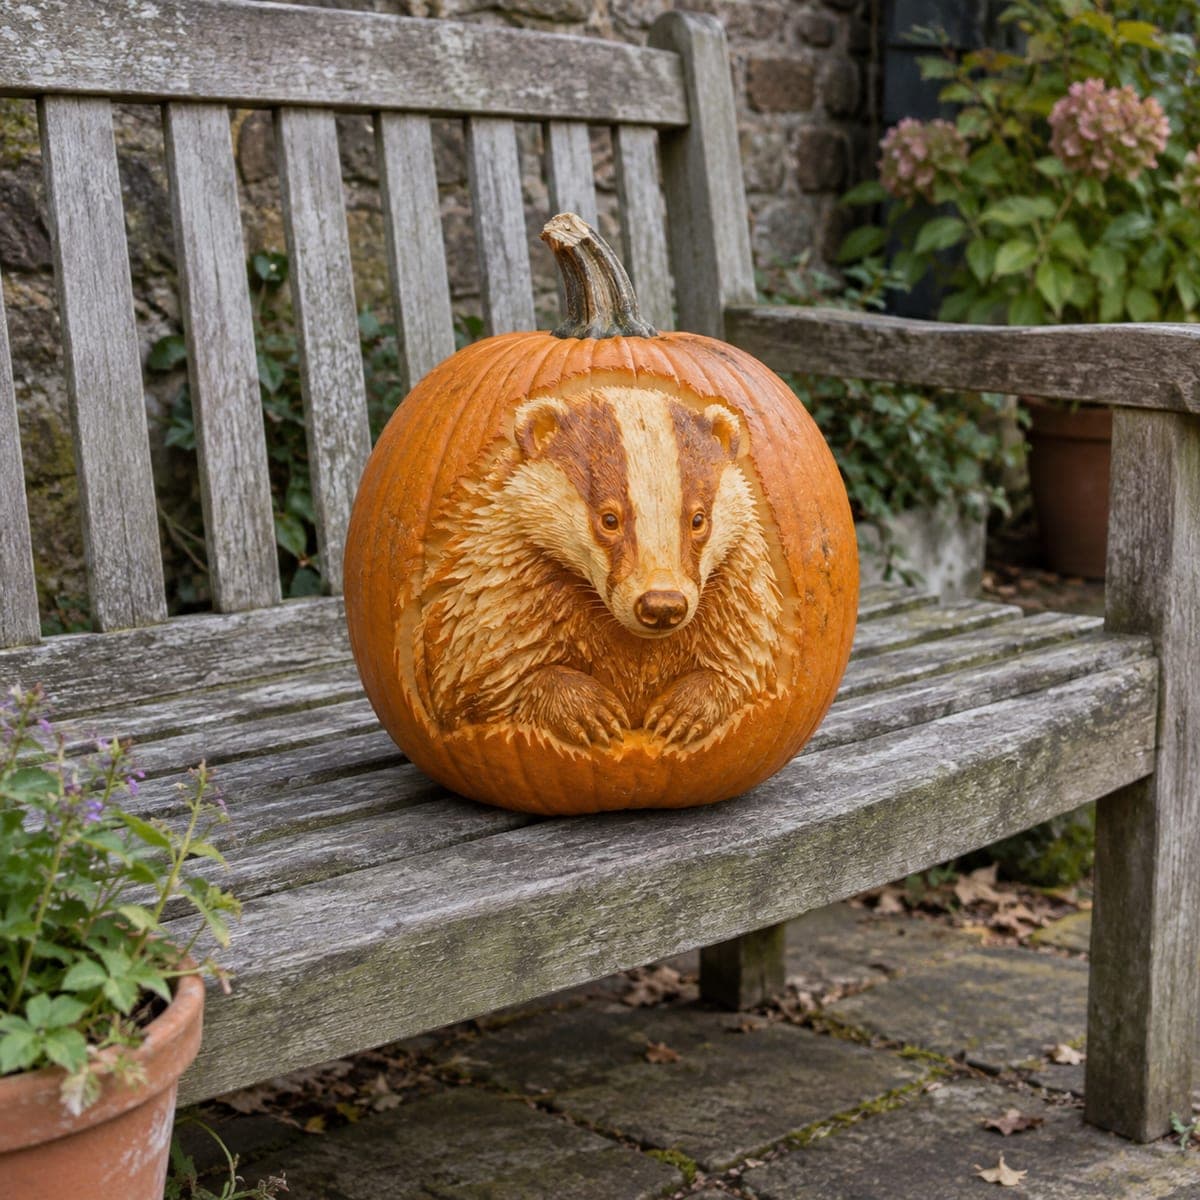
Woodland Badger Etched Pumpkin PortraitAI
0

Woodland Badger Etched Pumpkin Portrait

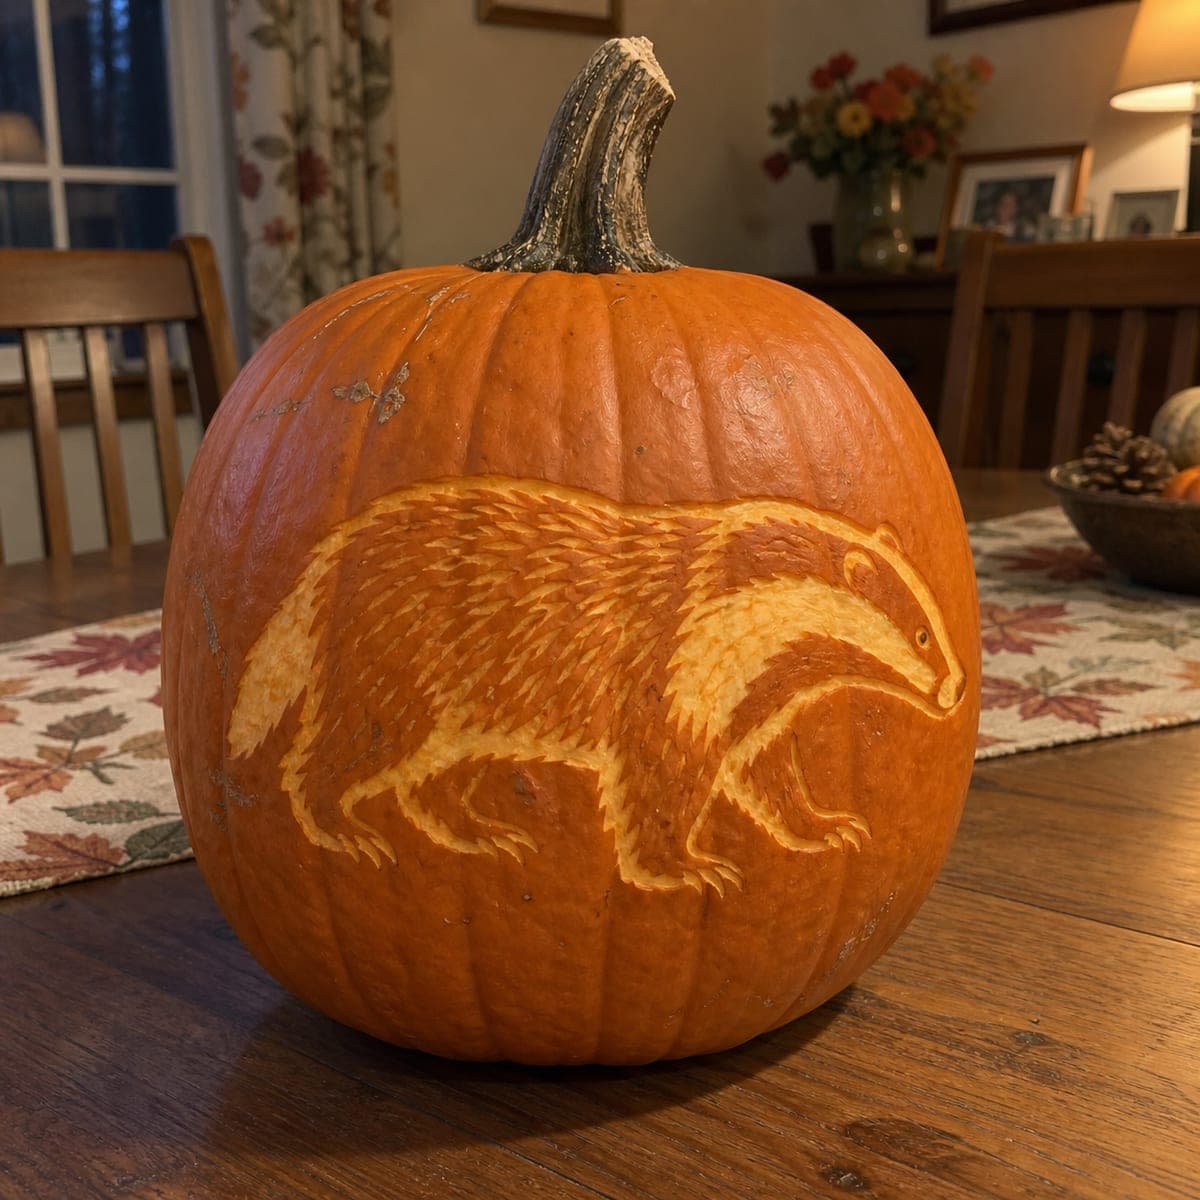
A trotting badger with its signature striped face is etched into this pumpkin using fine fur strokes that alternate between skin and pale flesh. Because the design relies on texture rather than cutouts, it holds up for a week or more on a covered table. Sketch the body outline, then build the coat with short pulls of a V-gouge following the direction of the fur, saving the white face stripes for your cleanest, deepest peels.

This is an AI-generated concept image: a realistic, carvable design idea rather than a photo of a finished carve. AI concepts are always labeled and sit out the leaderboard and the contest.

No ratings yet · Sign in to rate
Comments (0)

  • No comments yet — be the first.

Save without an account. Sign in to like or comment.

Our tips for carving a similar design

The whole effect here comes from etching rather than cutting, using short directional gouge strokes to build a shaggy coat that glows softly when lit. The plan is to peel skin at varying depths so the badger's body reads as texture, then reserve your deepest, cleanest peels for the bright face stripes. Because nothing is cut clean through, the design stays sturdy and looks great even in daylight.

Written by PumpkinCarvingIdeas.com, inspired by the image above. These are our suggestions, not instructions from the uploader. This approach to the AI concept has not been tested on a real pumpkin.

From pumpkin to porch

  1. Prep the pumpkin and pick your side

    Choose a pumpkin with a smooth, wide flat area for the body and wipe it clean and dry. Since this design is surface only, you can cut a small lid or a discreet back door for your LED, or leave it whole and light it from a base hole. Scrape the inside wall behind your design down to about one inch so peels glow evenly. Let the interior dry before you start etching.

  2. Transfer the badger outline

    Sketch or tape a side-profile badger stencil onto the flattest panel, keeping the whole body within the smooth zone. Trace the outer body line and the major fur zones with a poking tool or washable marker. Mark where the pale face stripes and belly sit so you don't lose them once fur strokes cover the area. Step back and check the pose reads clearly before you cut anything.

  3. Establish the body edges

    With a small V-gouge, outline the badger's back, legs, and tail using a shallow groove. Keep these strokes light so you can deepen them later without splitting the skin. Work slowly around the paws and claws, leaving small bridges of skin so the delicate toes stay attached. This outline becomes your map for the fur that follows.

  4. Build the coat with directional strokes

    Peel the skin across the body to expose pale flesh, then use short pulls of the V-gouge that follow the direction the fur grows, from the spine down toward the belly and legs. Vary your pressure so some strokes are shallow and dim and others are deeper and brighter, which gives the coat its shaggy depth. Keep strokes short and overlapping rather than long and straight. Rotate the pumpkin as you go so your wrist stays comfortable and the angles stay natural.

  5. Carve the signature face stripes

    Save the white face stripes for your cleanest, deepest peels so they read as the brightest part of the portrait. Remove the skin fully and shave the flesh thin along the two light bands running from the nose over the eye, leaving the dark mask between them untouched. Add a tiny deep dot for the eye and a soft peel for the nose. Take your time here since these stripes are the feature everyone recognizes.

  6. Light it and photograph

    Drop in a warm LED light and dim the room to check your contrast. Areas that look flat can be peeled a touch deeper to glow more; areas too bright can be softened by scraping only lightly next time. Wipe away loose bits, then coat cut edges with a little petroleum jelly to slow drying. Set it on a covered table and snap your photo while the flesh is fresh and pale.

Gather your supplies

Check things off as you get ready.

Work on a stable surface, keep your free hand out of the cutting path, and have an adult handle sharp tools.

Three levels of light

  • Leave intact

    The dark facial mask between the stripes and the surrounding pumpkin background stay untouched skin.

  • Peel & shade

    The badger's shaggy body, legs, and tail get skin-peeled at varying depths for a soft mid glow.

  • Cut through

    Nothing is cut fully through; the deepest, thinnest peels on the face stripes and eye give the brightest highlights.

Learn the carving basics

Before you start cutting

Do I need to cut all the way through anywhere?

No, this is an etched design that relies on peeling skin and shaving flesh to different depths. Keeping everything as surface work is what makes it last a week or more and look good even before you light it. Just be sure to thin the wall behind the design so the peeled areas glow.

How do I make the fur look shaggy instead of flat?

Use short, overlapping V-gouge strokes that follow the direction the fur grows, curving down from the spine toward the belly and legs. Vary your pressure so some strokes are shallow and dim while others are deeper and brighter. That mix of depths is what tricks the eye into seeing texture.

What if my face stripes come out uneven?

Carve the stripes last and go slowly, peeling the skin fully and shaving the flesh thin for maximum brightness. If one stripe is thinner than the other, gently widen the narrower one to match rather than trying to shrink the wider one. Small imperfections still read fine once the pumpkin is lit and viewed from a step back.

Your take belongs here, too.

Changed a detail? Made it simpler? Share a photo of your version and tell the community what worked.

Share your pumpkin

More pumpkins like this

You've reached the end · 8 pumpkins
The Patch Report

Fresh pumpkins, in your inbox.

The best new carvings, ideas worth stealing, and how-tos for carving season. Short, seasonal, and gone by November.

A short email during carving season. Unsubscribe anytime. See our privacy policy.