Halloween Pumpkin Carving Contest · Starts October 1st · $500 in prizes
← Back to ideas
@ai_concepts
Jul 22, 2026
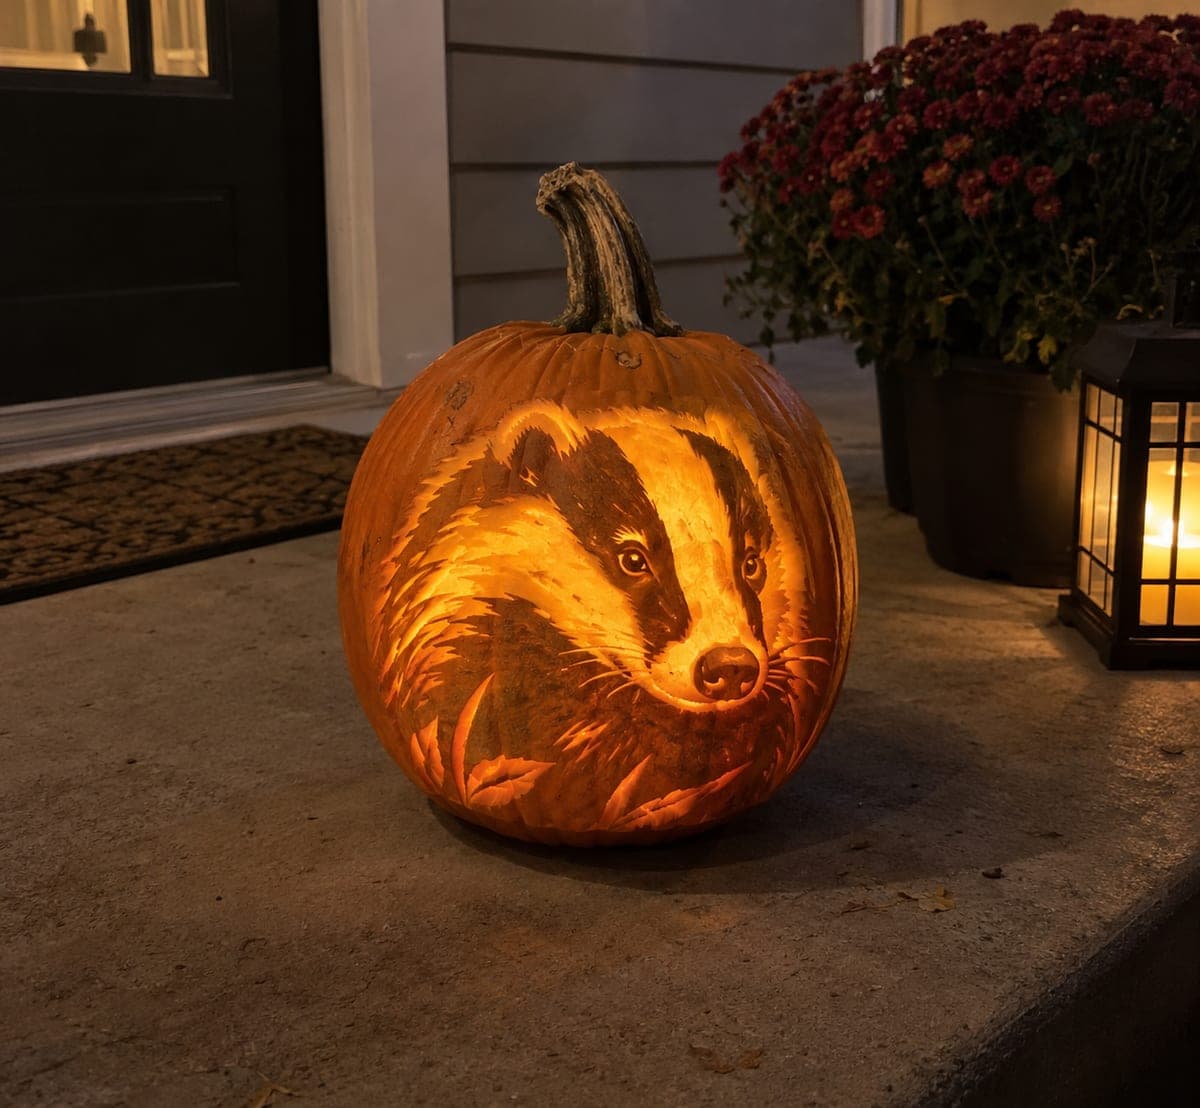
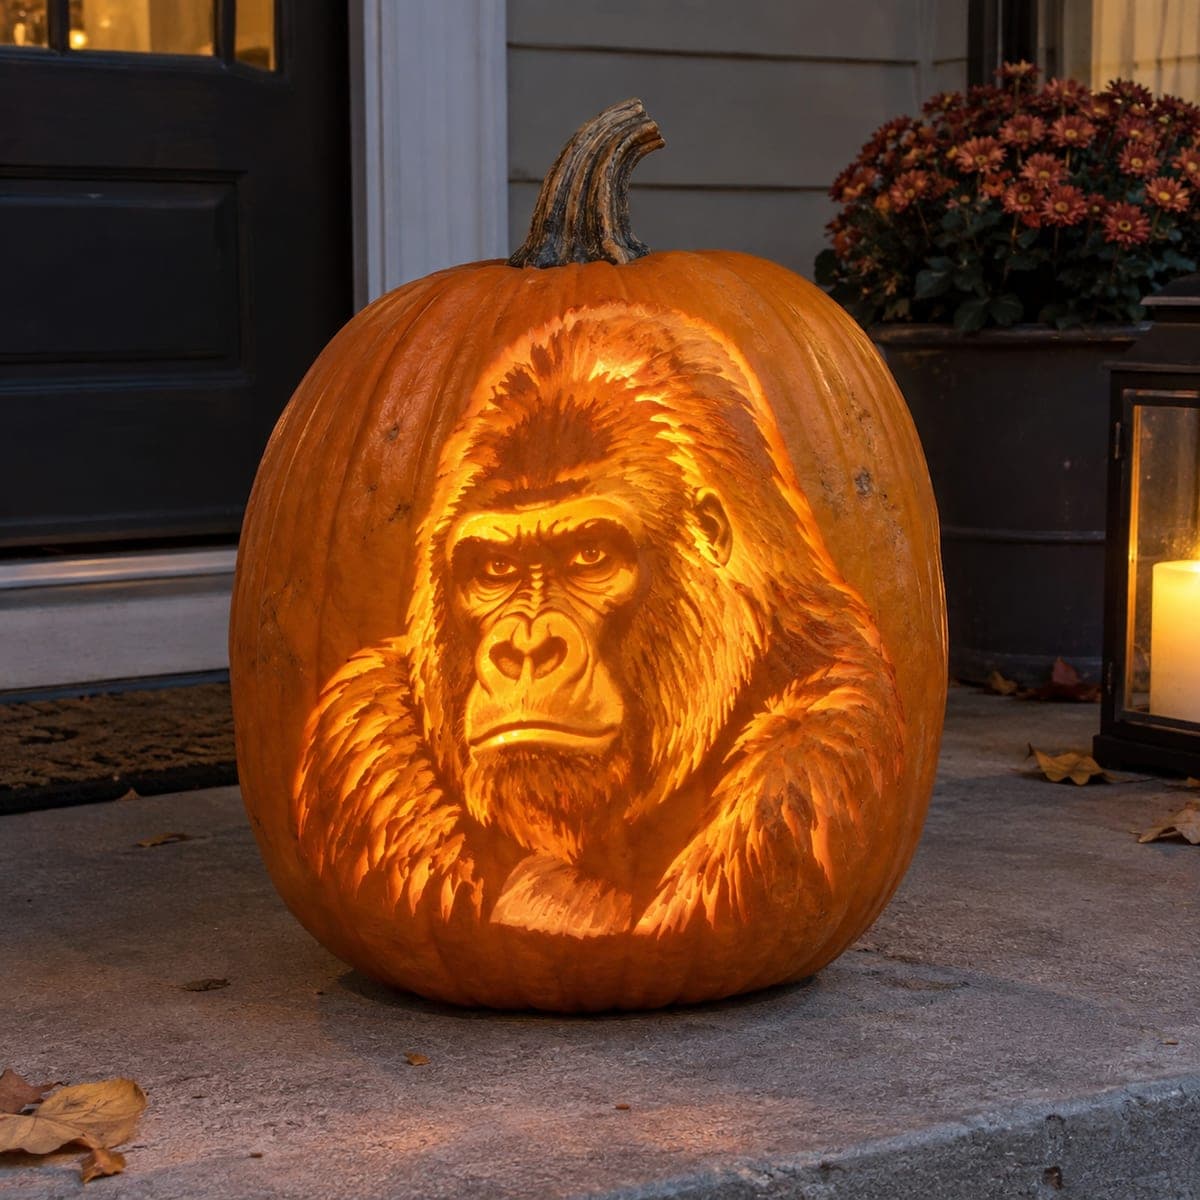
Badger Portrait Etched Pumpkin Carving at NightAI
0

Badger Portrait Etched Pumpkin Carving at Night

A European badger with its iconic white-striped face peers outward from this warmly lit etched pumpkin, the contrasting black and cream facial markings captured beautifully through varying depths of surface carving. The pumpkin carving technique here relies on shading rather than cutting through the wall, so the badger appears to emerge from a glowing amber field when candlelight warms the thinned areas. Carve the white facial stripe by removing the most skin depth, leave the dark mask near-full thickness, and treat the fur with short directional gouge strokes. This nature-themed design suits a front-porch display paired with a lantern.

This is an AI-generated concept image: a realistic, carvable design idea rather than a photo of a finished carve. AI concepts are always labeled and sit out the leaderboard and the contest.
No ratings yet · Sign in to rate

Comments (0)

  • No comments yet — be the first.

Save without an account. Sign in to like or comment.

Our tips for carving a similar design

This design is all about controlling depth rather than cutting all the way through the shell. The badger's white face stripe reads brightest because that skin is thinned the most, the dark mask stays near full thickness so it barely glows, and the fur is built from short directional gouge strokes. Plan your value map before you touch a tool so you know which areas stay dark, which glow softly, and which get the deepest shave.

Written by PumpkinCarvingIdeas.com, inspired by the image above. These are our suggestions, not instructions from the uploader. This approach to the AI concept has not been tested on a real pumpkin.

From pumpkin to porch

  1. Prep the pumpkin and pick a smooth face

    Choose a large pumpkin with a broad, even front so the portrait has room to breathe. Cut a lid from the bottom or the back rather than the top so the stem stays intact for that natural look, then hollow the inside and scrape the front wall down to a consistent thickness of about one inch. A thinner, even wall shades more predictably. Wipe the surface dry before transferring your pattern.

  2. Transfer the badger pattern

    Tape your badger stencil over the smoothest part of the front and poke through the outlines with a pin or transfer tool. Mark the boundaries of the white stripe, the dark eye mask, the snout, and the outer fur field so you have a clear map of light and dark zones. Take a moment to label which regions will be deepest and which stay untouched. Getting this map right now saves guesswork later.

  3. Skin the brightest stripe first

    Using a shallow gouge or ribbon tool, remove the outer skin down to the deepest layer along the white facial stripe and the bridge of the snout. Go slow and keep the depth even so it glows uniformly when lit. These are your brightest values, so this is where you take away the most flesh without breaking through. Test against a light now and then to check the glow.

  4. Build the fur with directional strokes

    Switch to short, tapering gouge strokes that follow the direction the fur grows, sweeping outward from the face into the surrounding field. Vary how deep you carve so some strokes glow brighter and others stay dim, which is what creates the soft furry texture. Keep the dark eye mask and the outer edges of the head near full thickness so they read as shadow. Work in small sections and step back often to judge the overall value balance.

  5. Refine the eyes, nose, and edges

    Lightly detail the eyes and the wet-looking nose with tiny controlled cuts, leaving thin ridges of skin to suggest highlights and moisture. Feather the outer fur so the badger fades into the amber field instead of ending in a hard line. Resist cutting any full openings, since this design relies entirely on shading depth for its glow. An adult should handle the fine detail tools for safety.

  6. Light it and photograph

    Drop in a battery LED puck or string light rather than a candle so the thinned areas glow steadily and safely. Set the pumpkin on the porch beside a lantern to echo the warm nighttime mood. Shoot in low light with the LED as your main source to capture the depth of the shading. Mist the surface with water if it starts to dry, which keeps the glow crisp for a day or two.

Gather your supplies

Check things off as you get ready.

Work on a stable surface, keep your free hand out of the cutting path, and have an adult handle sharp tools.

Three levels of light

  • Leave intact

    The dark eye mask, ear edges, and outer fur boundary stay near full thickness so they read as shadow.

  • Peel & shade

    The fur field and cheeks get shallow directional strokes for a soft mid glow.

  • Cut through

    Nothing is cut fully through; the white face stripe and snout bridge are skinned deepest for the brightest amber glow.

Learn the carving basics

Before you start cutting

Do I cut any holes all the way through?

No, this portrait is a pure shading piece, so you never breach the wall. All the contrast comes from how deeply you thin the skin. Keeping the shell intact is what lets the badger appear to emerge from a solid glowing field.

How do I keep the white stripe from looking flat?

Vary your depth slightly even within the bright stripe and let a few thin skin lines break it up. Real fur is not one solid tone, so tiny value shifts read as texture. Check it against your light to make sure it glows evenly without harsh borders.

How long will a shaded pumpkin like this last?

Thinned surfaces dry and shrink faster than raw skin, so expect a good look for about two to three days. Store it in a cool spot when not on display and mist the carved face with water to slow drying. A light coat of petroleum jelly on the cut areas also helps hold moisture.

Your take belongs here, too.

Changed a detail? Made it simpler? Share a photo of your version and tell the community what worked.

Share your pumpkin

More pumpkins like this

You've reached the end · 8 pumpkins
The Patch Report

Fresh pumpkins, in your inbox.

The best new carvings, ideas worth stealing, and how-tos for carving season. Short, seasonal, and gone by November.

A short email during carving season. Unsubscribe anytime. See our privacy policy.